shivani singh
- August 18, 2021
6 Steps to Install Gradle on Ubuntu 20.04
Gradle is a free & open-source build tool. It is used for JAVA projects. It is the combination of Ant & Maven. It uses Apache Groovy for defining the java-project & build scripts.
There are some steps to setup Gradle on ubuntu 20.04
Step 1: Update the System.
apt-get update
Step 2: Install Java.
apt-get install openjdk-11-jdk
Step 3: Check the Java version.
java -version
- Here is the command output.

Step 4: Download the latest version of Gradle using wget command.
wget https://services.gradle.org/distributions/gradle-7.2-bin.zip -P /tmp
- Install unzip.
apt-get install unzip.
- Extract the downloaded Gradle zip file.
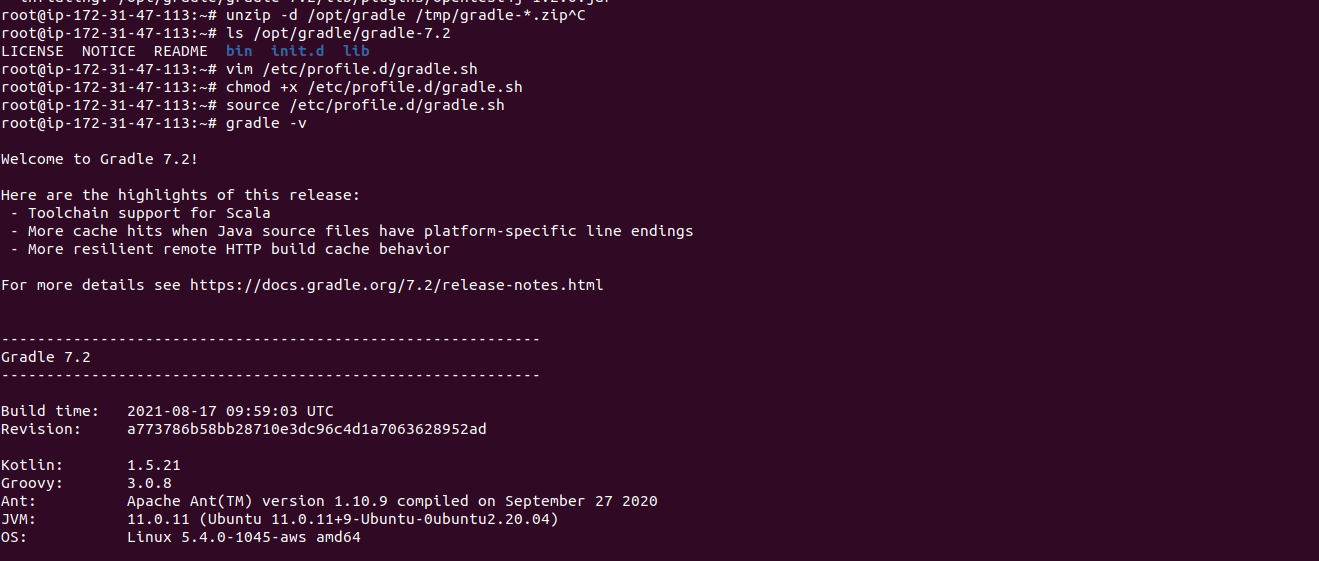
unzip -d /opt/gradle /tmp/gradle-*.zip
- List the Gradle files.
ls /opt/gradle/gradle-7.2
Step 5: Configure the Environment variables for Gradle.
vim /etc/profile.d/gradle.sh
- Add the following lines:
export GRADLE_HOME=/opt/gradle/gradle-7.2

export PATH=${GRADLE_HOME}/bin:${PATH}
- Provide the following Permission.
chmod +x /etc/profile.d/gradle.sh
- Apply the configured environment variables using source command.
source /etc/profile.d/gradle.sh
Step 6: Check the Gradle version.
gradle -v
- Here is the commands output.