shivani singh
- February 11, 2022
Steps to Install & Configure Bamboo on Ubuntu 20.04 LTS
Bamboo is a free & open source continuous integration and continuous deployment serve. It is developed by Atlassian. It helps to provide an automated and reliable build and test process for application source-codes. We can easily Install and configure Bamboo.
Prerequisites:
- Ubuntu system with Sudo Privileges.
- Java 8.0
- 4GM RAM.
There are some steps to install & configure Bamboo on Ubuntu:
Step 1: Update the System.
apt-get update
Step 2: Install Java.
apt-get install openjdk-8-jdk
- Check Java version.
java -version
- Here is the command output.

Step 3: Install PostgreSQL on system.
apt install postgresql postgresql-contrib
- Here is the command output.

- Login to postgresql shell.
sudo -u postgres psql
- Here is the command output.

- Create database.
create database bamboo;
- Create user.
create user user_bamboo with encrypted password 'Password';
- Provide the Grant all privileges.
grant all privileges on database bamboo to user_bamboo;
- Type \q to quit.
\q
Step 4: Download the Bamboo.
cd /opt

wget https://www.atlassian.com/software/bamboo/downloads/binary/atlassian-bamboo-8.1.2.tar.gz
- Here is the command output.

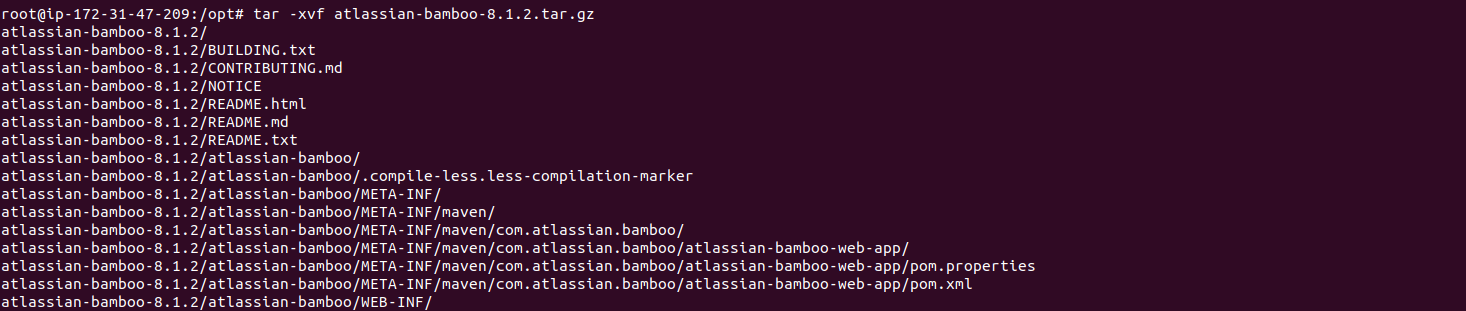
- Extract the downloaded folder.
tar -xvf atlassian-bamboo-8.1.2.tar.gz
- Here is the command output.
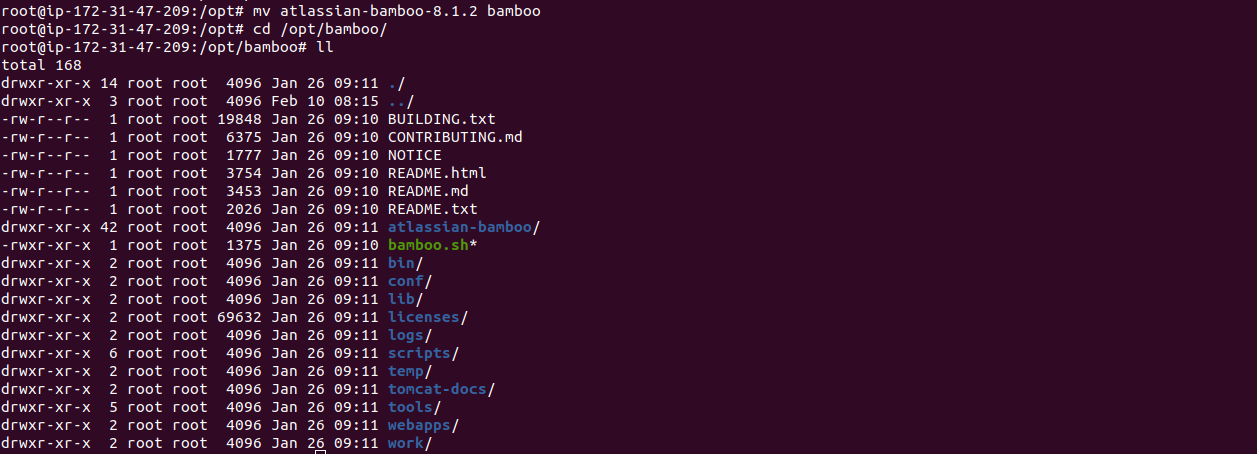
- Change the name.
mv atlassian-bamboo-8.1.2 bamboo
- change the path.
cd /opt/bamboo/
- List the files.
ll
- Here is the command output.
Step 5: Configure Bamboo.
- Create a directory.
mkdir -p /home/ubuntu//bamboo/bamboo-home
- Open the following file.
vim /opt/bamboo/atlassian-bamboo/WEB-INF/classes/bamboo-init.properties
- Un-comment the line.
#bamboo.home=C:/bamboo/bamboo-home
- Edit the un-commented line.
bamboo.home=/home/ubuntu/bamboo/bamboo-home
- Here is the command output.

Step 6: Start the bamboo service.
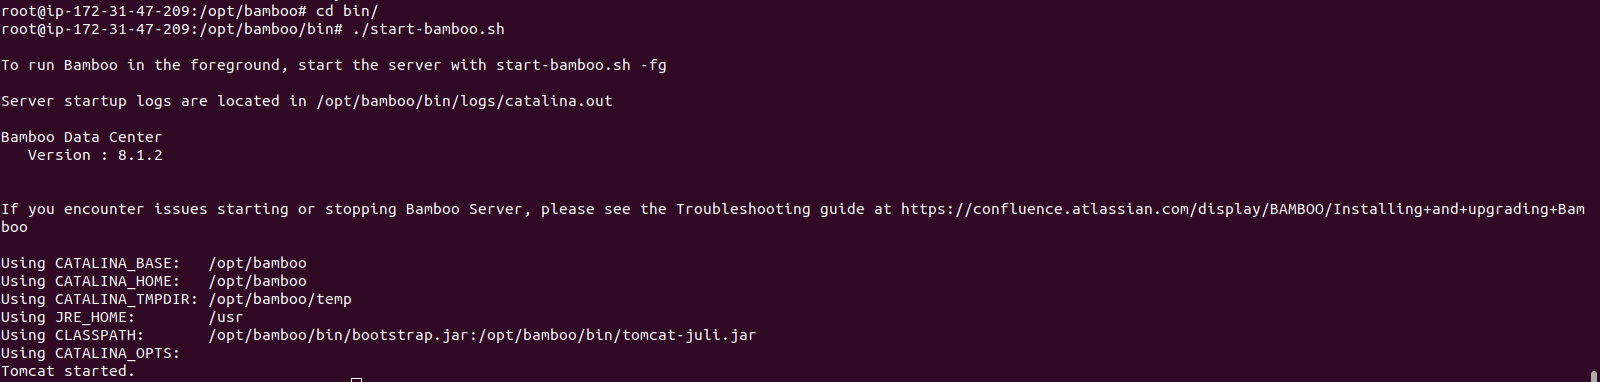
- Change the directory.
cd /opt/bamboo/bin
- Run the following command.
./start-bamboo.sh
- Here is the command output.
- Open the following port number in firewall.
ufw allow 8085
- Here is the command output.

Step 7: Open Bamboo web interface.
http://server-ip:8085
- Here is the output.
- We need a License key.
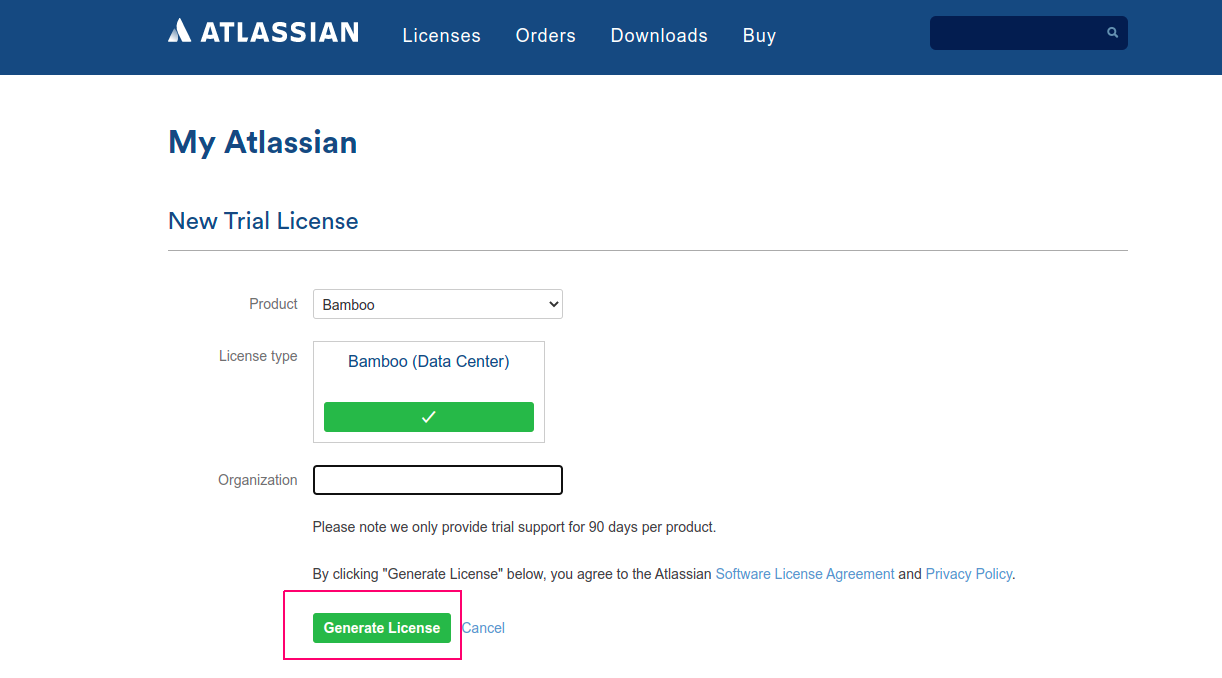
- Click on Generate a Bamboo Data Center license option.
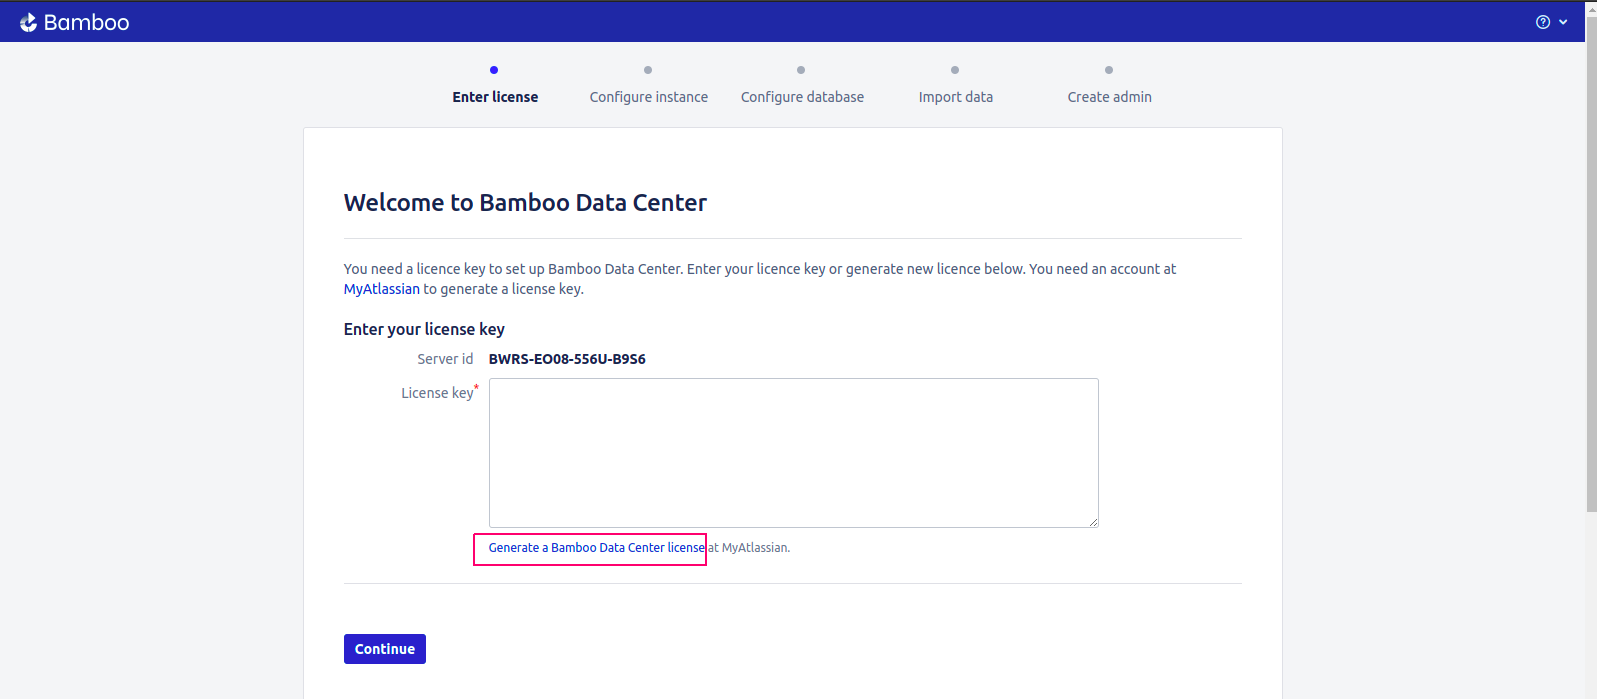
- Provide a Organization name.
- Click on Generate License.
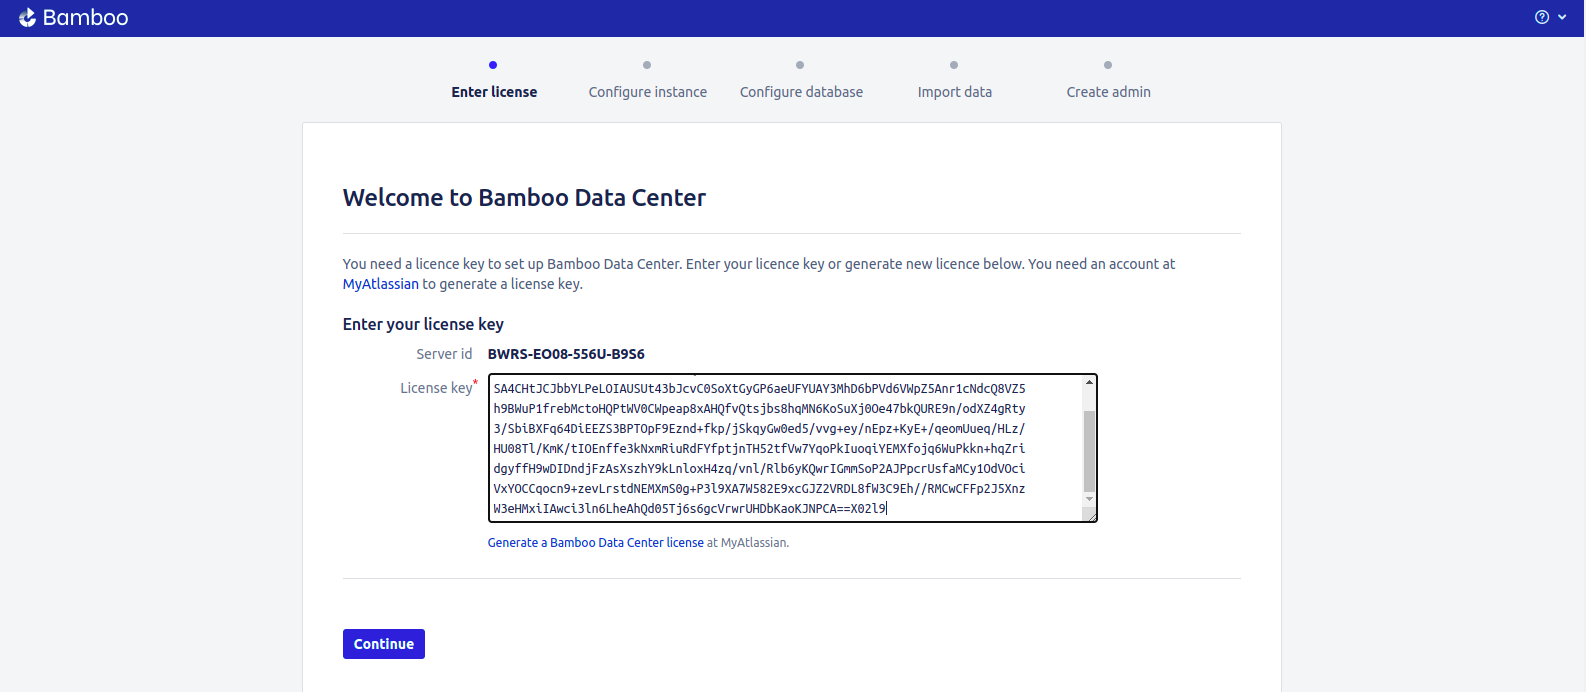
- Copy the License key.
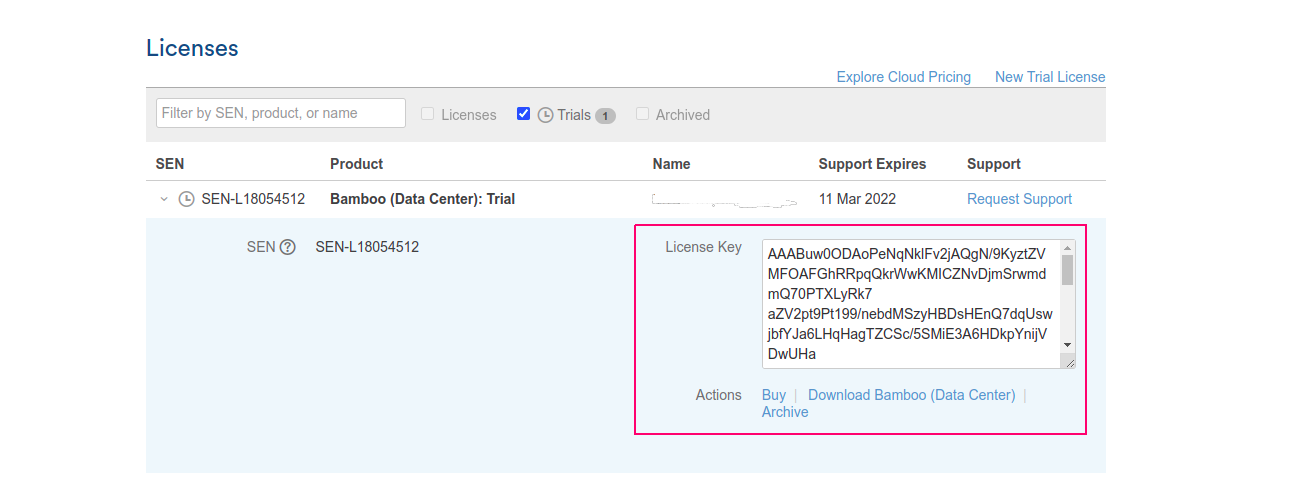
- Paste in license key column.
- Click on Continue.
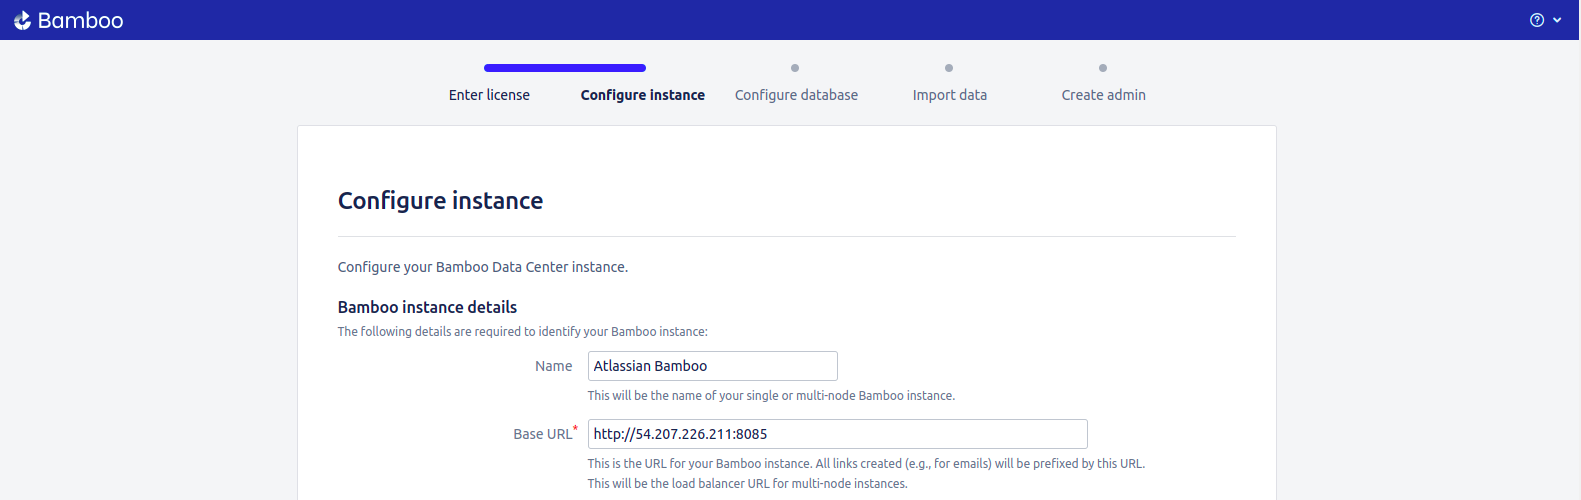
- Configure the instance.
- Provide the Bamboo instance name & check Base URL.
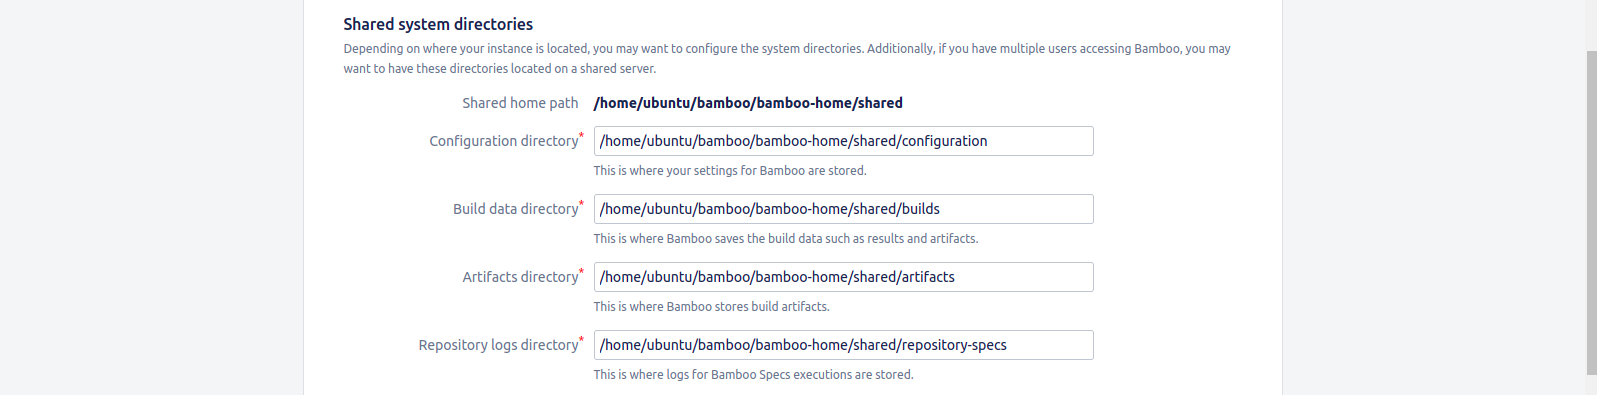
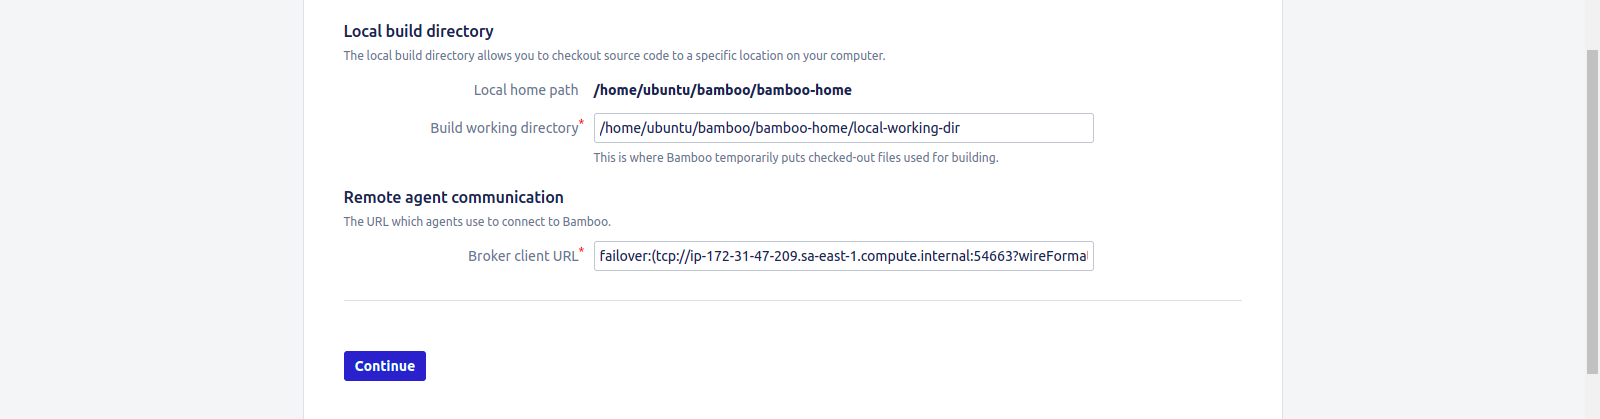
- Check Shared system directories.
- Click on Continue.
- Select Database Type.For example: select PostgreSQL database type.
- Click on Continue.
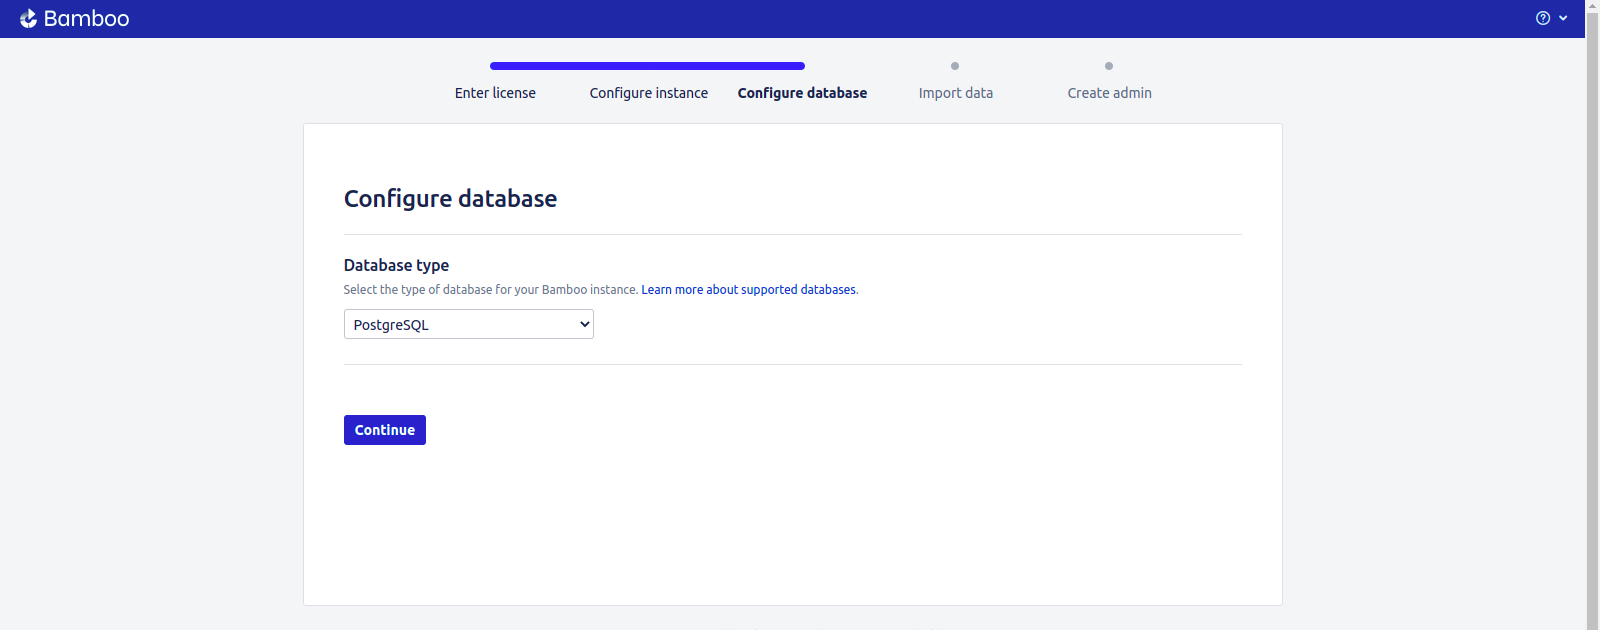
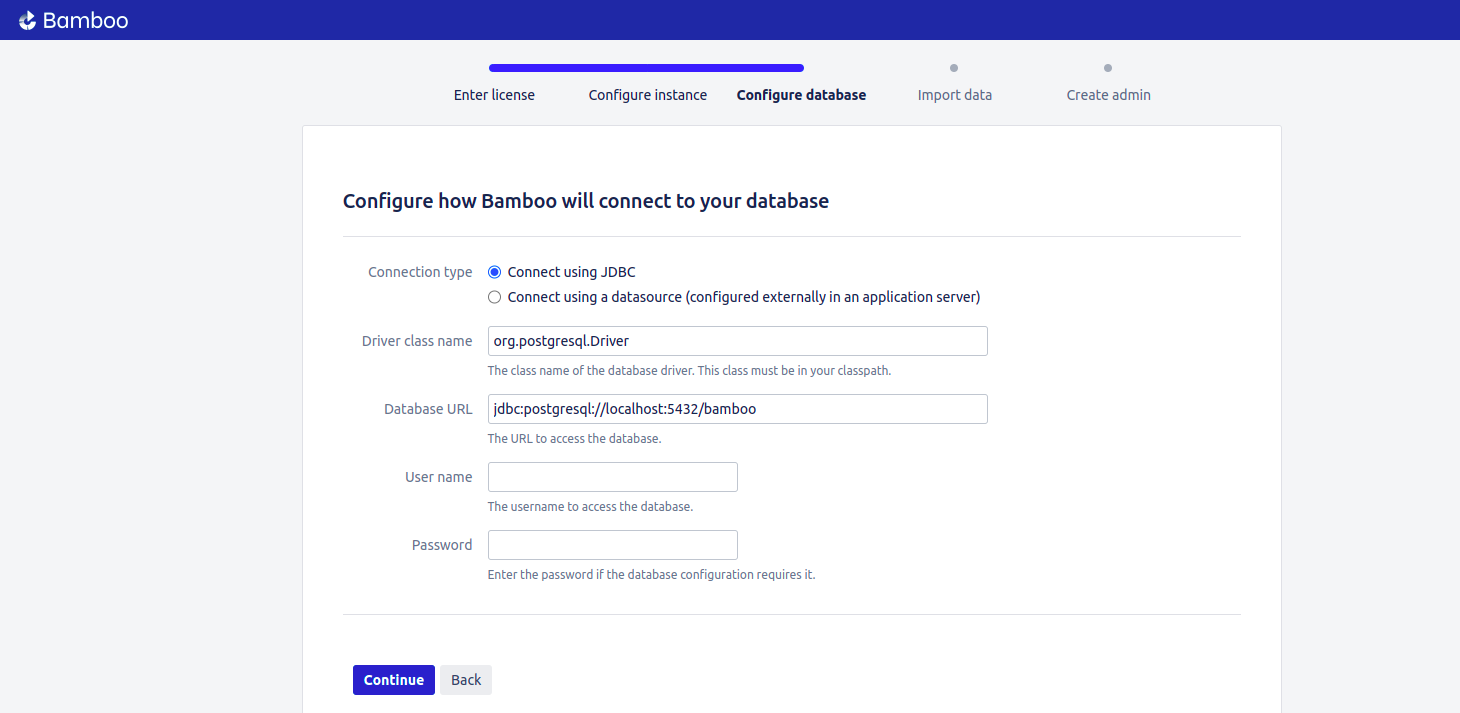
- Configure the database.
- Provide the Db Username & Password.
- Click on Continue.
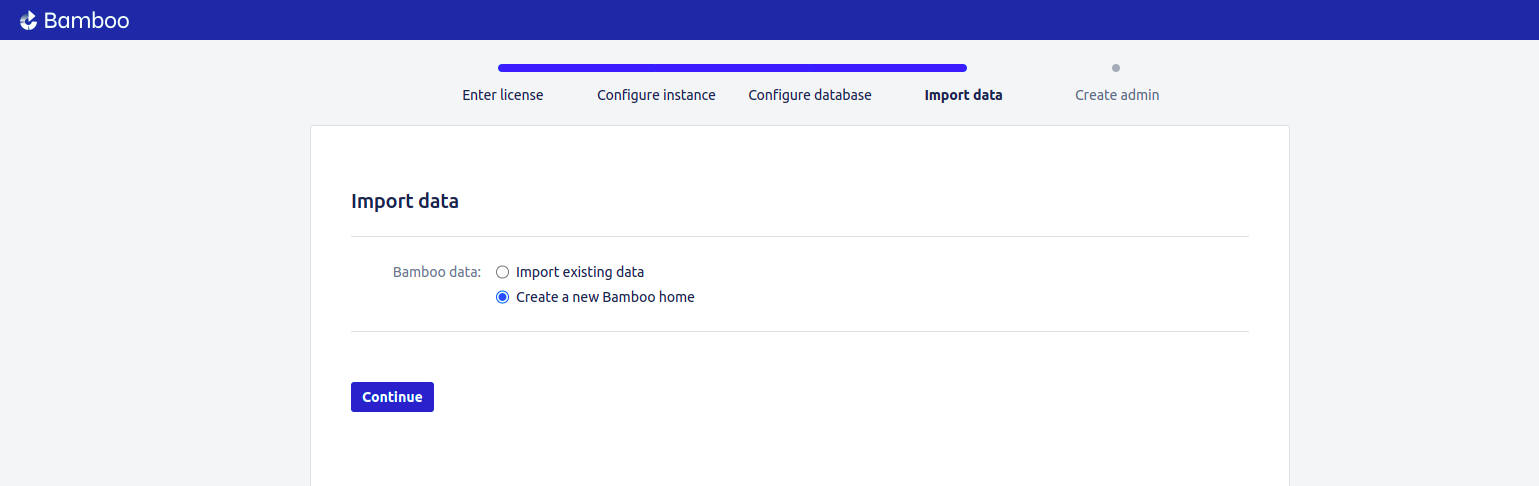
- As first time installation,Click on Create a New Bamboo home.
- Click on Continue.
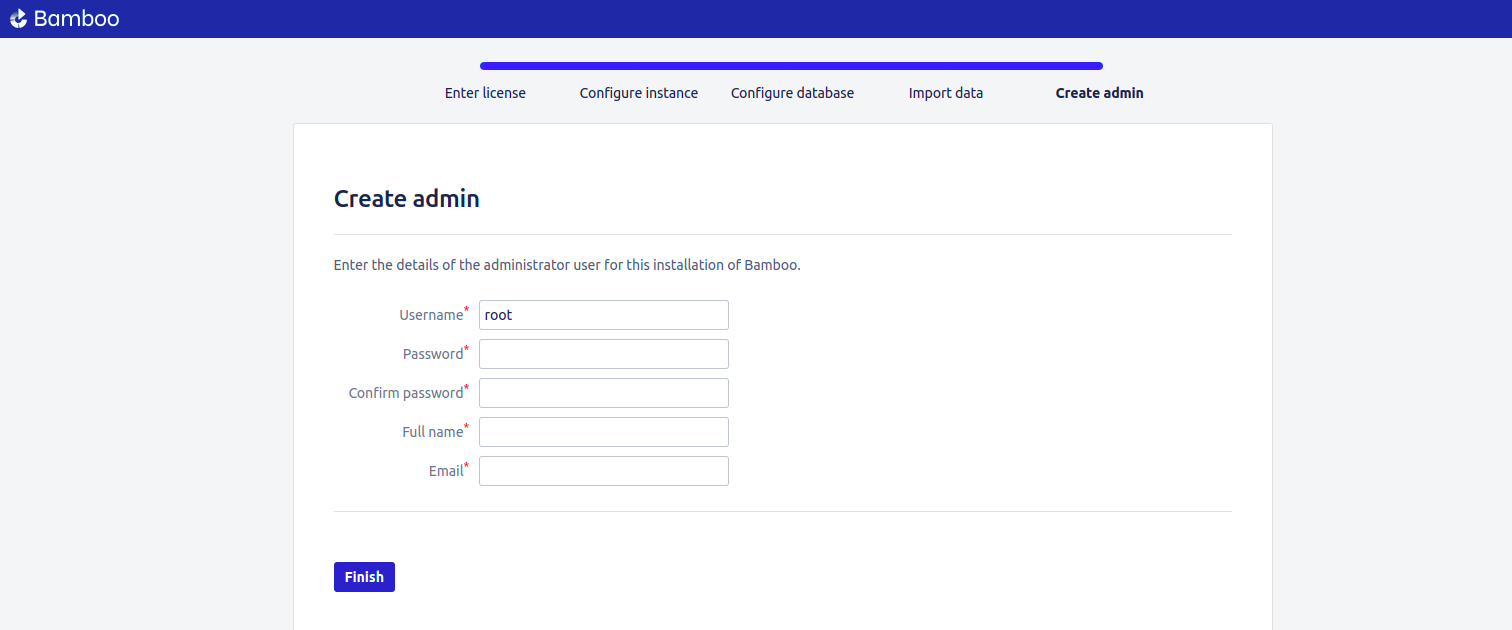
- Provide the Admin credentials such as username,password,full name & email-address.
- Click on Finish.
- Click on Install Remote Agent.
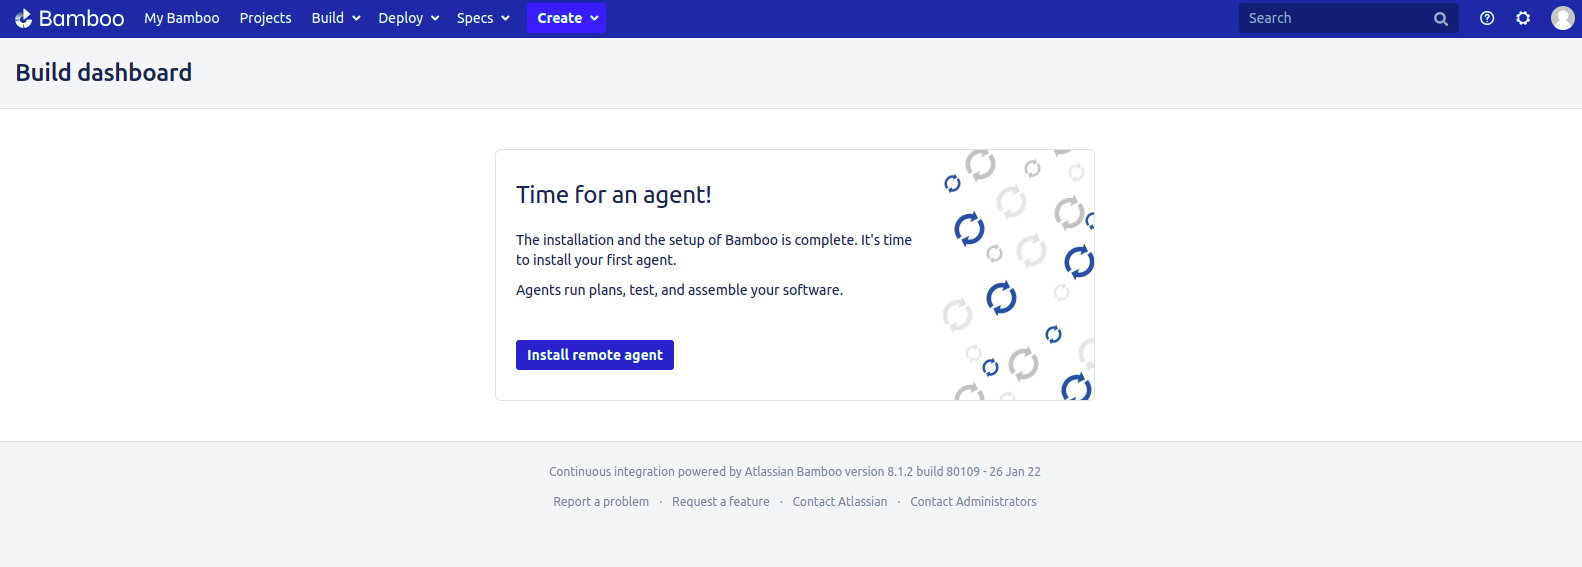
- Now,we need a Agent Machine.
- Install Java 8.0 on Agent Machine.
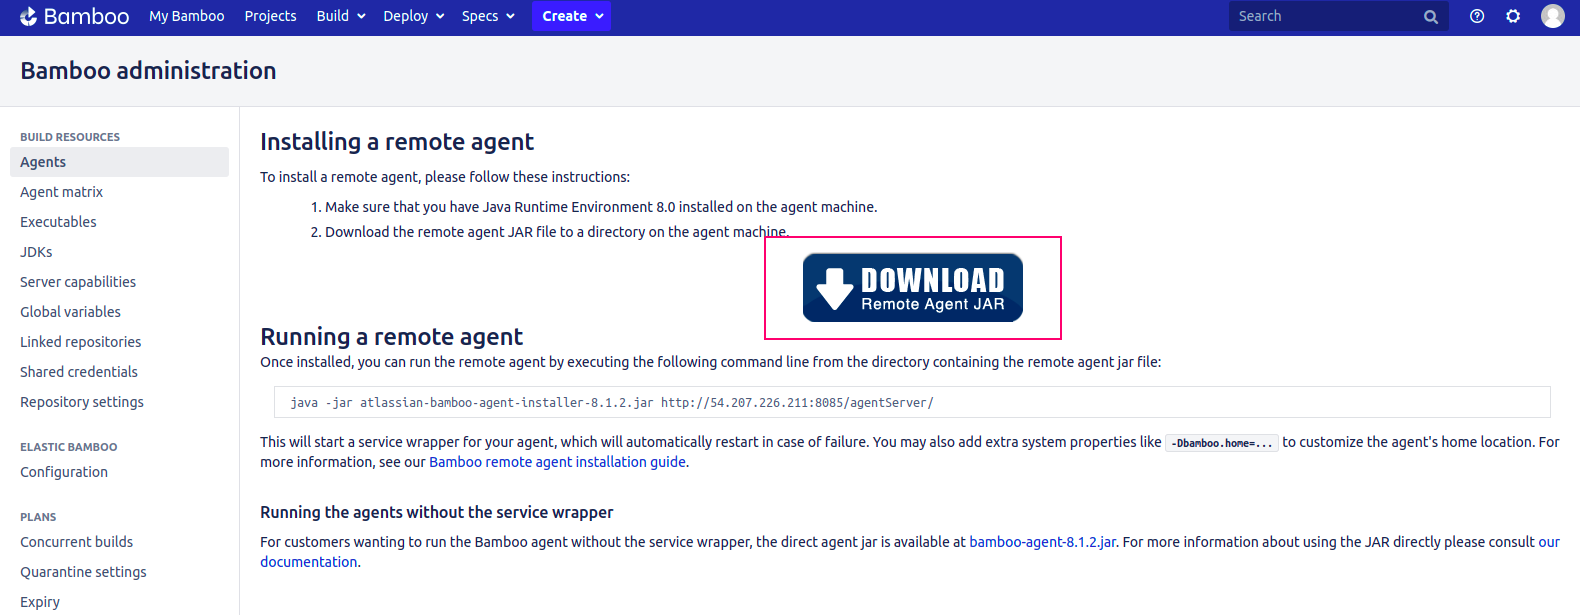
- Download the Remote Agent JAR file on Agent machine.
- Right click on Download Remote Agent JAR option—->Copy the link Address.Run on Agent machine
- Here is the output.

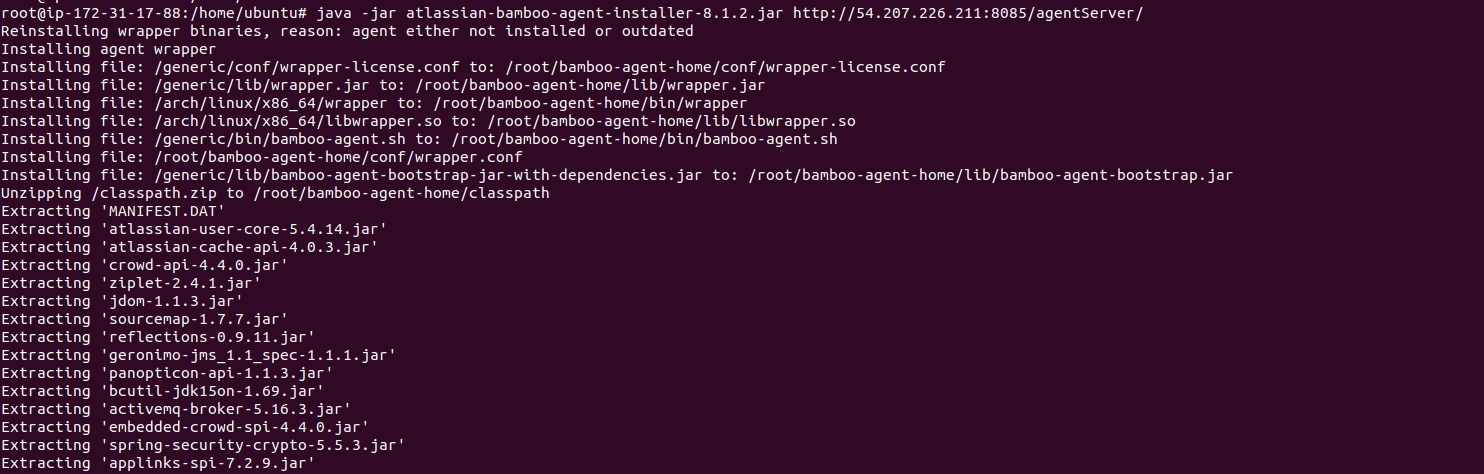
- Once remote agent JAR installed,Run the Remote Agent command.
- Here is the output.
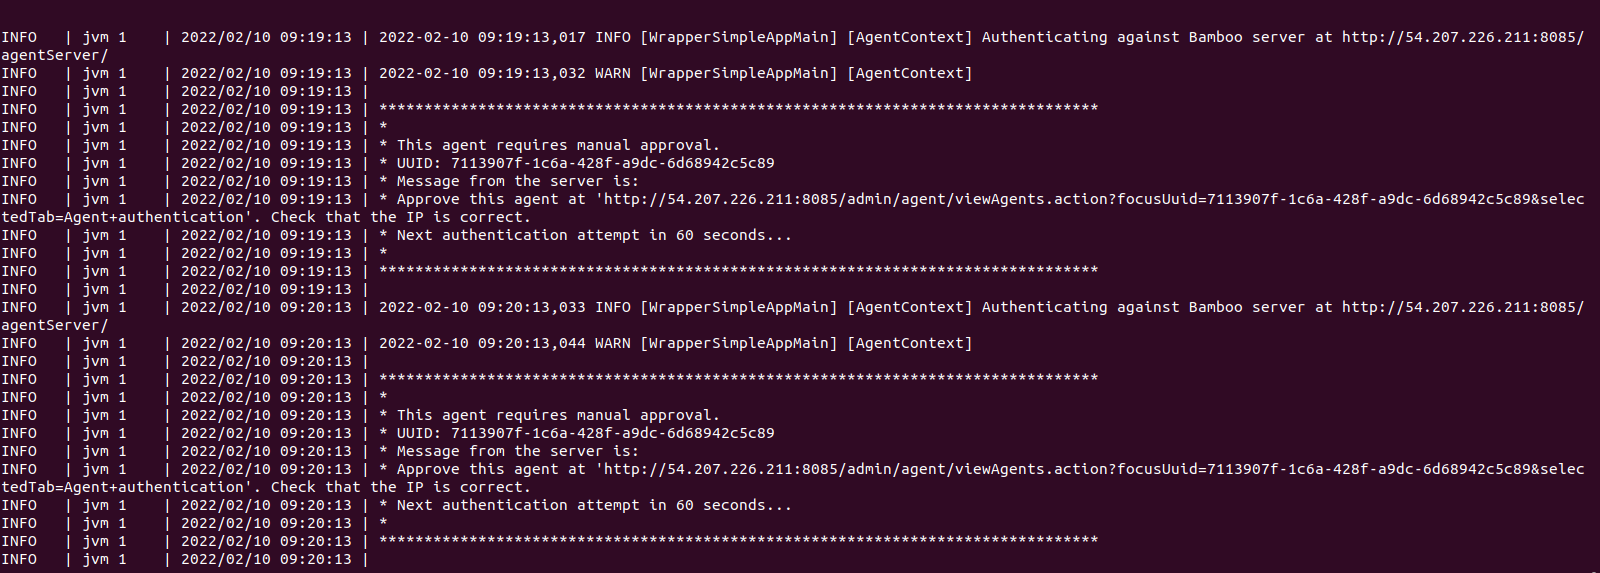
- After sometime,we need a approval for Remote Agent.
- Go to Bamboo web interface.
- Click on Agents.
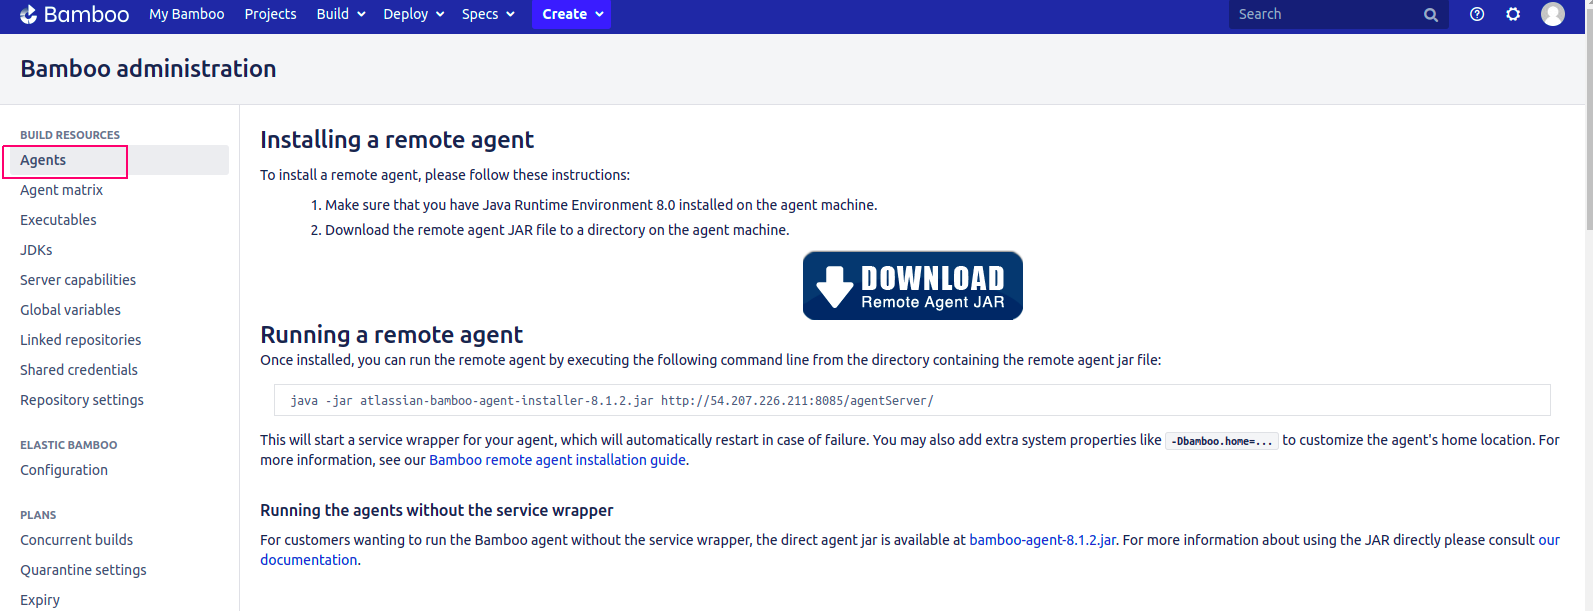
- Click on Approve Access.
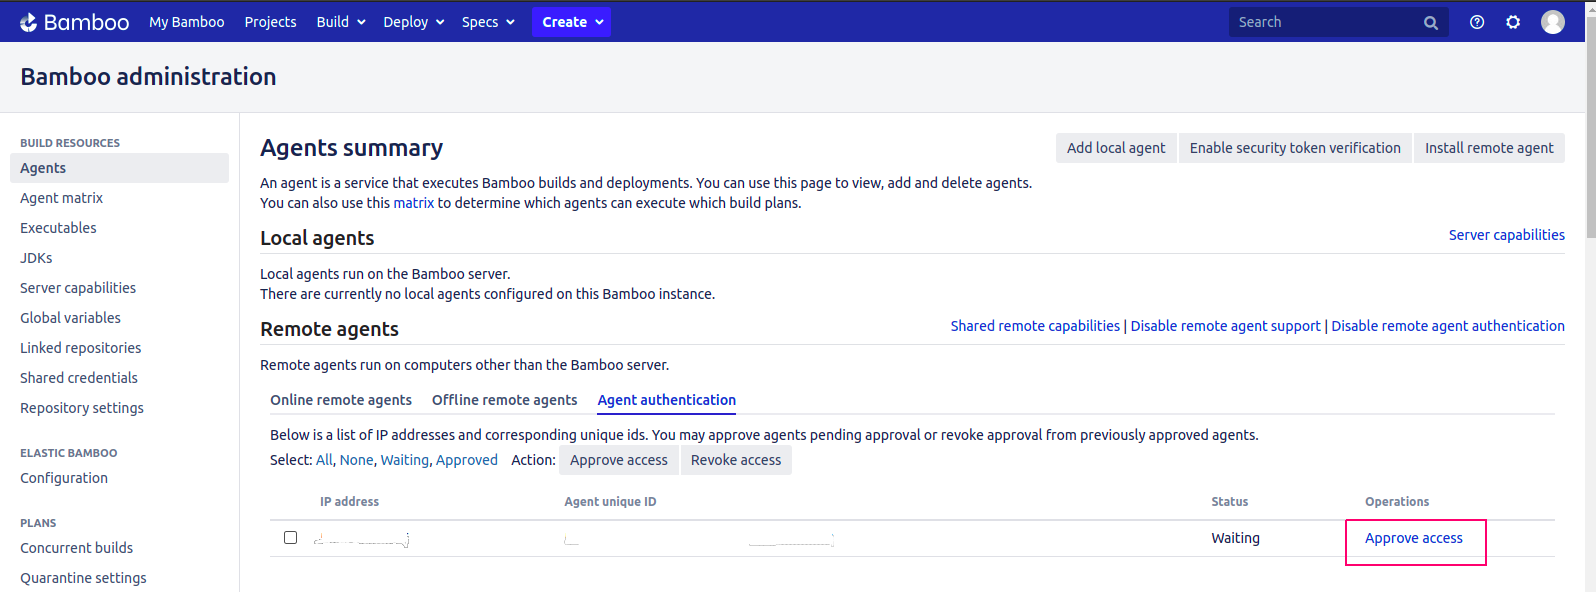
- Access Approved.
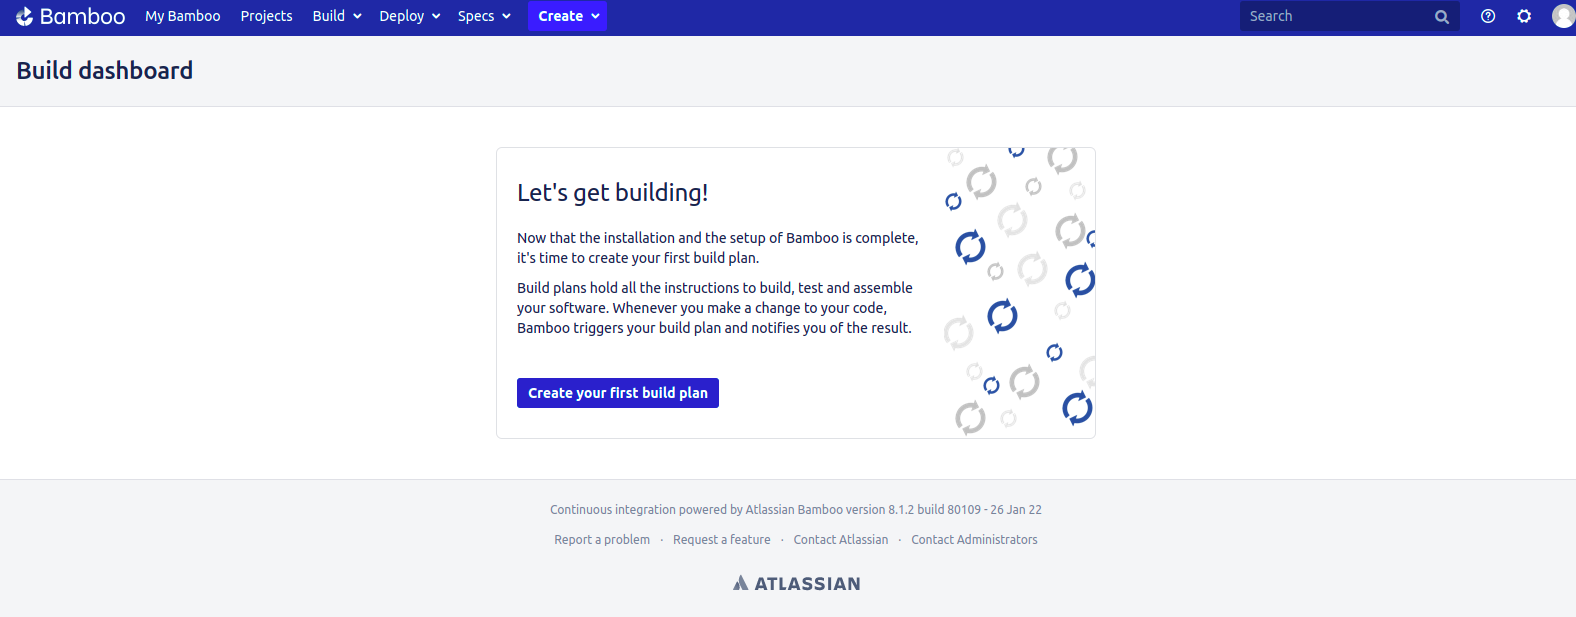
- Once Remote Agent installed,click on Bamboo.

- Click on Create Your First Build Plan.
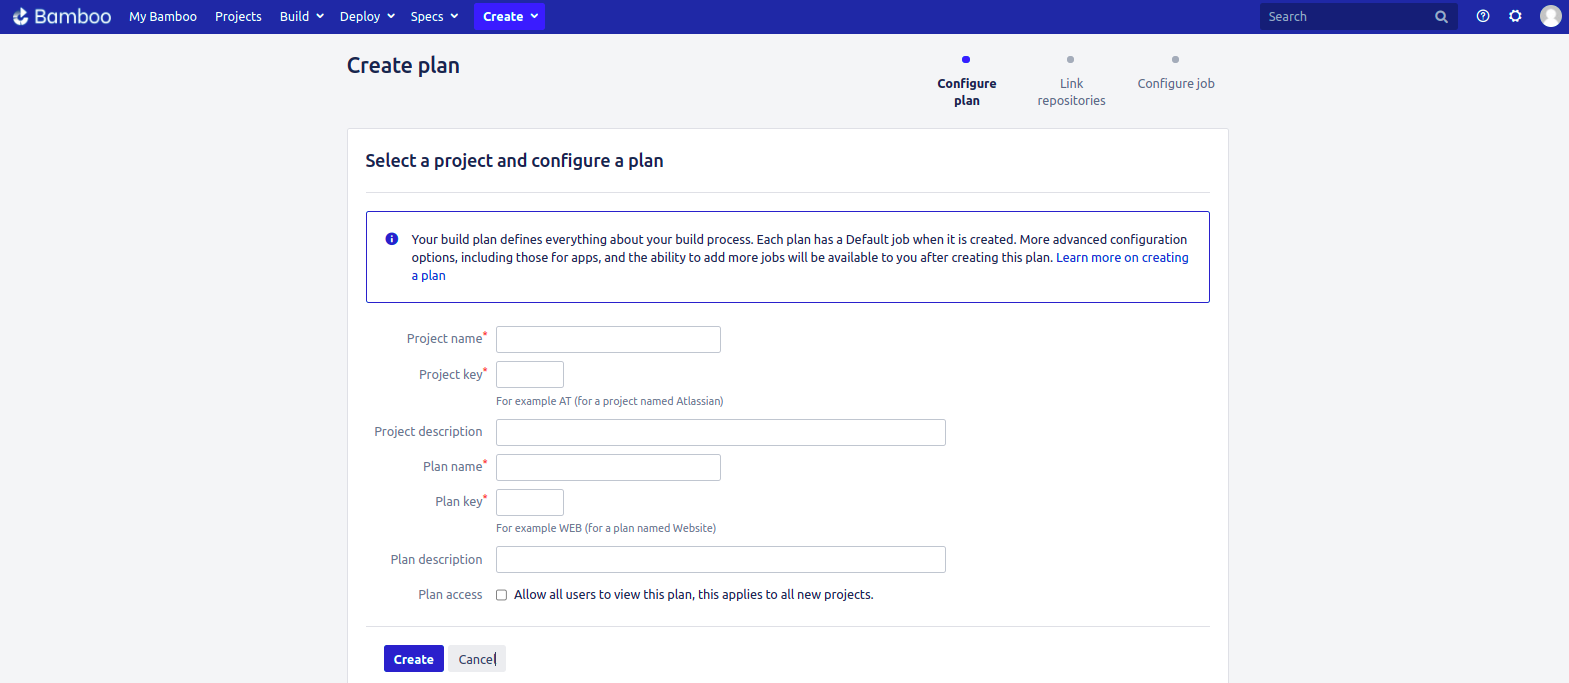
- Provide a Project & Plan name.
- Select Plan access.If we want to allow all users to view this plan then enable the plan access.
- Click on Create.
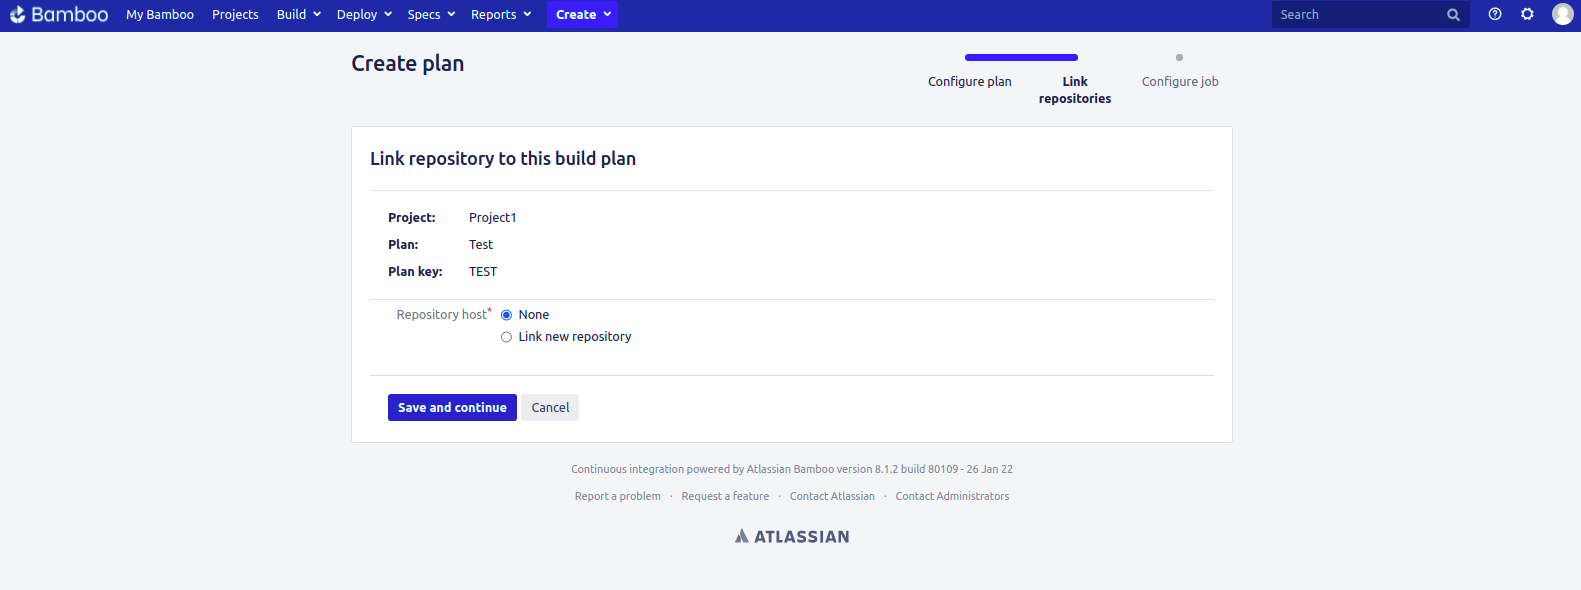
- Provide a Repository host.
- Select Link New repository so provide Bitbucket or GitHub link or select none.
- Click on Save & Continue.
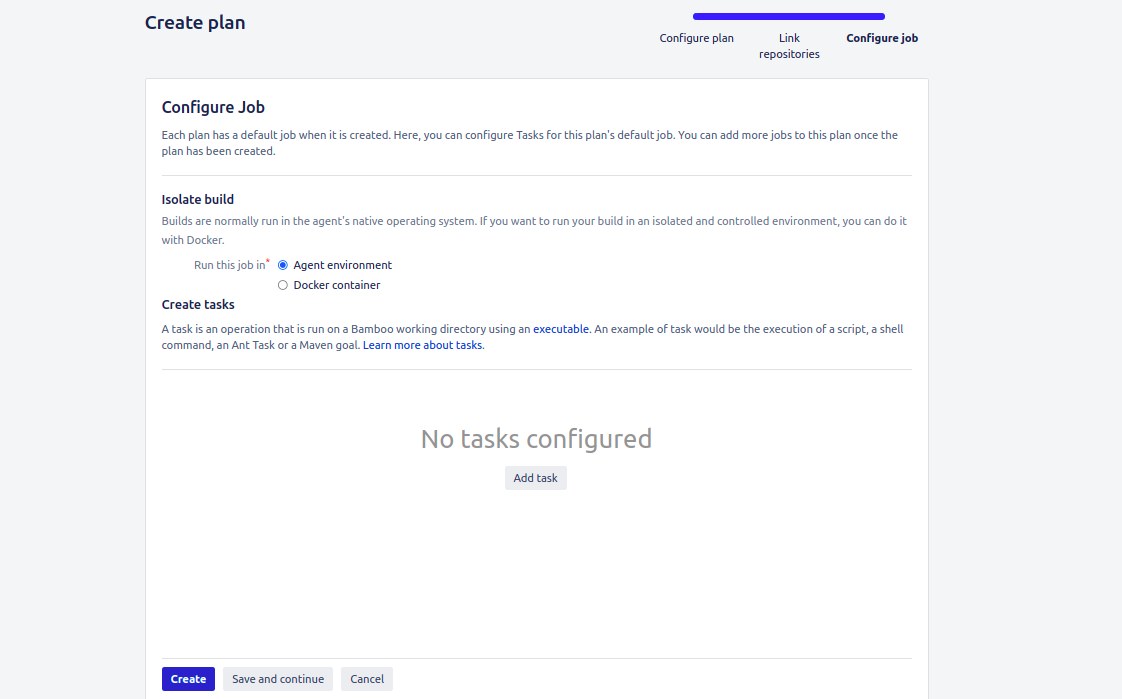
- Configure the Job as per needs or requirements.
- Click on Create.
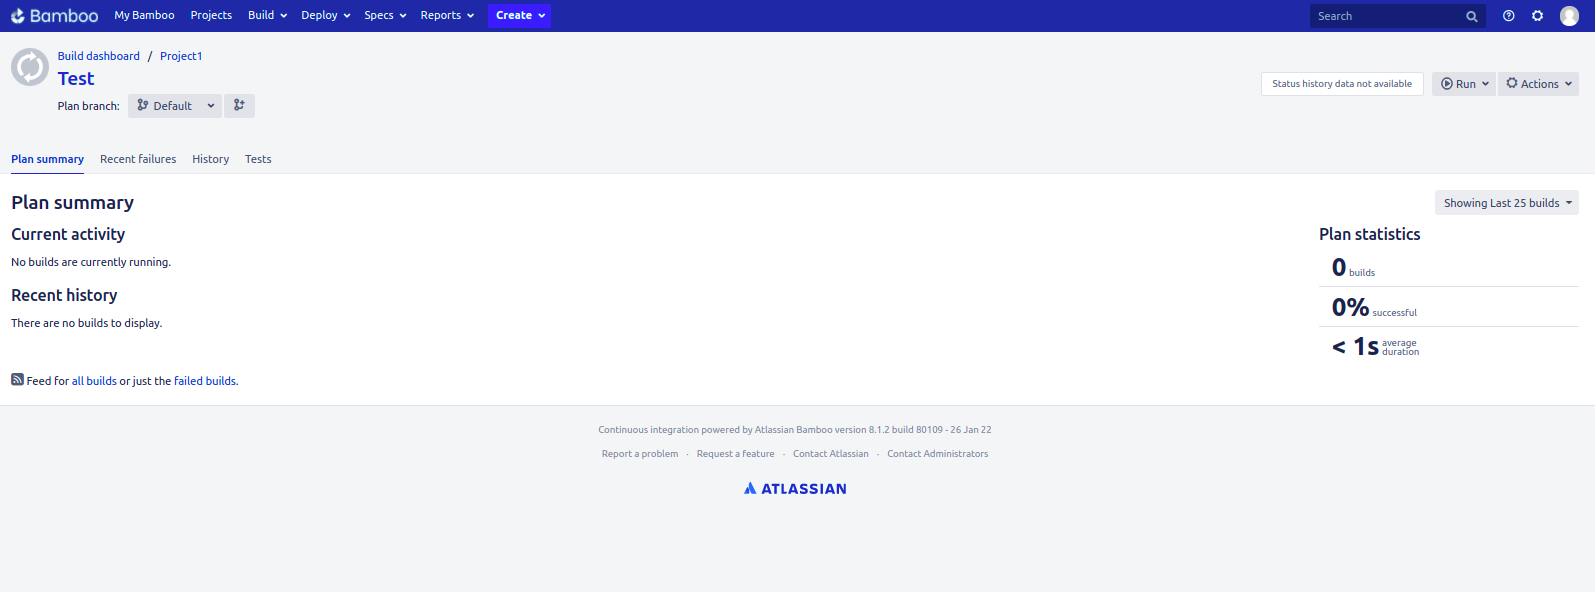
- Now First build plan is successfully created.