 shivani singh
- March 24, 2022
Steps to Install & Configure Gulp on Ubuntu 20.04 LTS
Gulp is a free & open-source JavaScript software toolkit. It helps to automate or time-consuming tasks in development workflow. It is a command-line tool that helps to run task for Node.js applications.
There are some steps to Setup Gulp in Ubuntu:
Step 1: Update the System.
apt-get update
Step 2: Install the required packages.
apt-get install python3-software-properties gnupg2 curl wget
Step 3: Add the Node.js repository.
curl -sL https://deb.nodesource.com/setup_14.x | sudo -E bash -
- Here is the command output.

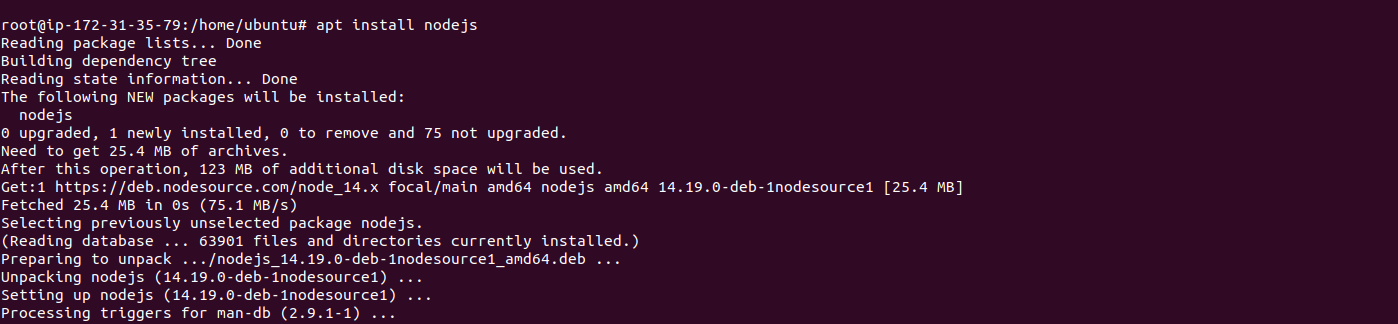
- Install Node.js.
apt-get install nodejs
- Here is the command output.
- Check Node & NVM version.
node --version

npm --version
- Here is the command output.

Step 4: Create a Sample Node.js Application.
- Create a new directory & change the directory.
mkdir gulp-project && cd gulp-project
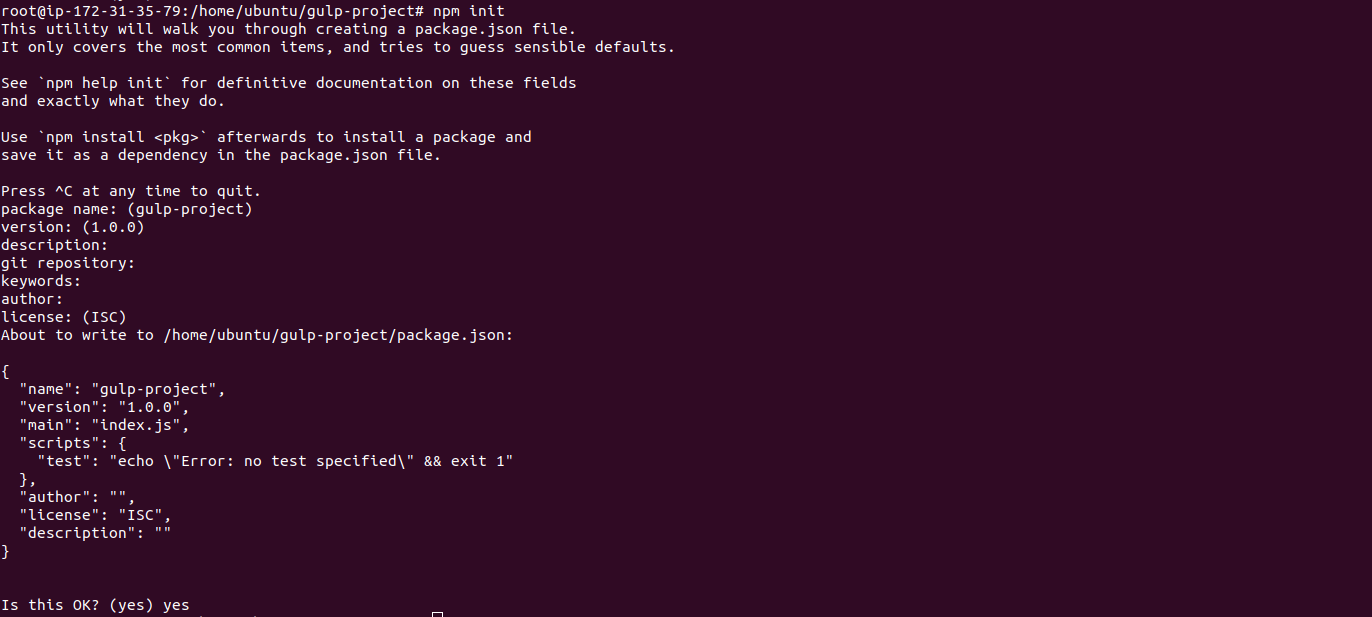
- Create a new application with NPM.
npm init
- Here is the command output.
- Provide some information or Press Enter to create a package.json file.
Step 5: Install Gulp.js on system.
npm install -g gulp-cli
- Here is the command output.

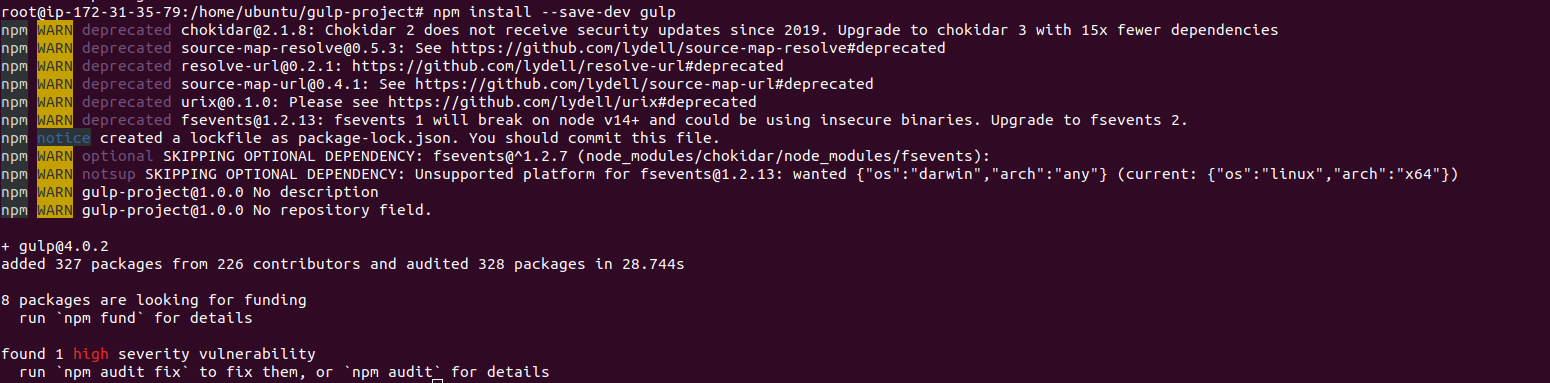
- Install the gulp package.
npm install --save-dev gulp
- Here is the command output.
- Check Gulp version.
gulp --version
- Here is the command output.

Step 6: Gulp Application Example.
- Create a gulpfile.js.
vim gulpfile.js
- Add the following lines:
var gulp = require('gulp');

gulp.task('hello', function(done) {

console.log('Hello World!!!');

done();

});
- Run the gulp task.
gulp hello
- Here is the command output.
