shivani singh
- July 20, 2022
Steps to create a new disk partition in window server 2019 base
Hello,In this blog we are creating a new disk partition in window server 2019 base.Using disk partition or disk slicing, we are creation of one or more regions on secondary storage.These regions are called partitions.Each partition can be managed separately.
There are some steps to create a disk partition in window server 2019 base:
- Login to window server 2019 base.

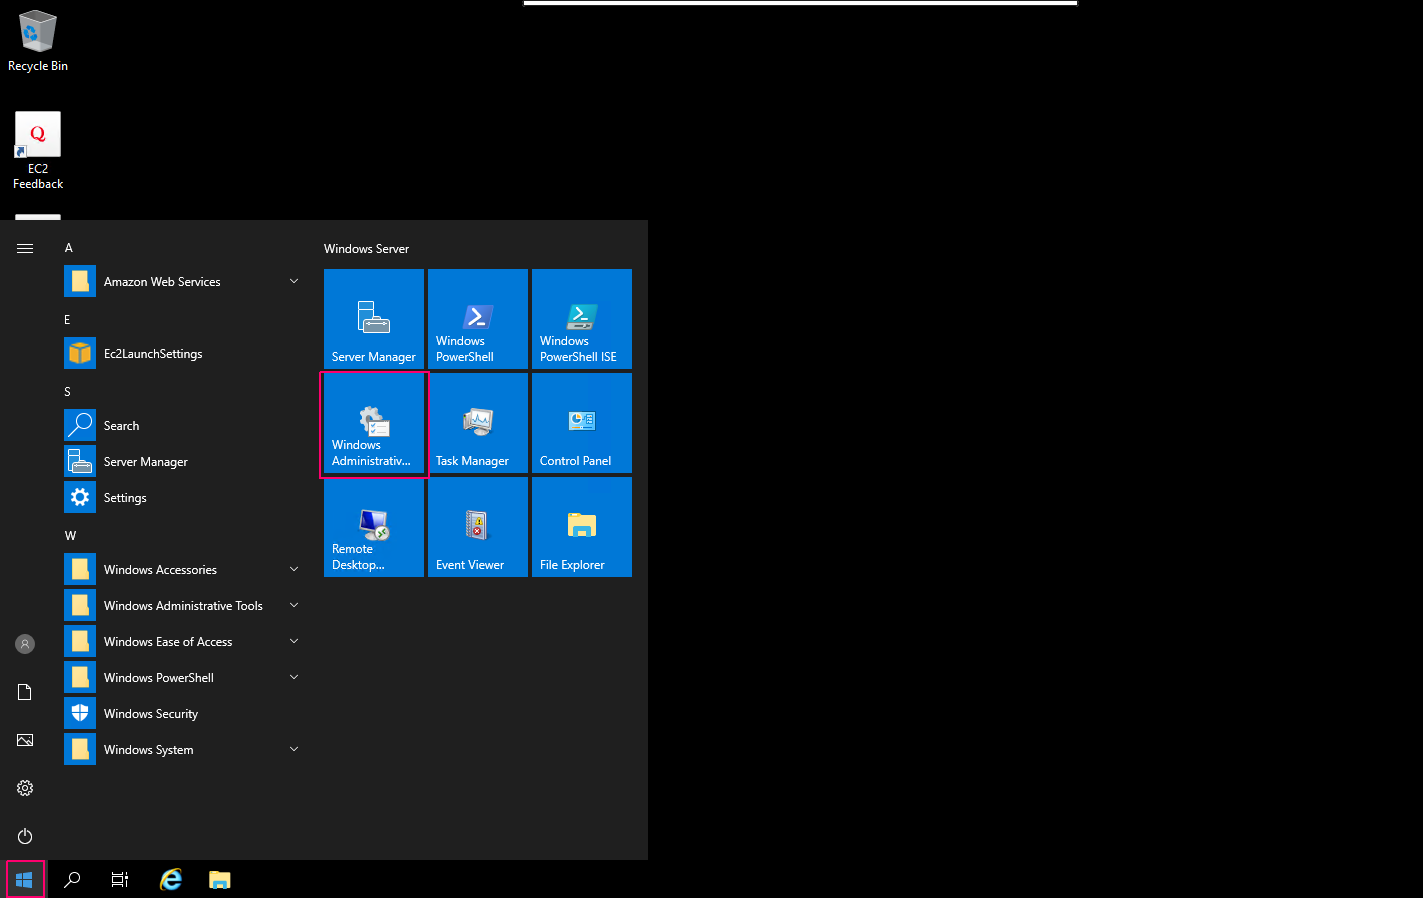
- Click on Start & select Windows Administrative.
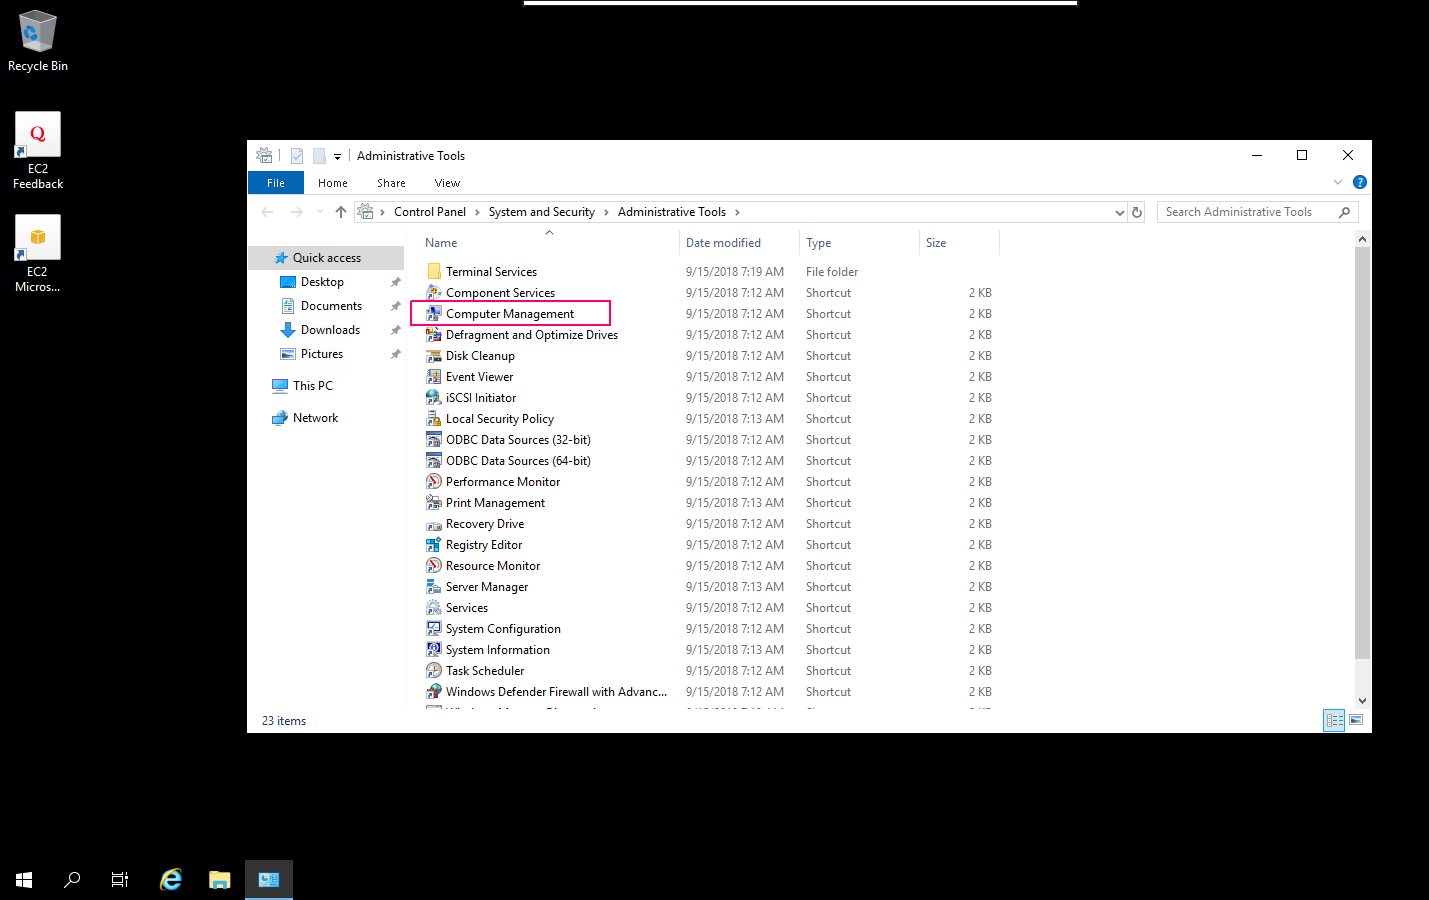
- Click on Computer Management.
- Click on Disk Management.
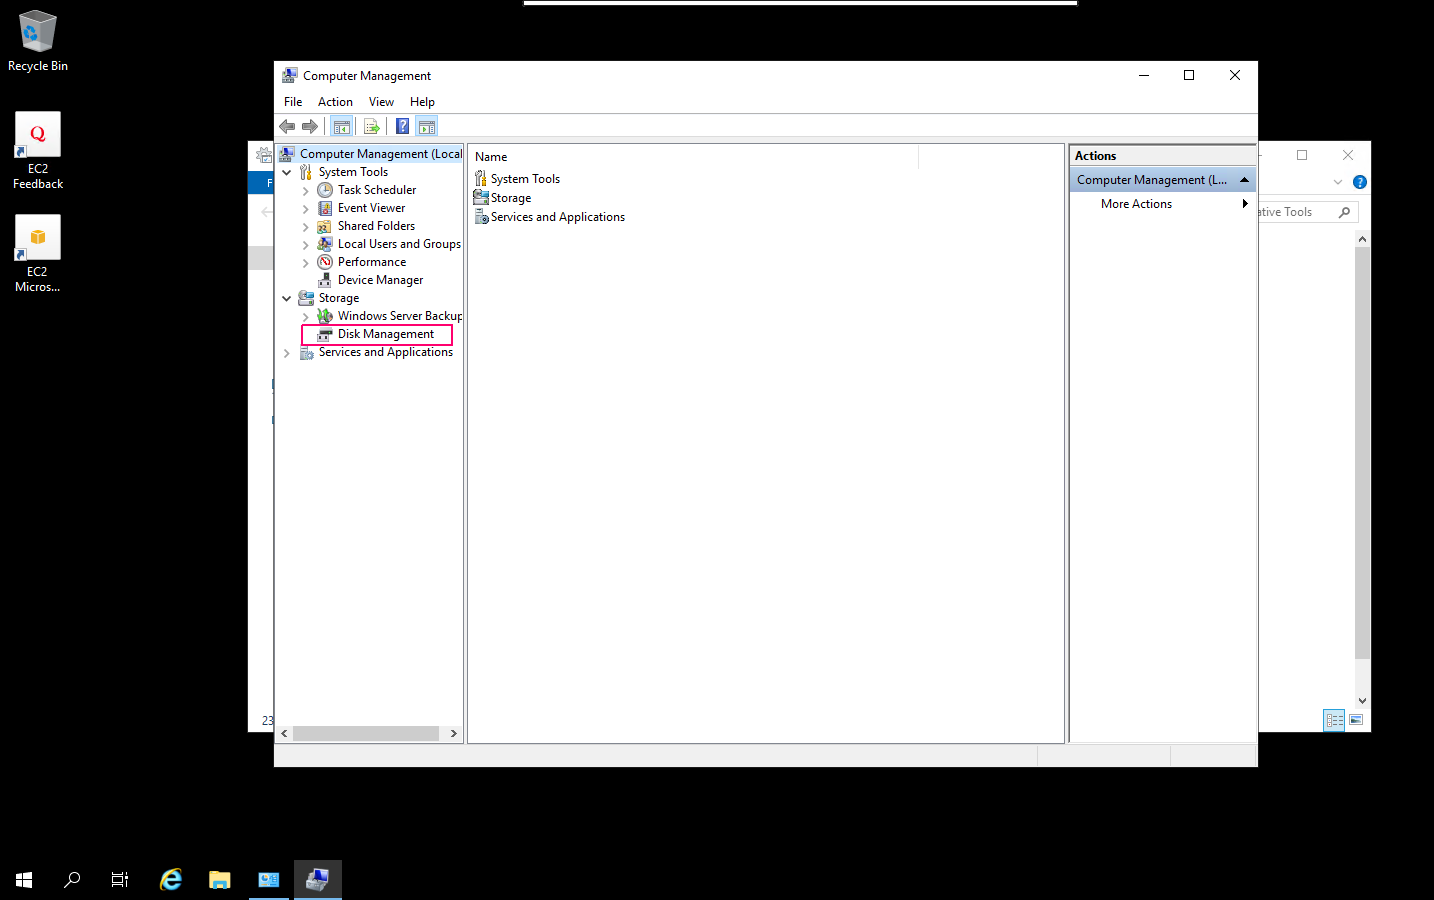
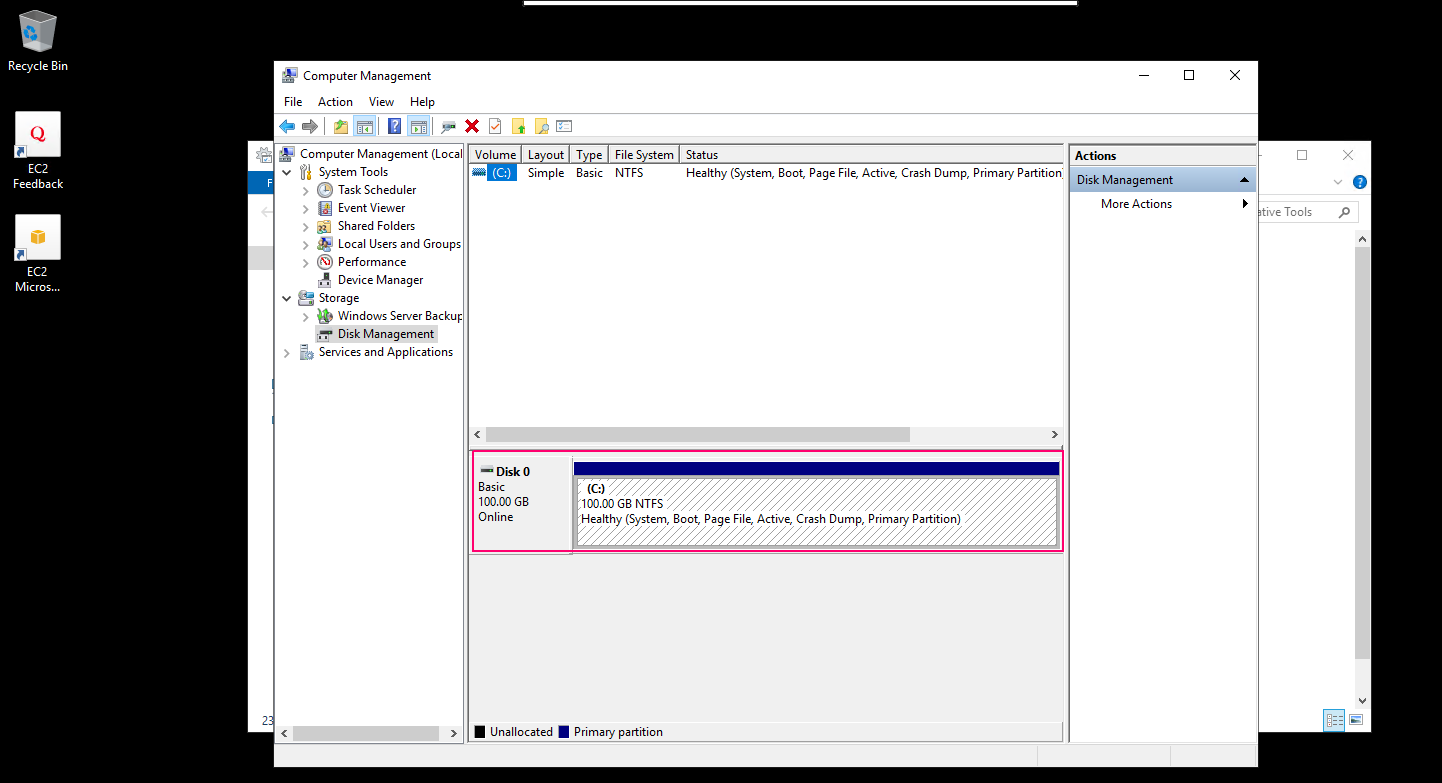
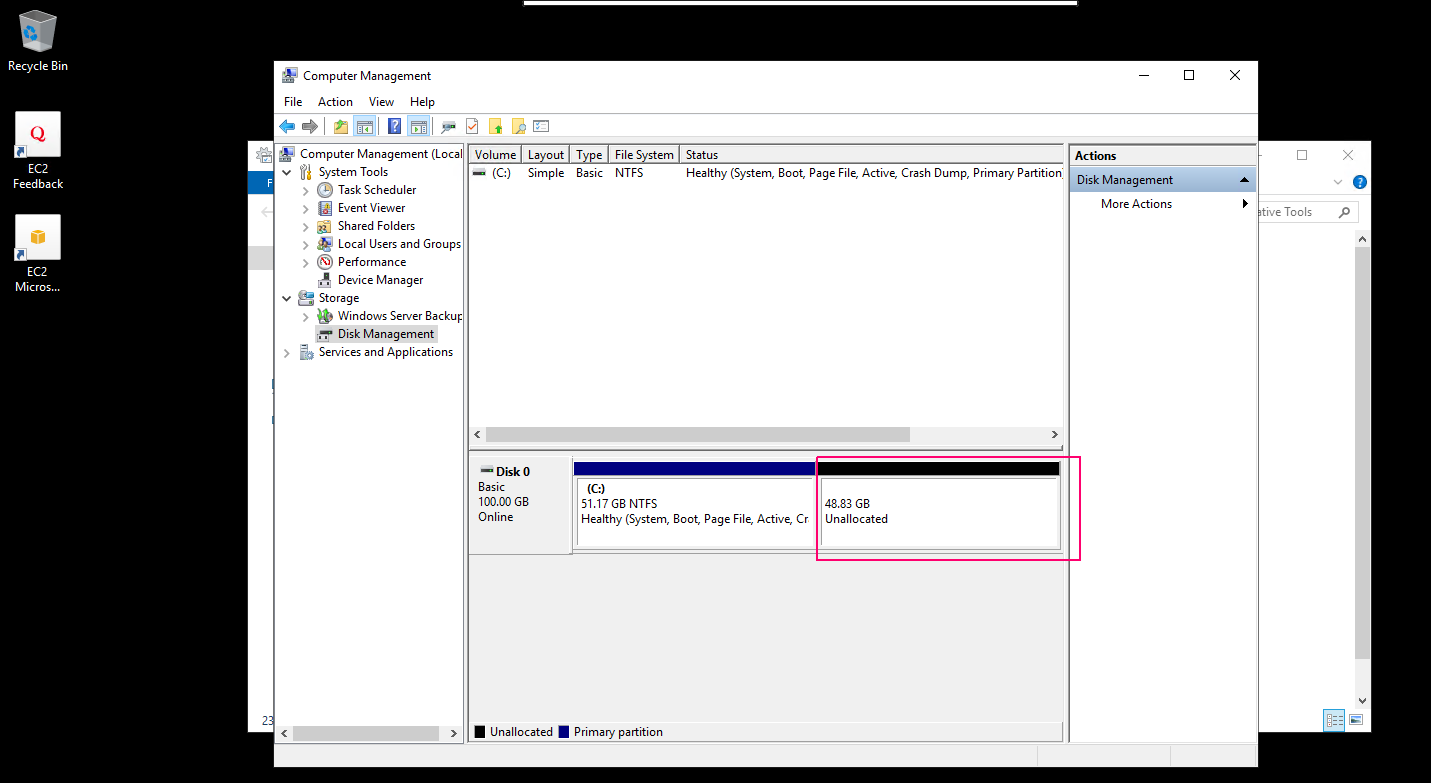
- Here, we can see the available disk.
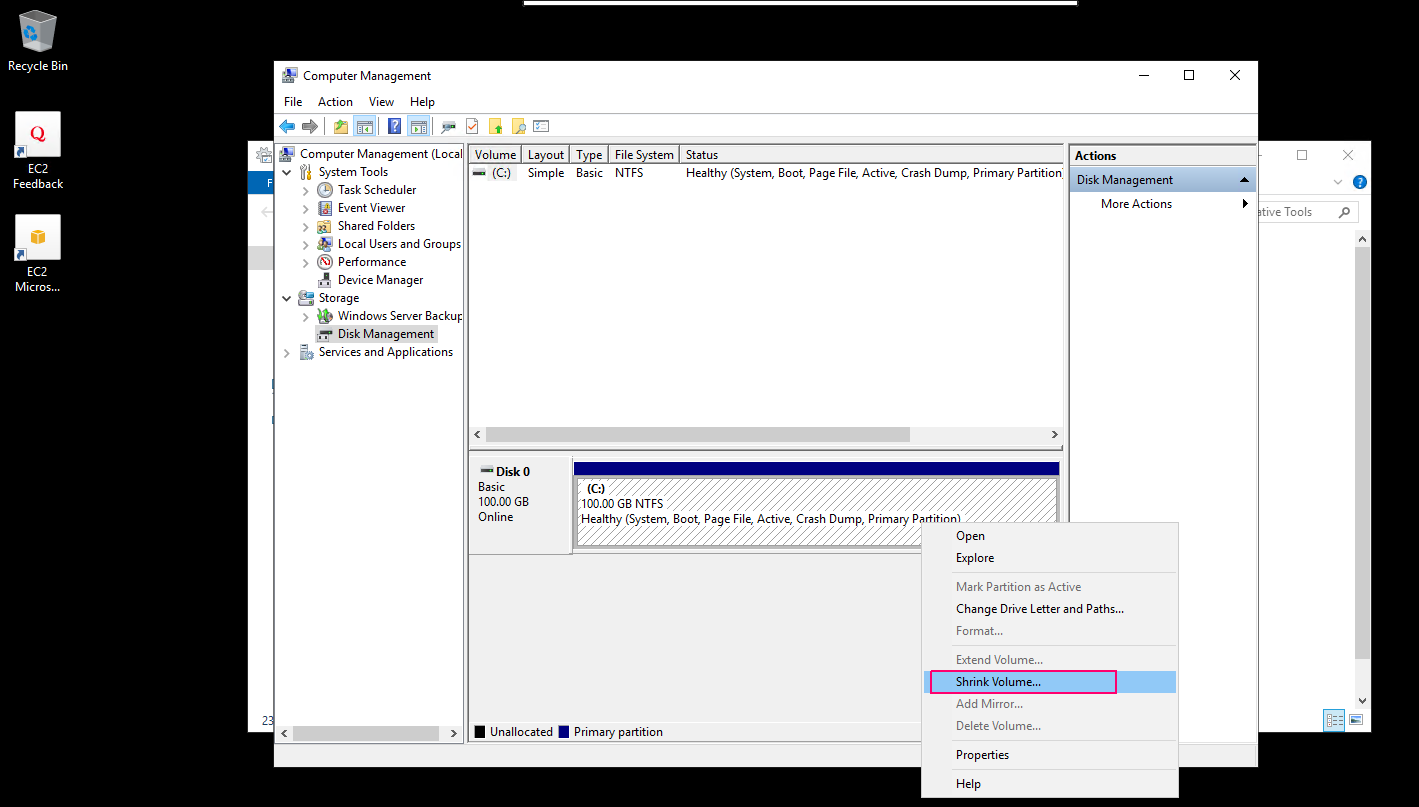
- First we need to create a Unallocated space,right click on Available local disk (C:) then select Shrink Volume option.
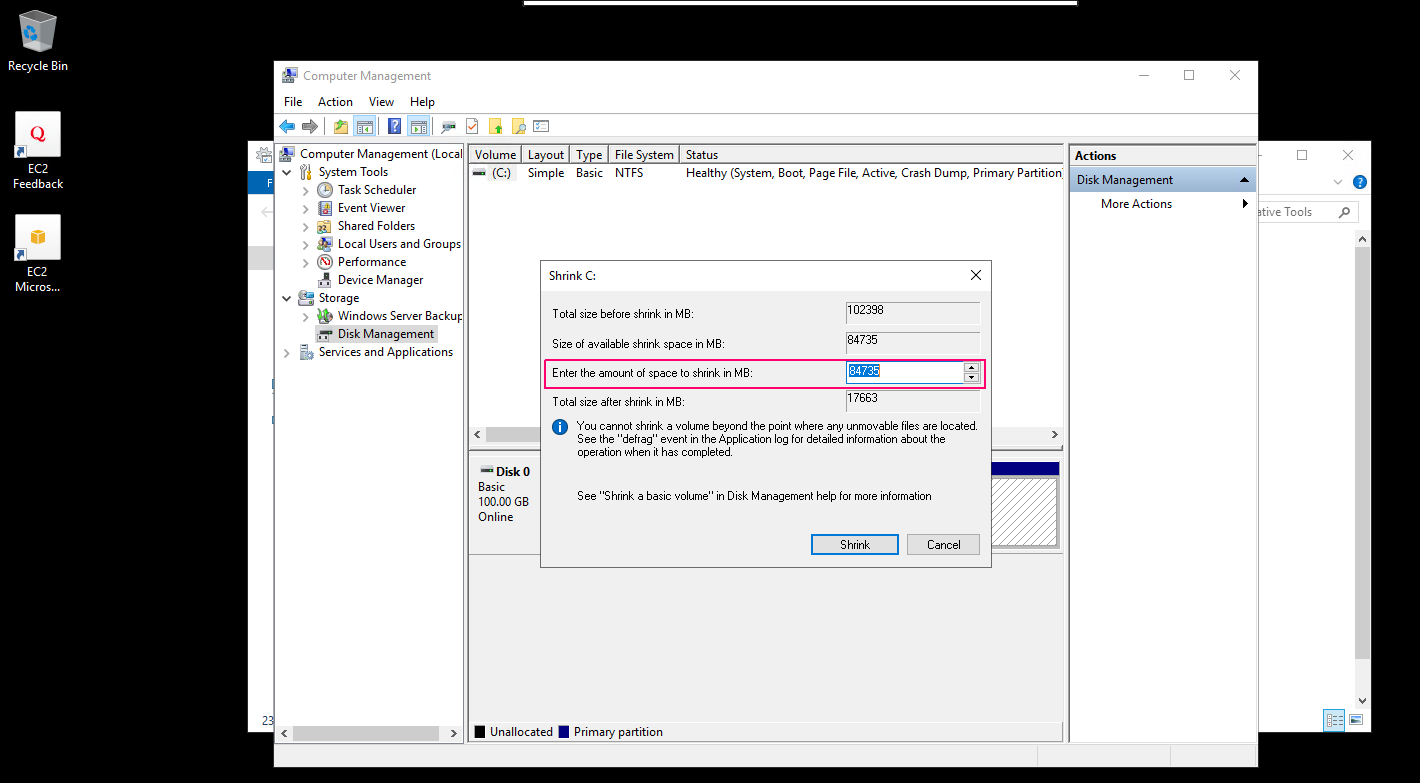
- Enter the amount of space to shrink in MB & Click on Shrink.
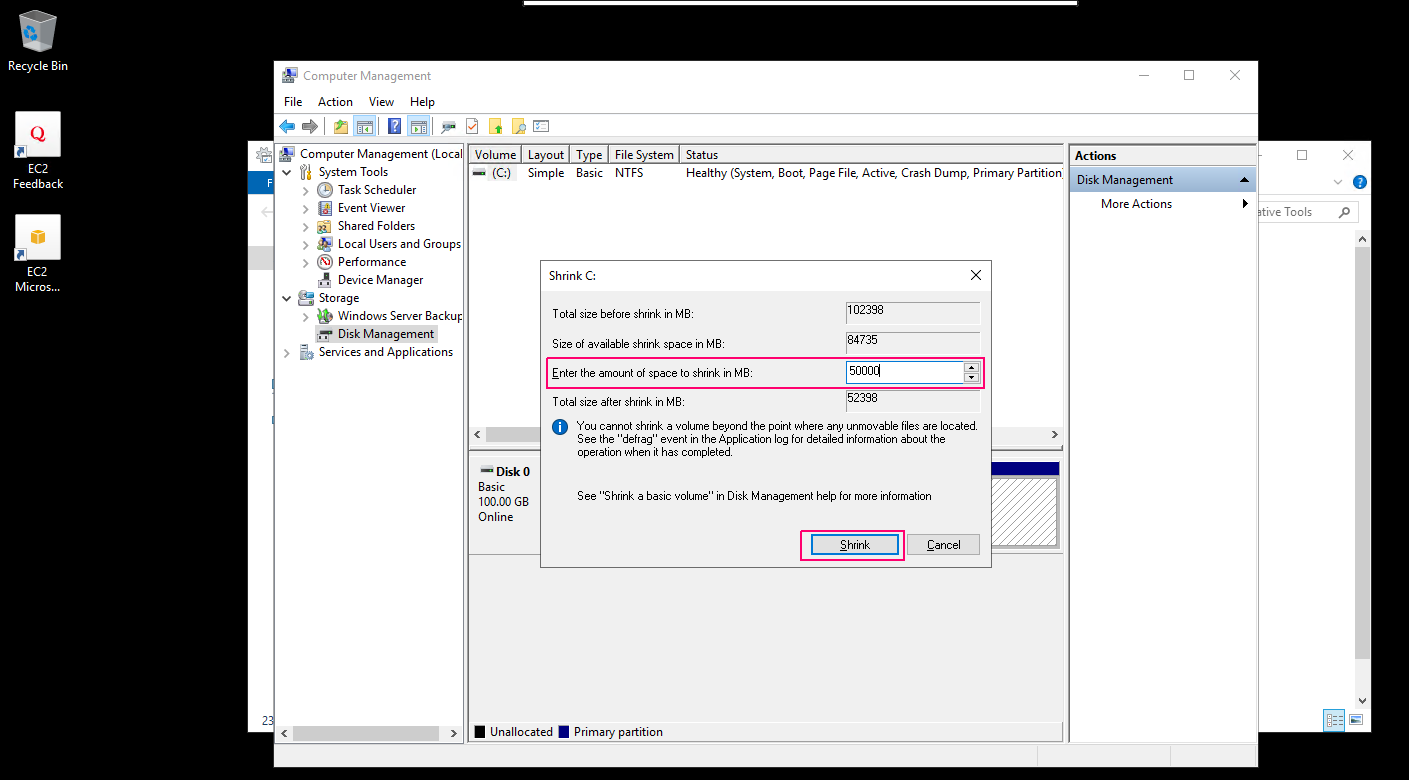
- Unallocated space is created.
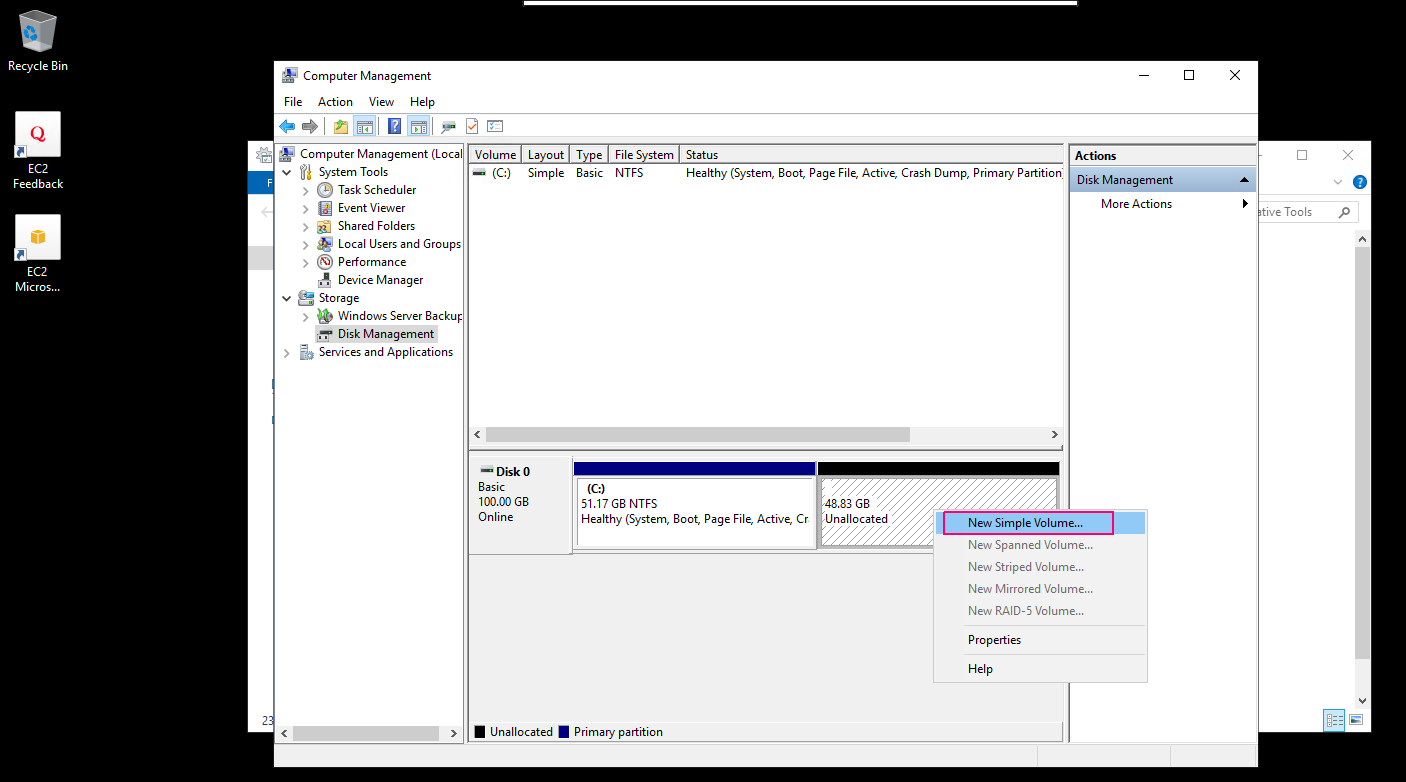
- Right click on Unallocated space then select New Simple Volume.
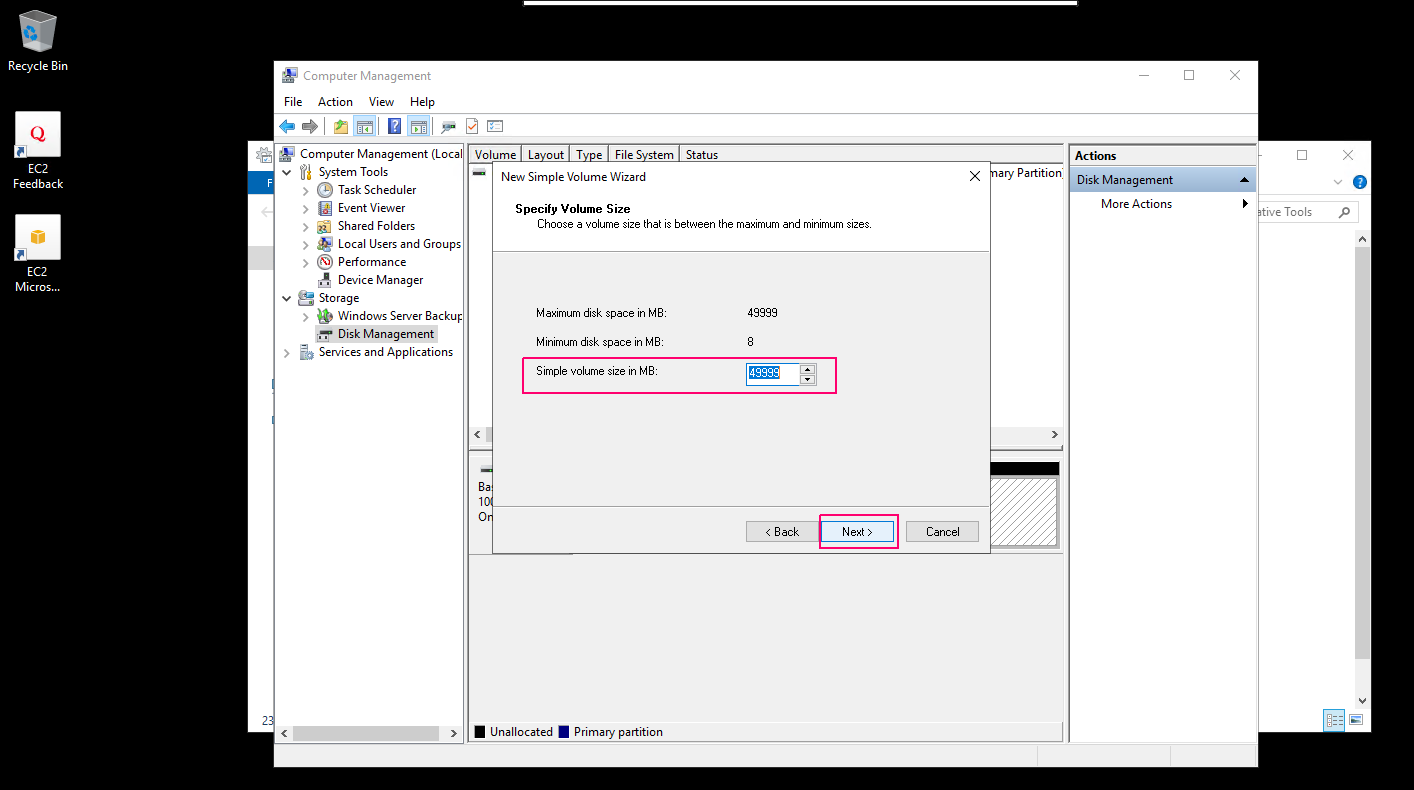
- Welcome wizard will open.Click on Next.

- Enter the Simple volume size in MB.Click on Next.
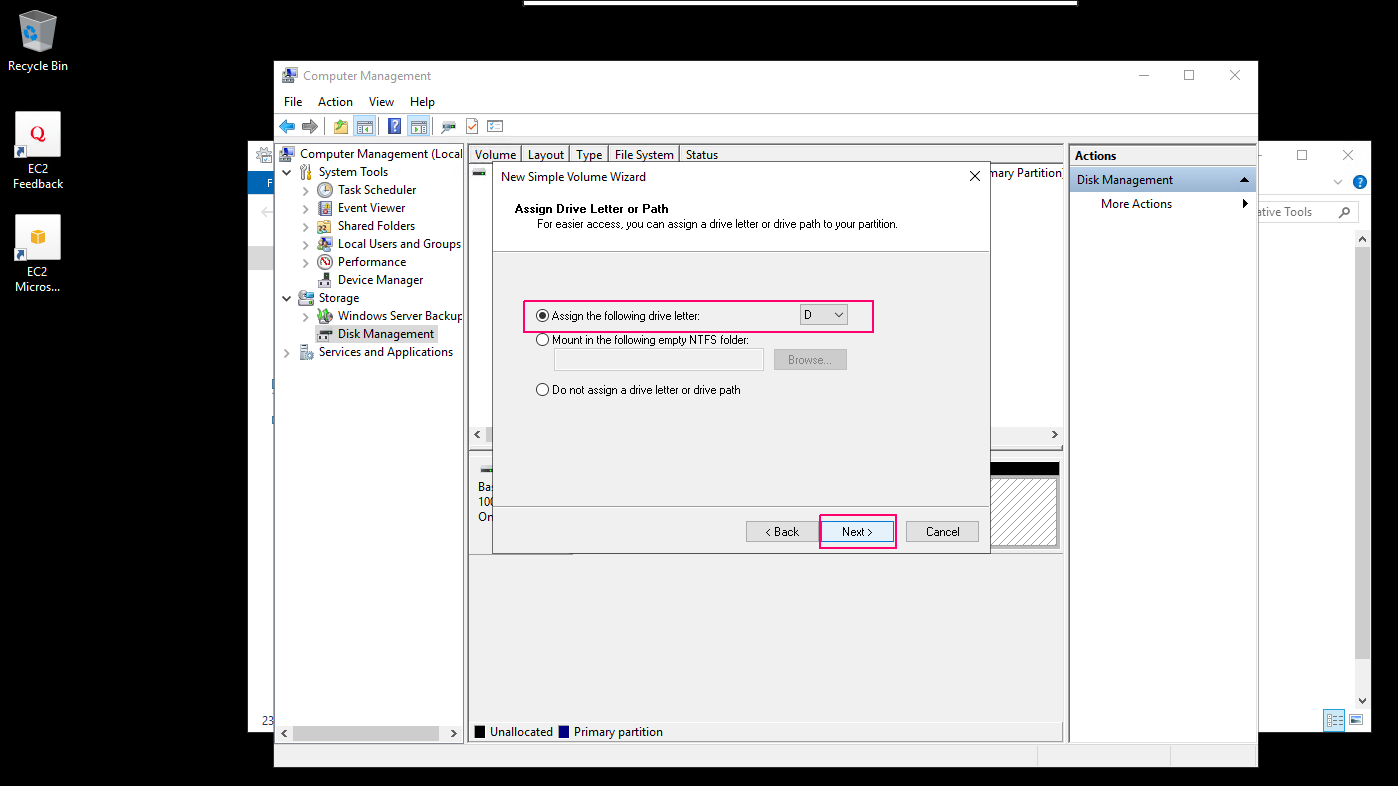
- Assign a Disk drive letter & Click on Next.
- Format the New created partition.Select NTFS file system & provide a volume label name.
- Select the “Perform a quick format” & click on Next.
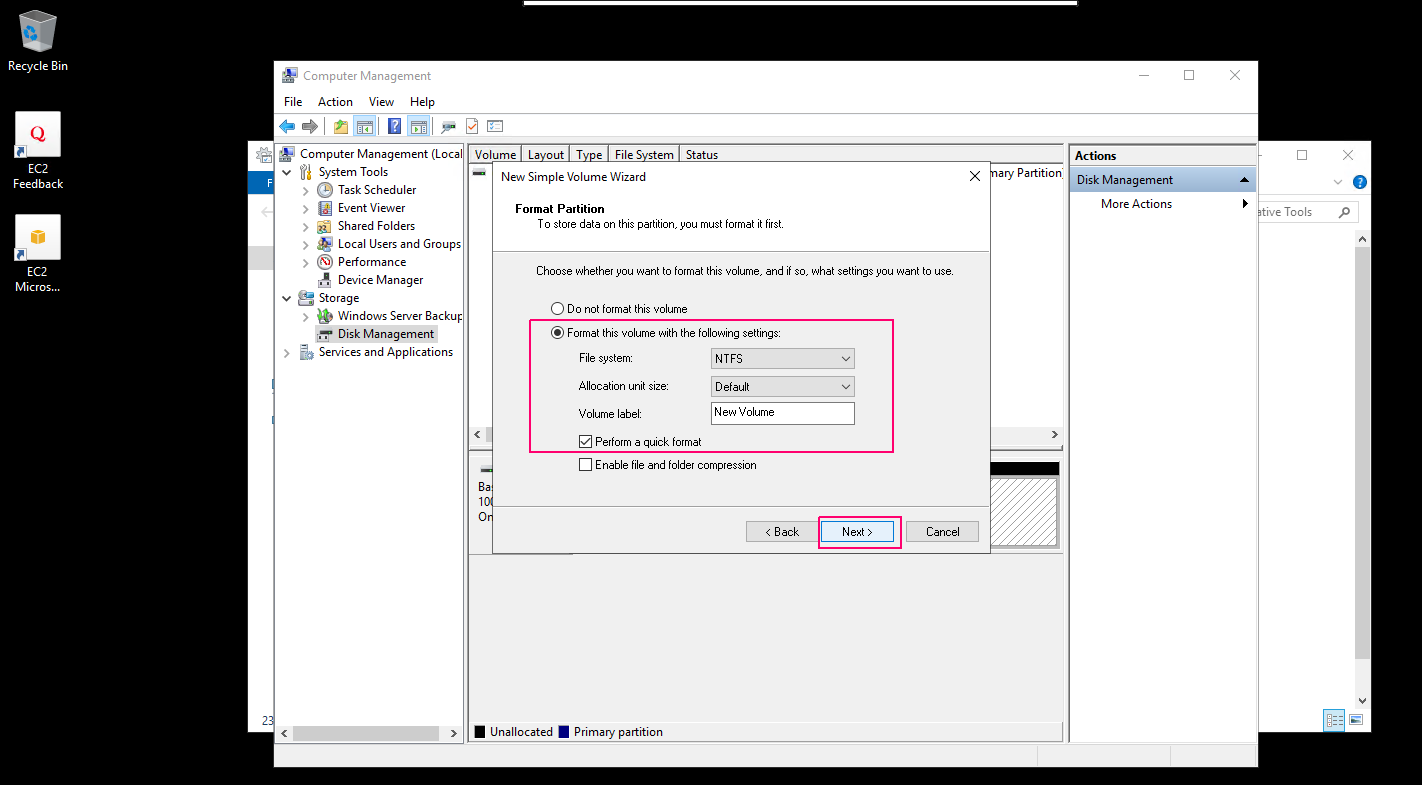
- Click on finish.
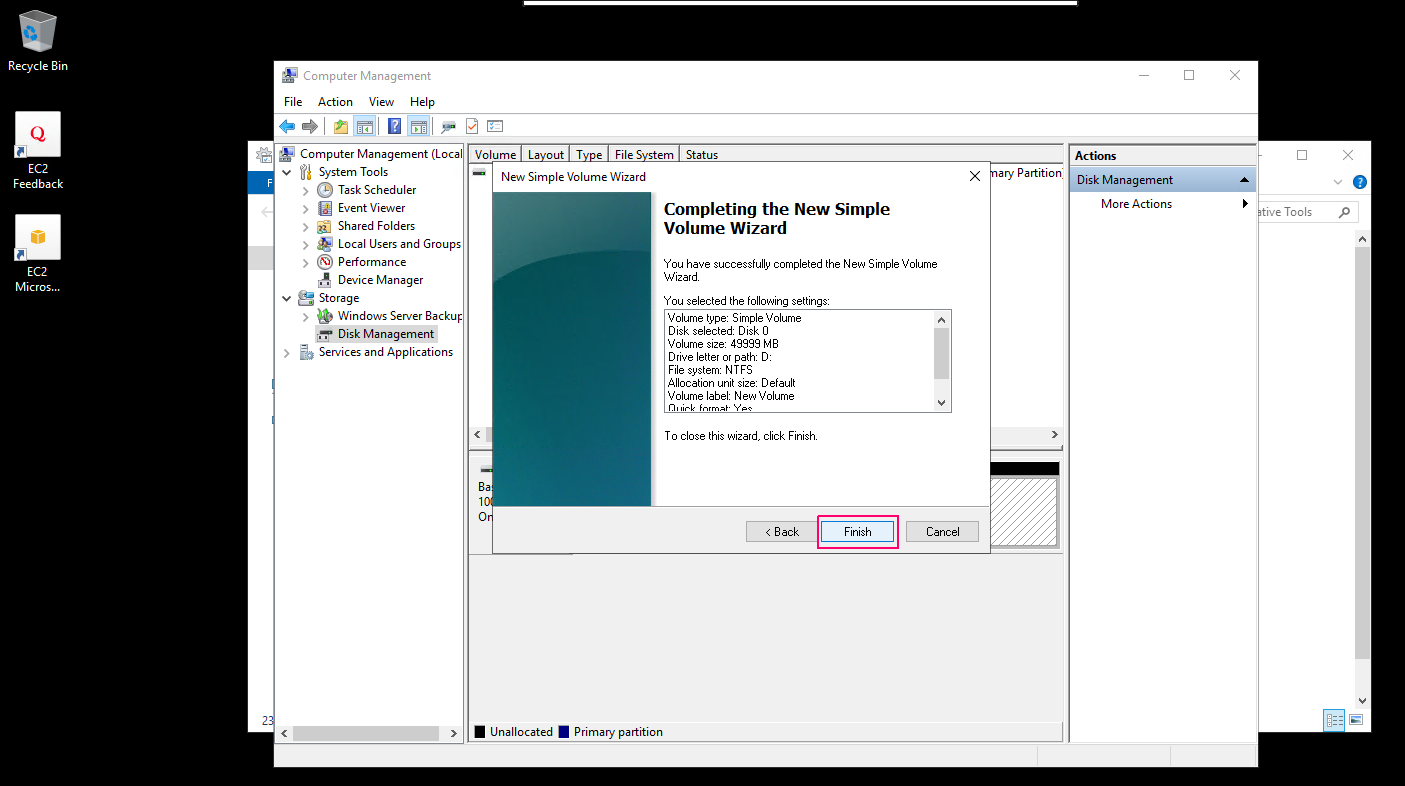
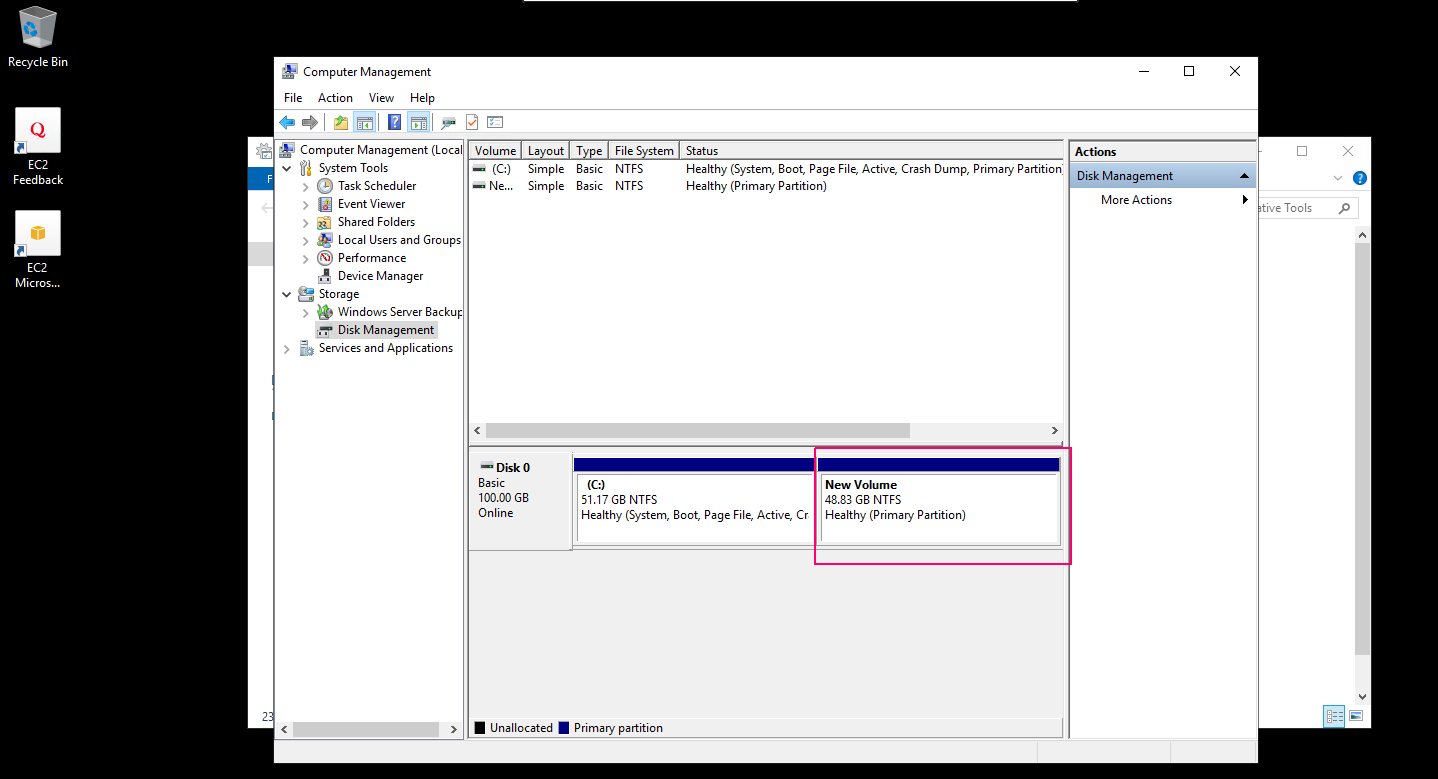
- Now New disk partition is created successfully.
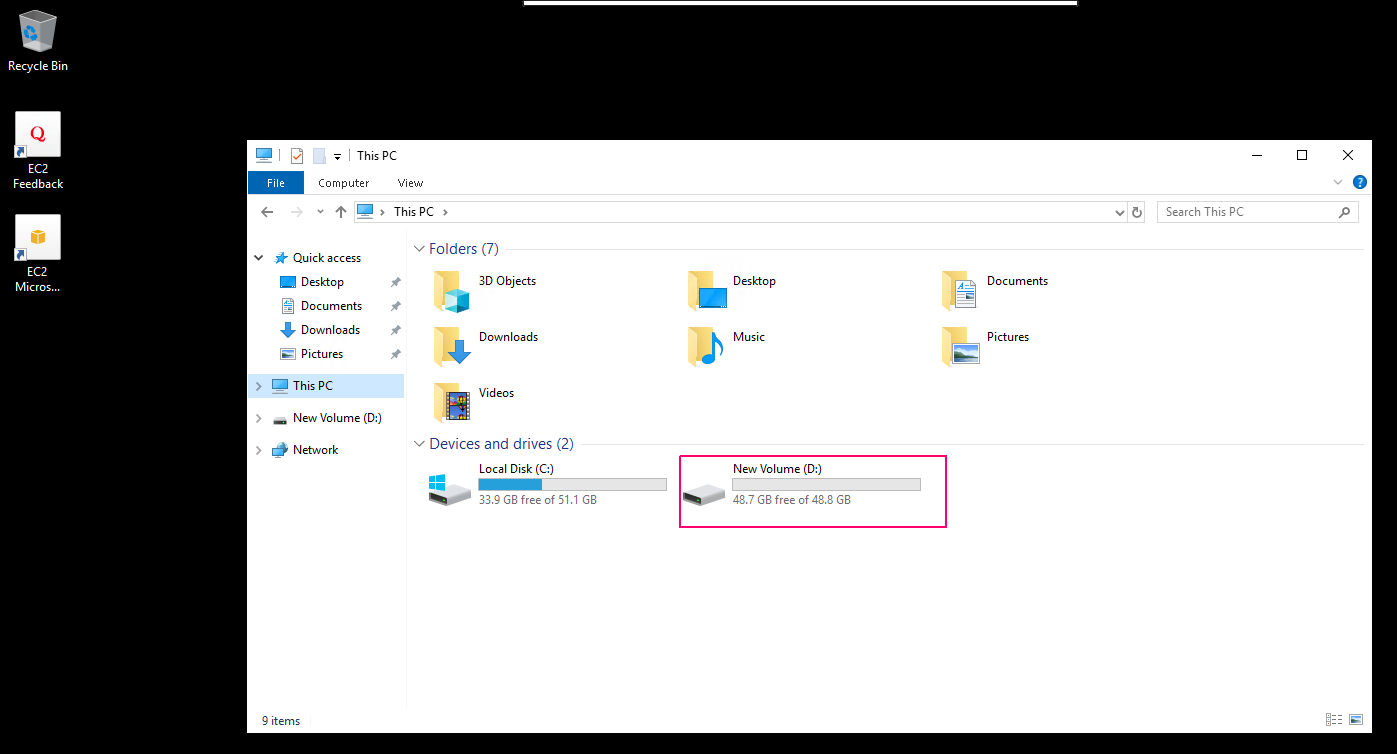
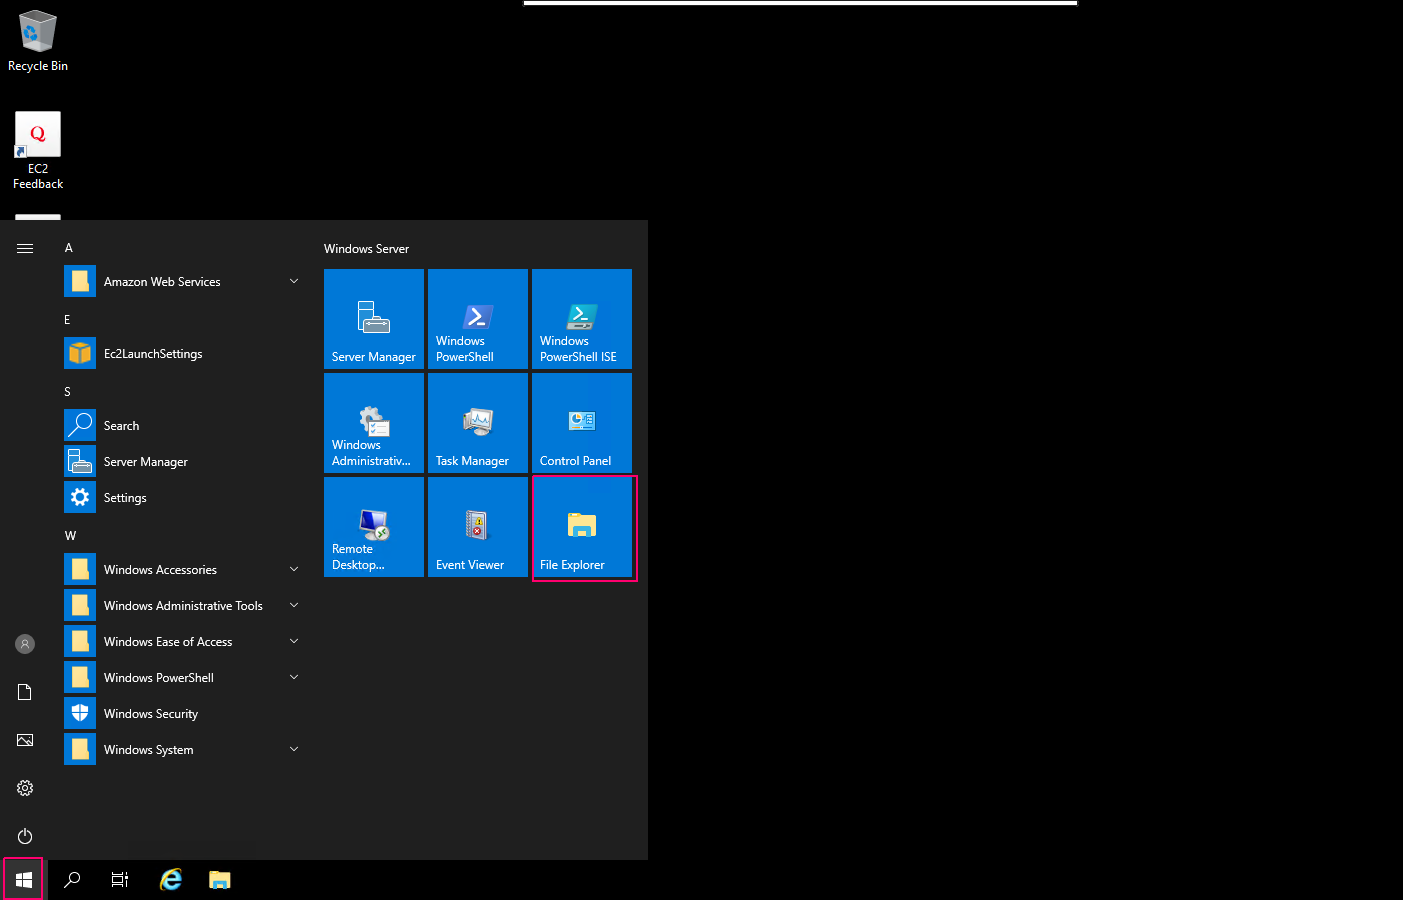
- Check the new created disk,go to Start & click on file explore.
- Click on “This PC”.
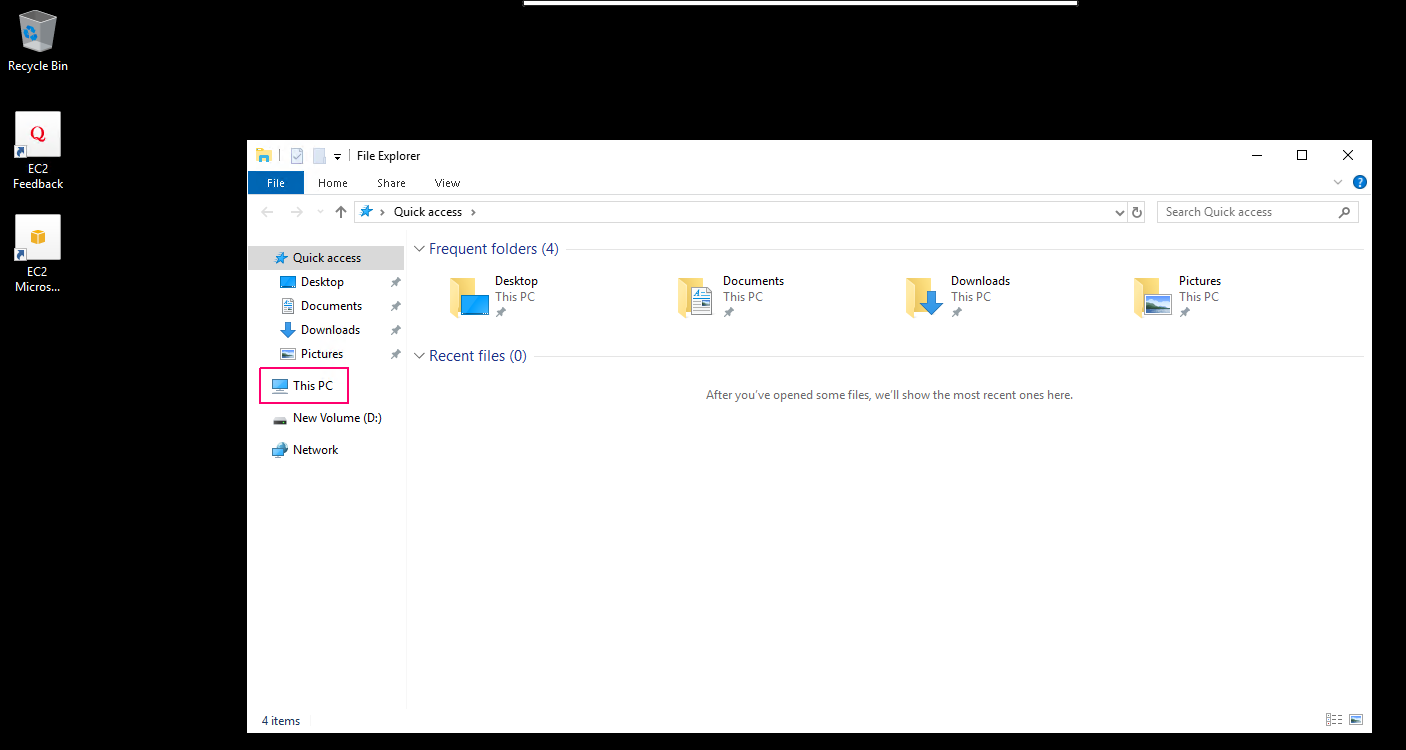
- Here, we can see the new created disk partition [New Volume (D:)].