shivani singh
- June 23, 2022
Steps to Add Roles & Features in Window Server 2019
Hello,here we are discussing about for window server 2019 base roles & features.Window Server roles refer to the roles that server can play on your network & features refer to additional capabilities of the Windows operating system itself.
There are some steps to Add roles & features in window server 2019 Base:
- Login to Window Server 2019 Base.

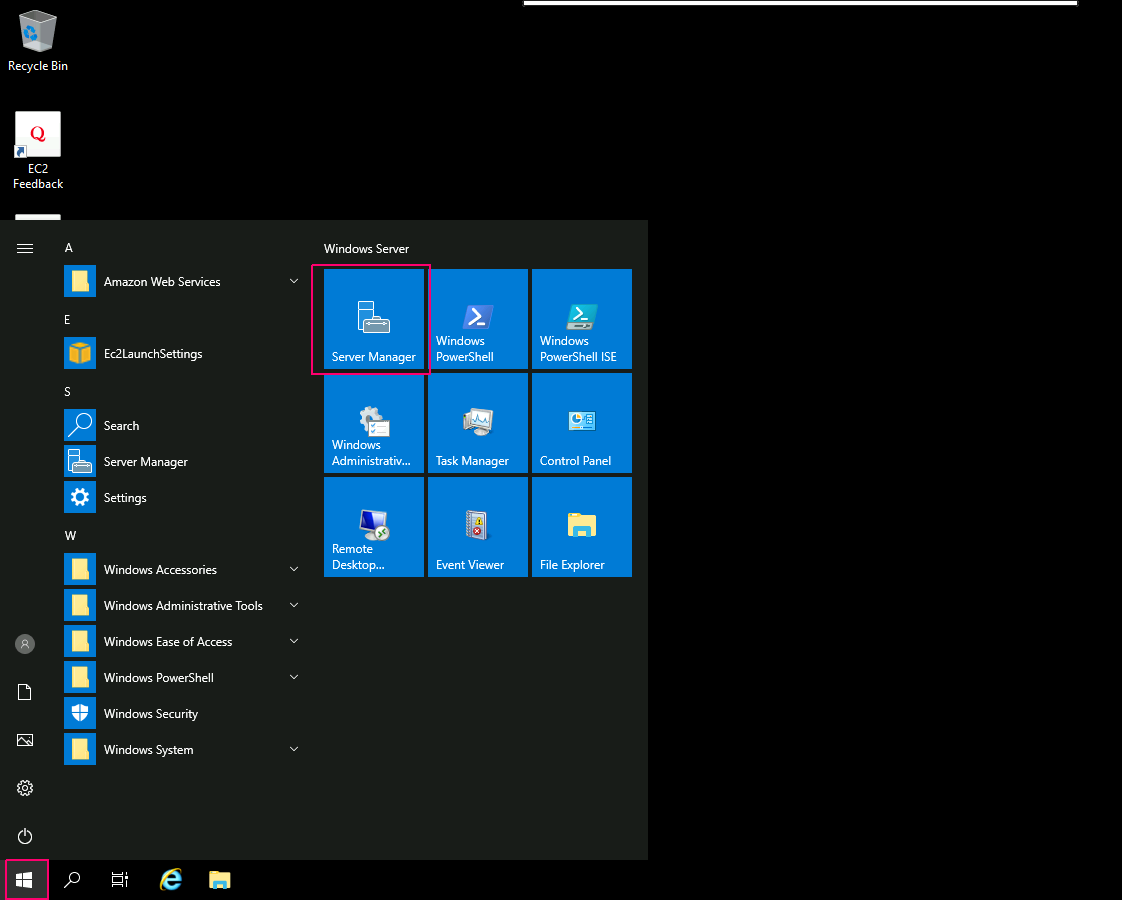
- Click on Start Button.
- Click on Server Manager.
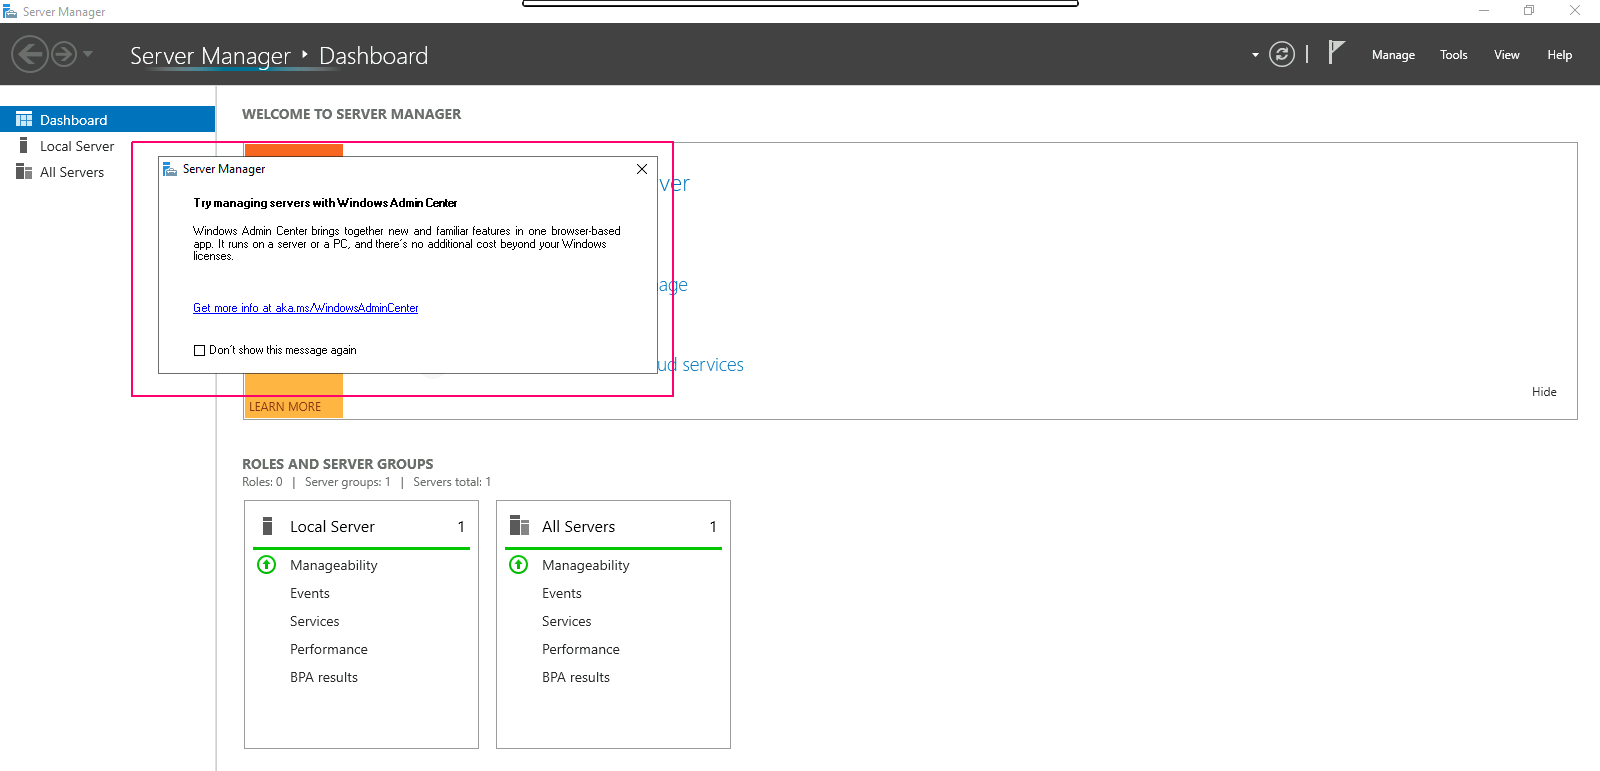
- Close the open wizard.
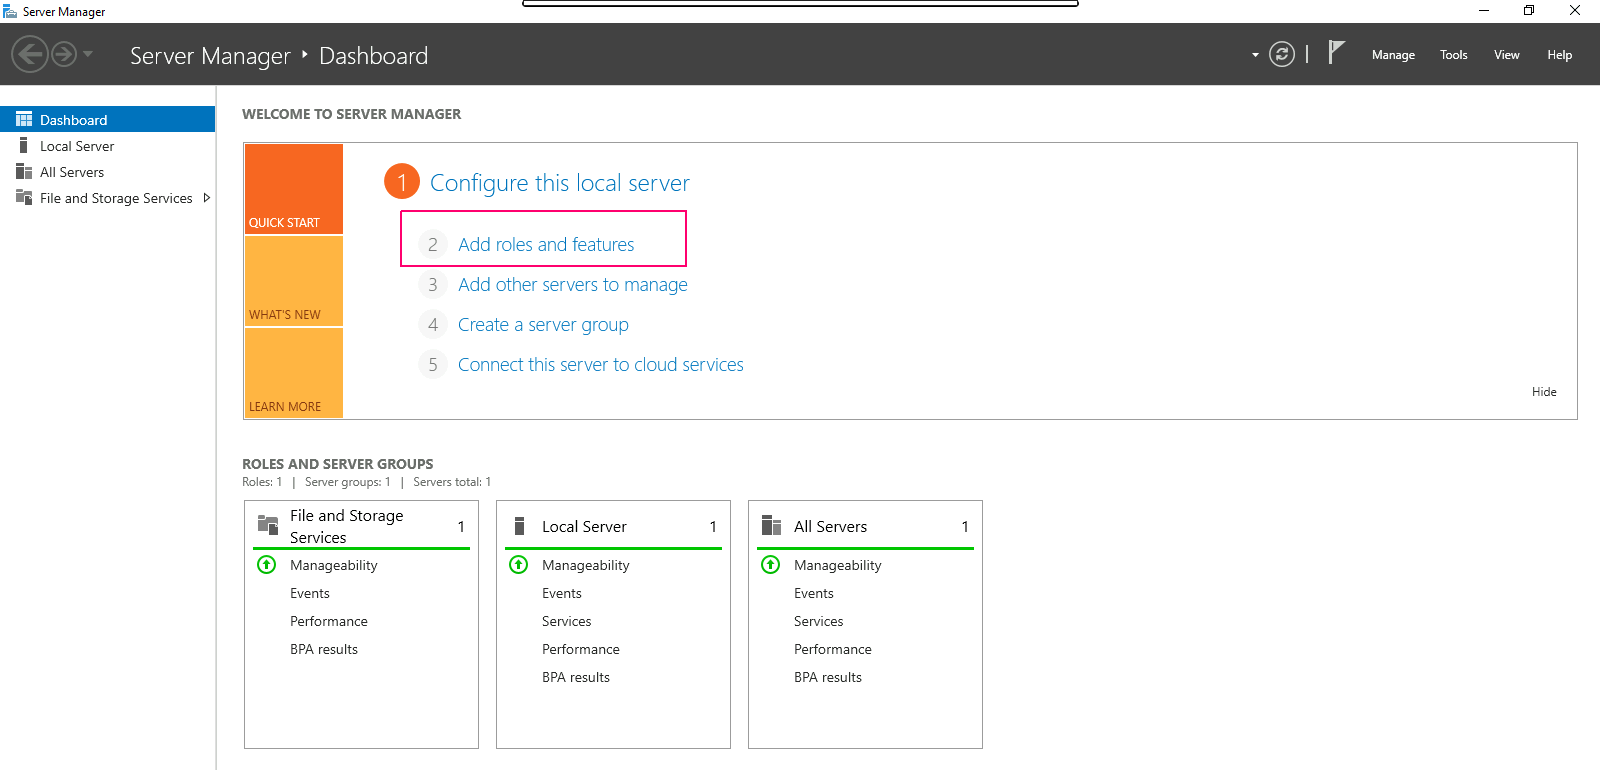
- Click on Add Roles & Features.
- In the Before you begin page,this wizard helps you install roles,features & role services.Click on Next.

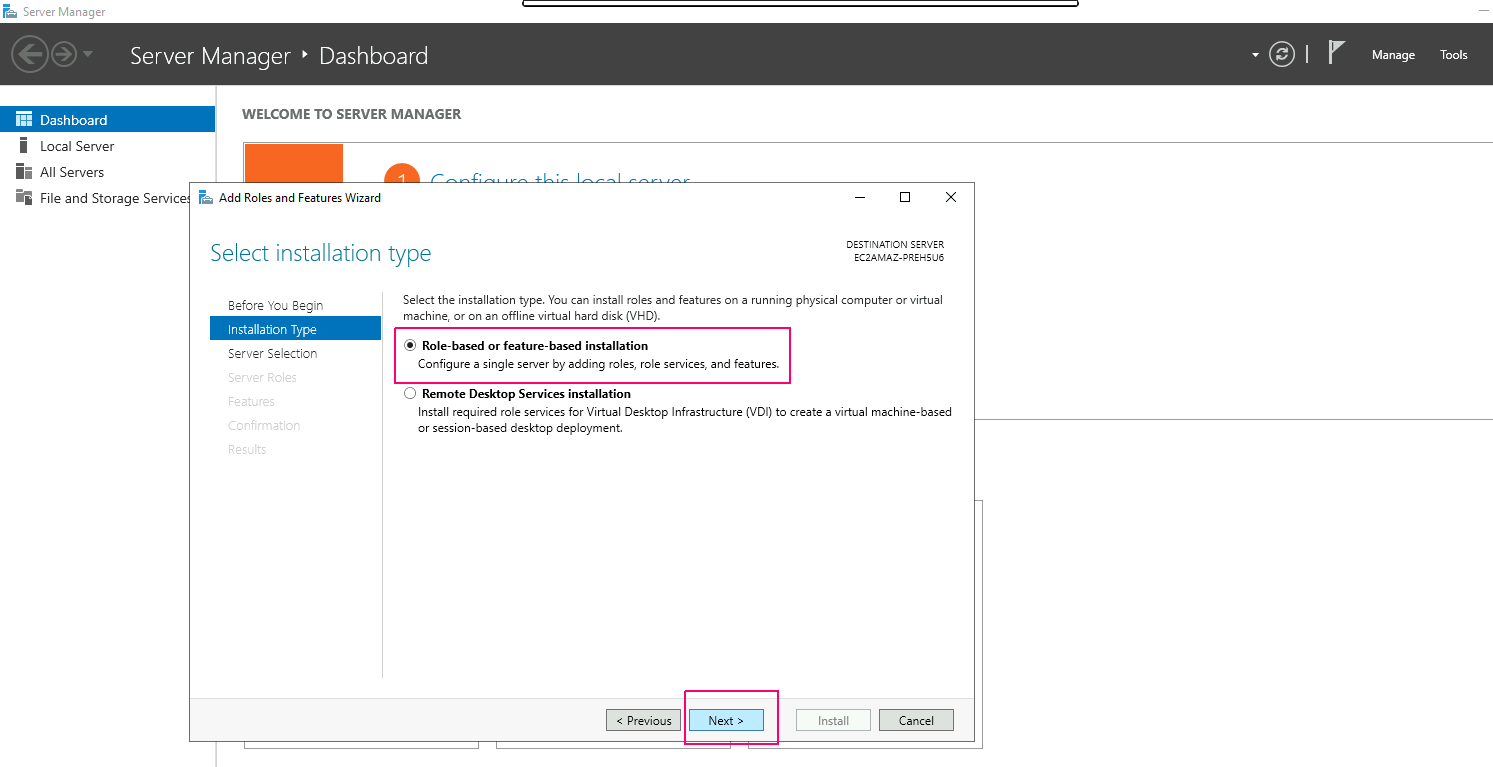
- In Installation type page,Select Role-based or Feature-based installation.Click on Next.
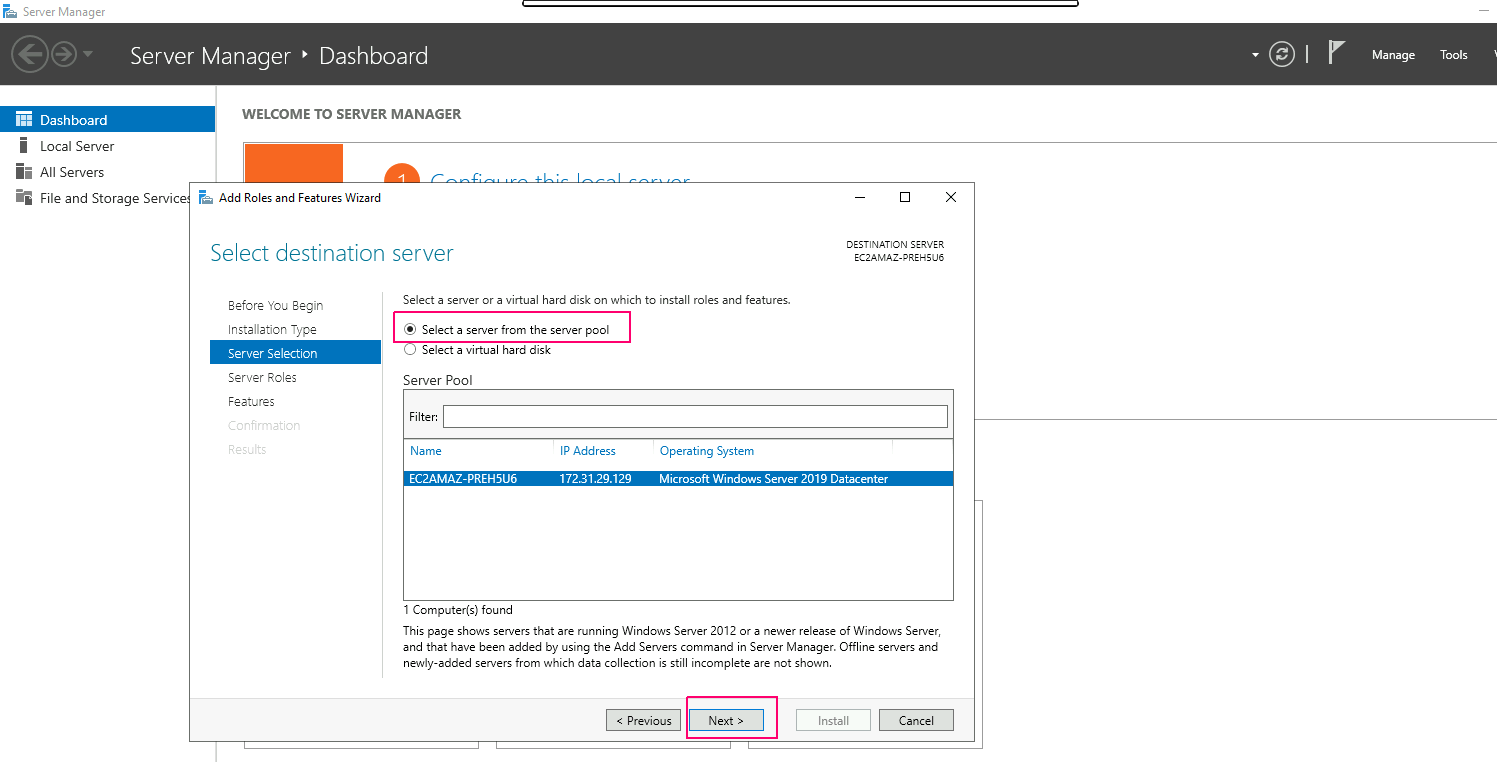
- In Server Selection page,select “select a server from the server pool”. Click on Next.
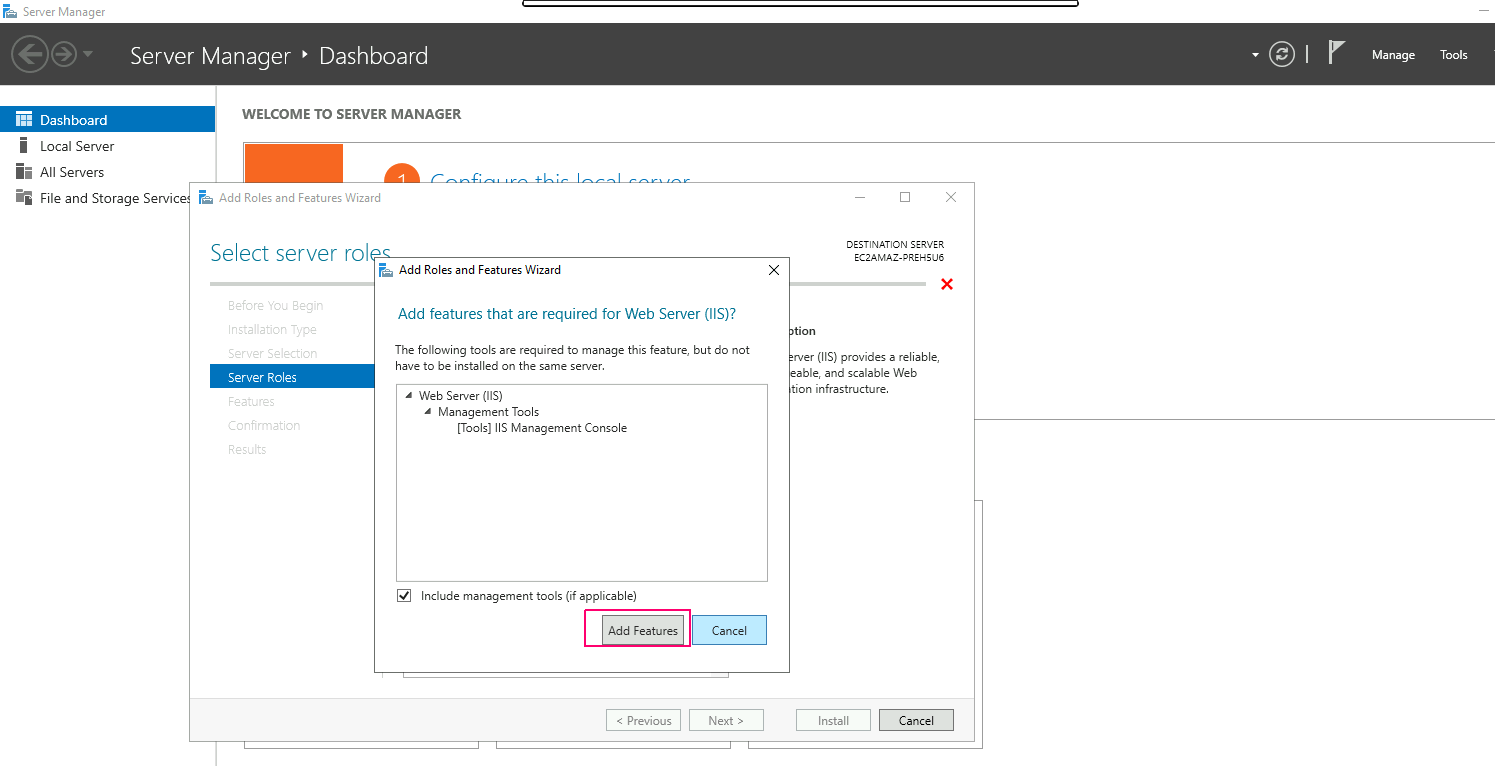
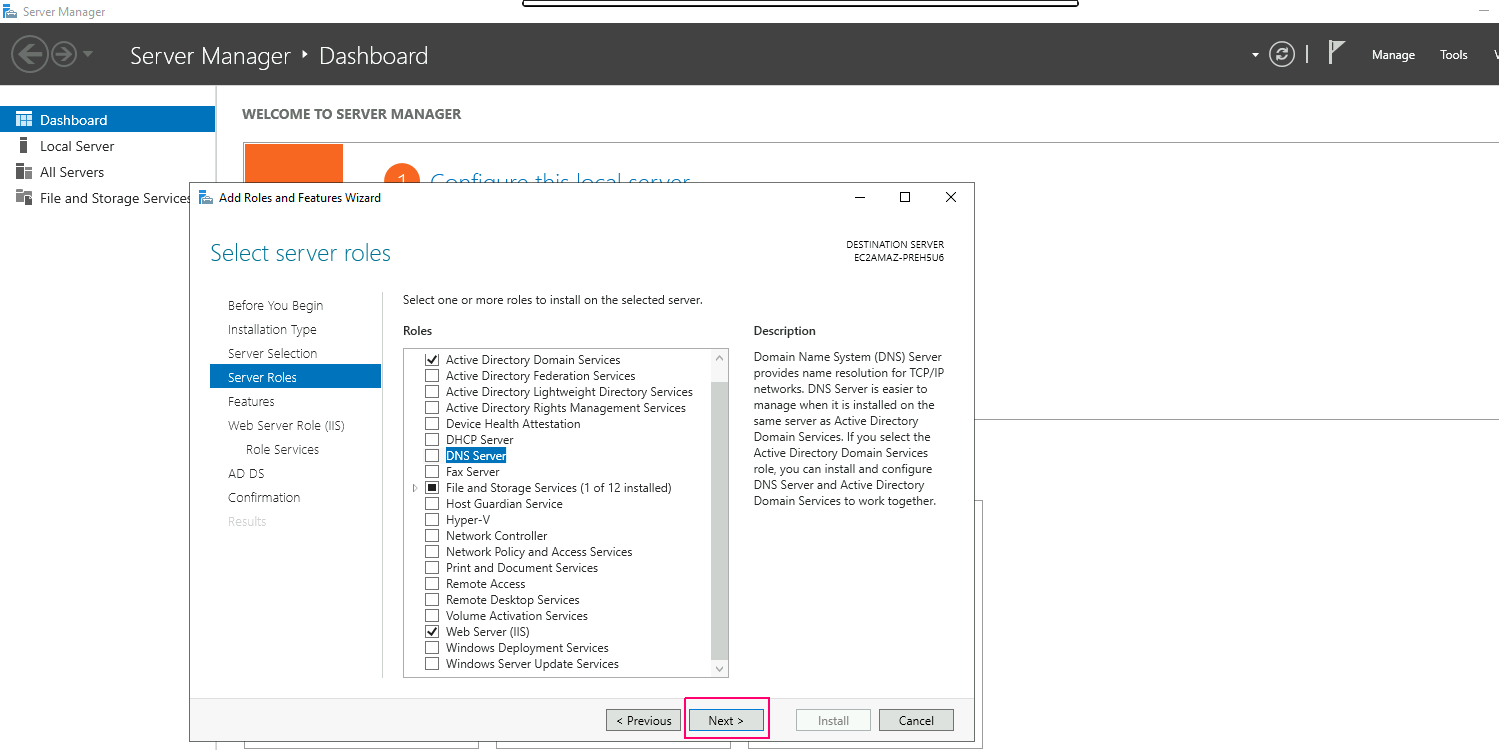
- In Server Roles page,Select the roles as per requirements.For Example: Select Web Server(IIS) & Active Directory Domain Services then Click on Add Features.
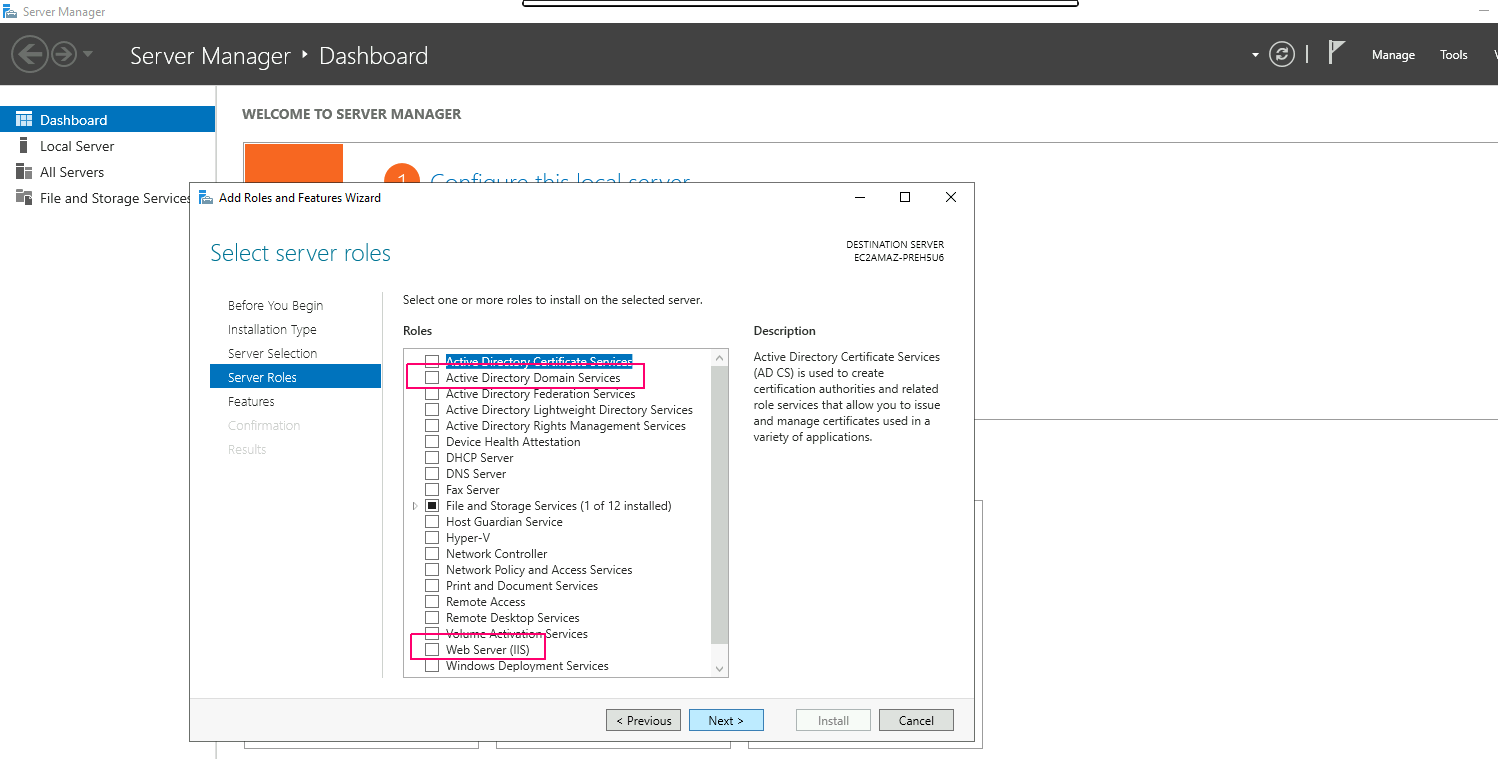
- Click on Next.
- In Features page,select features as per requirements.Click on Next.
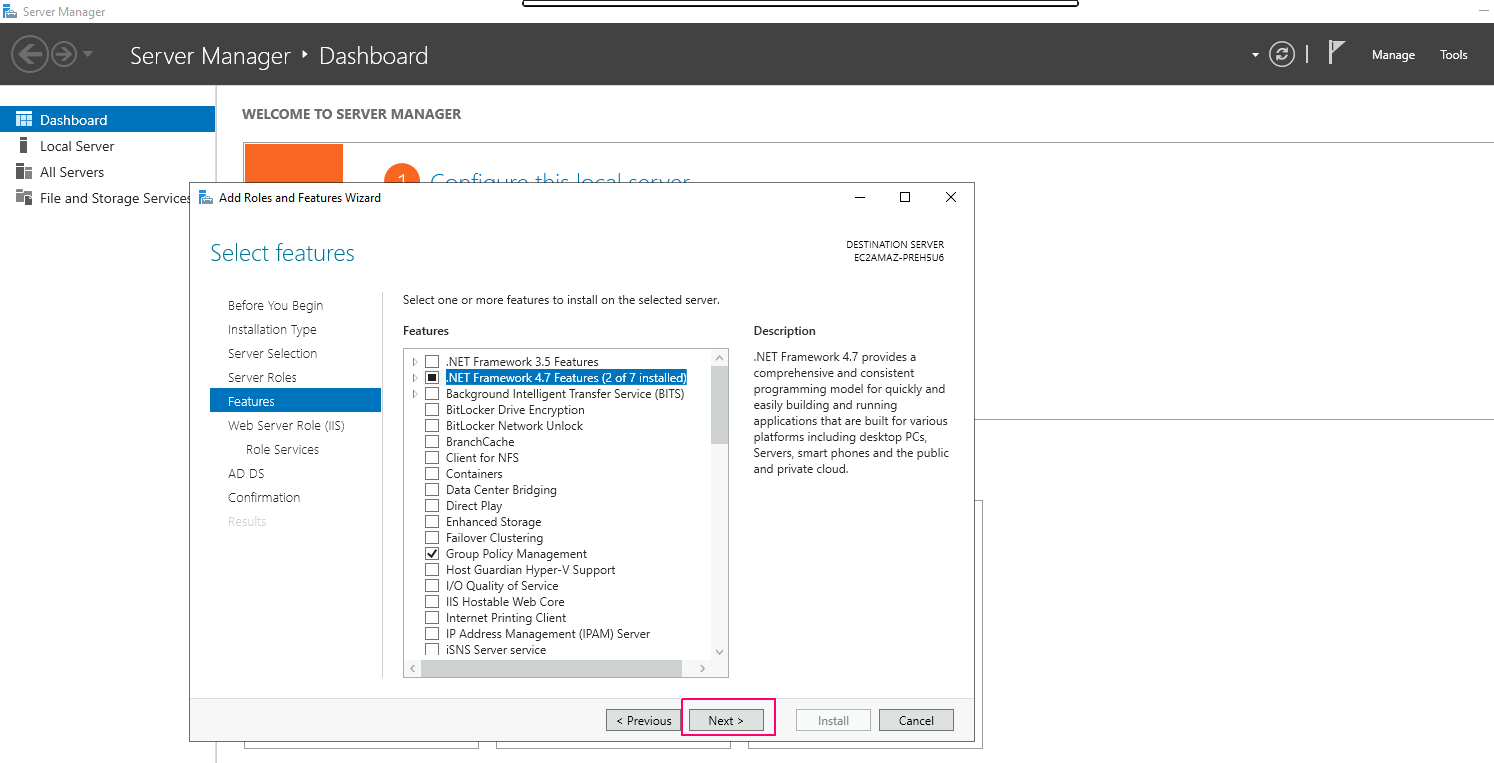
- Again,Click on Next.
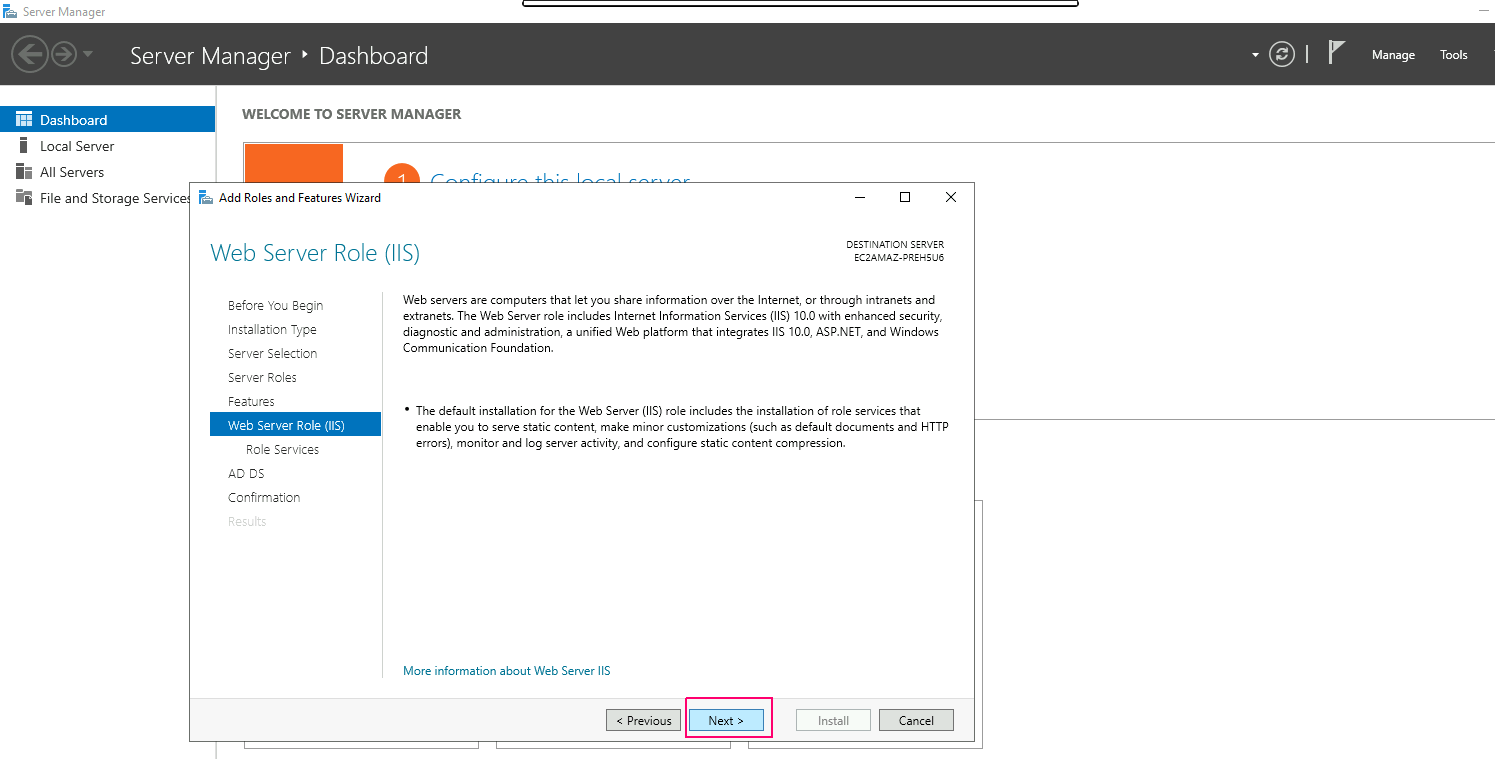
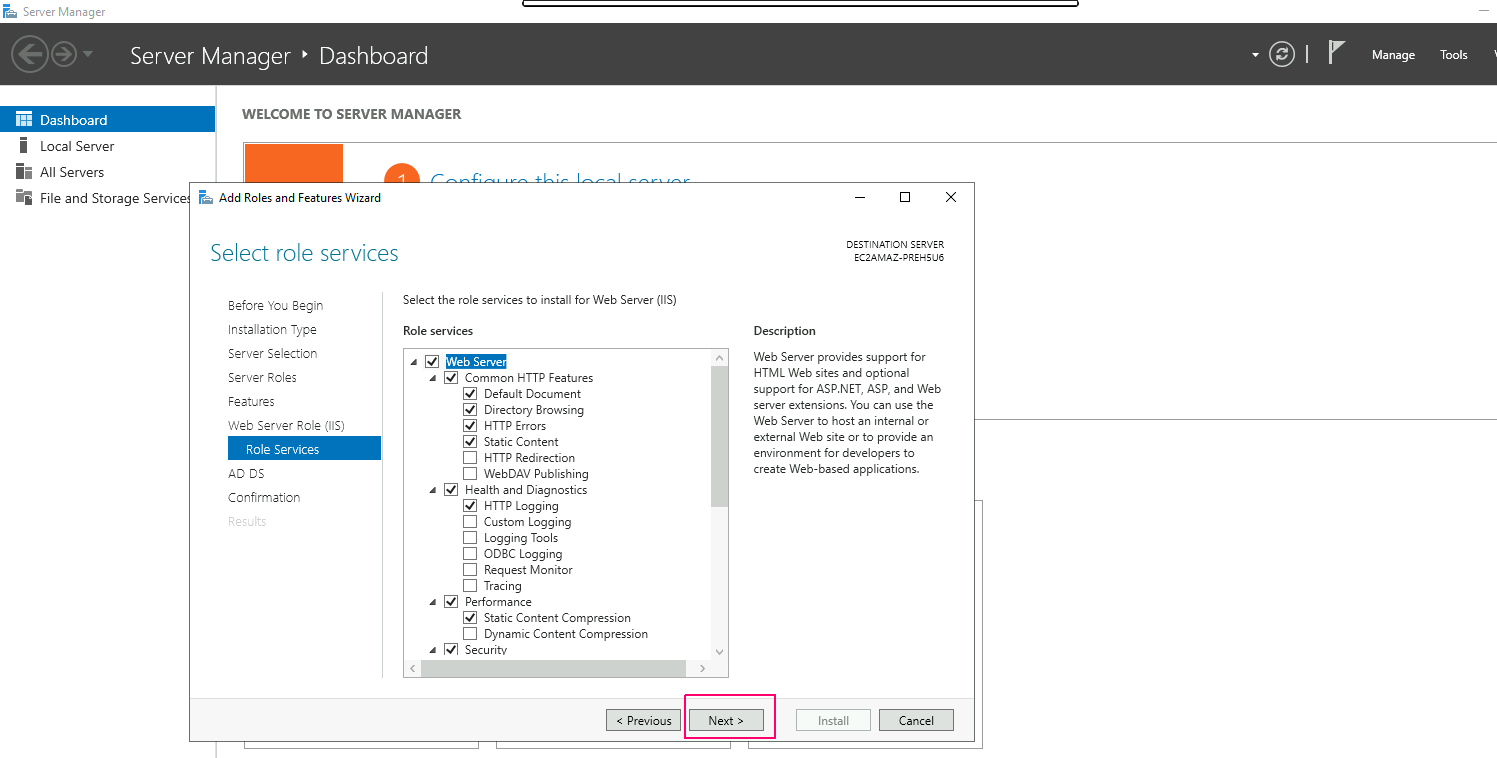
- In Web Server Role Service page,select roles services & Click on Next.
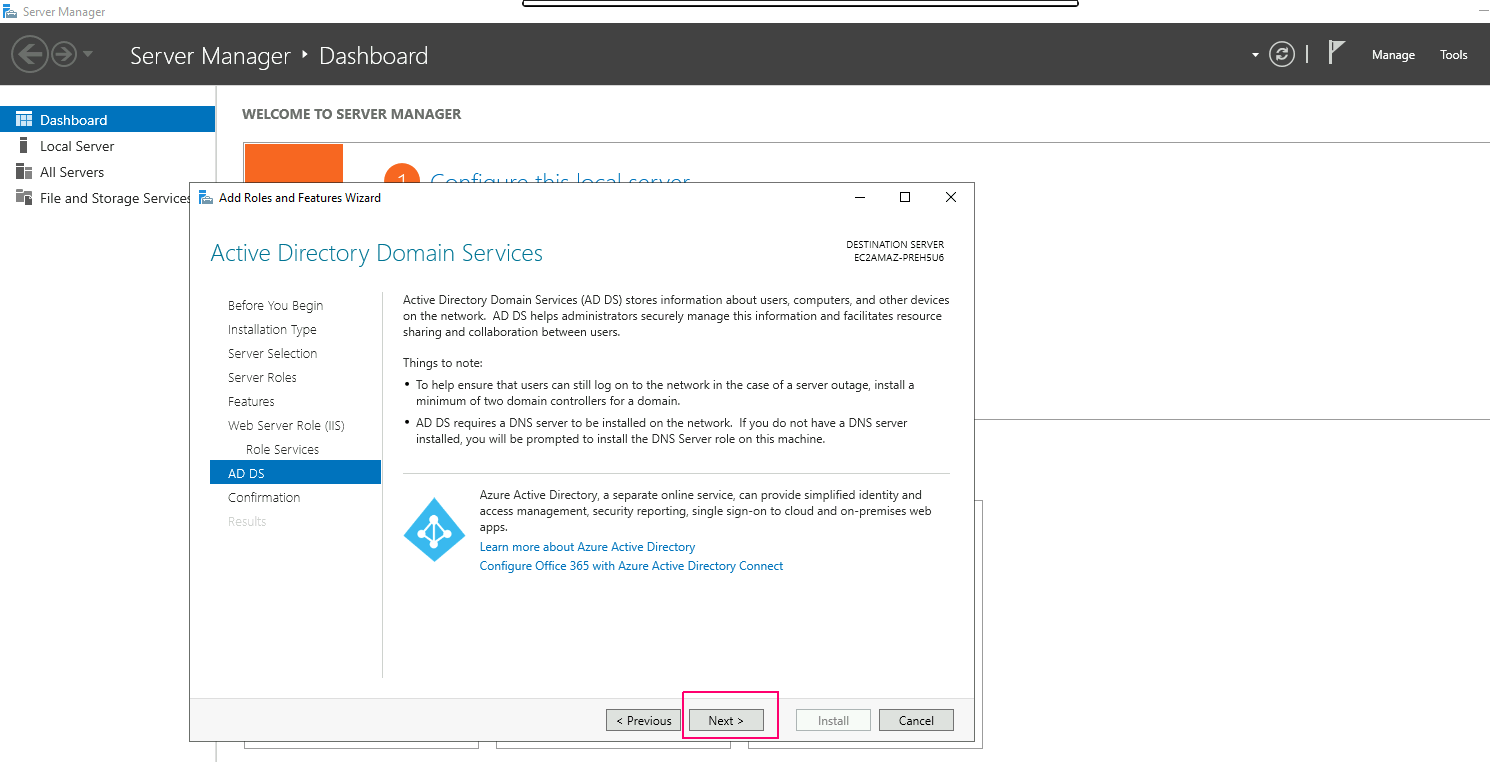
- In AD DS page,Click on Next.
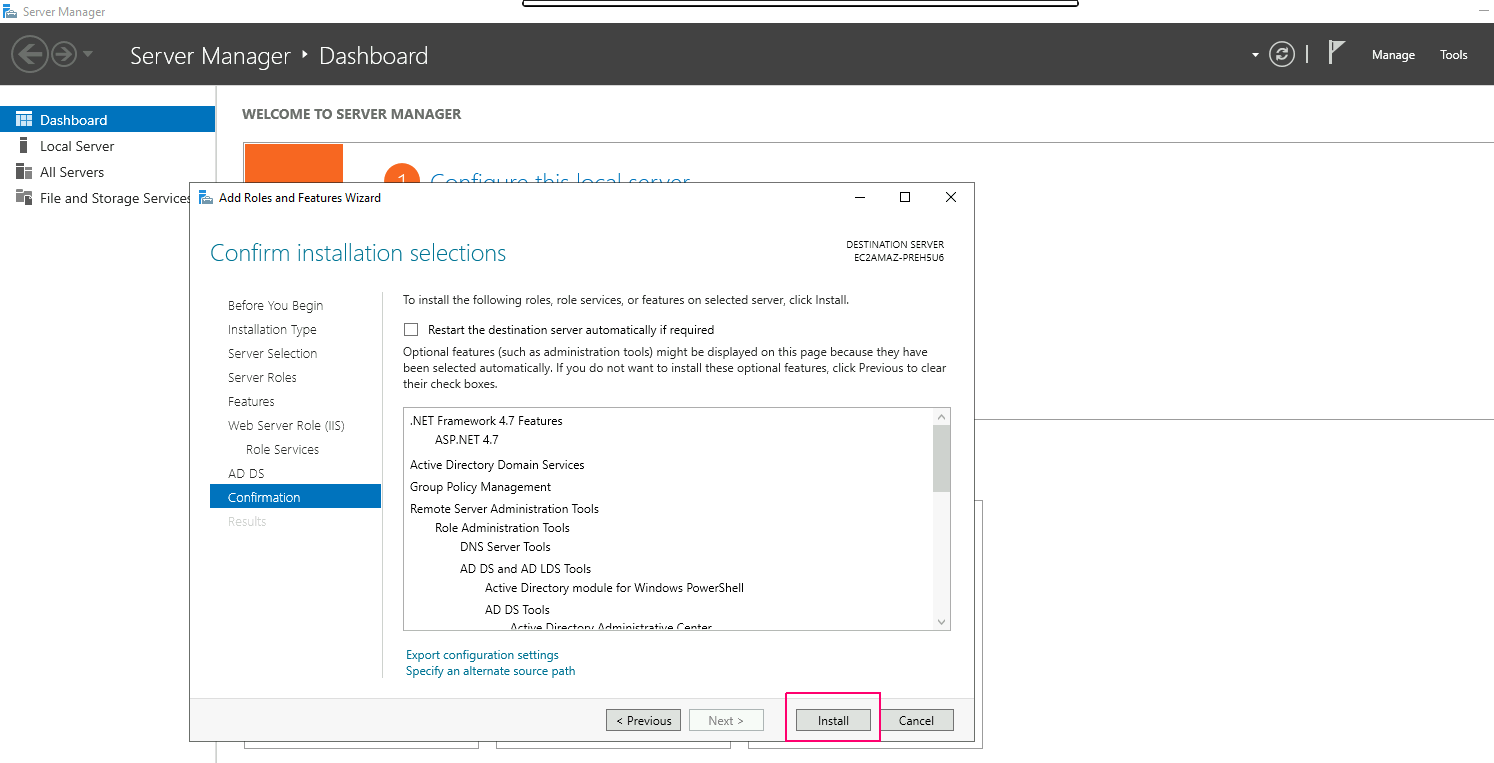
- In Confirmation page,review the add roles & features then click on Install.
- Once installation is done,click on close option to “Close the Add Roles & Feature wizard”.
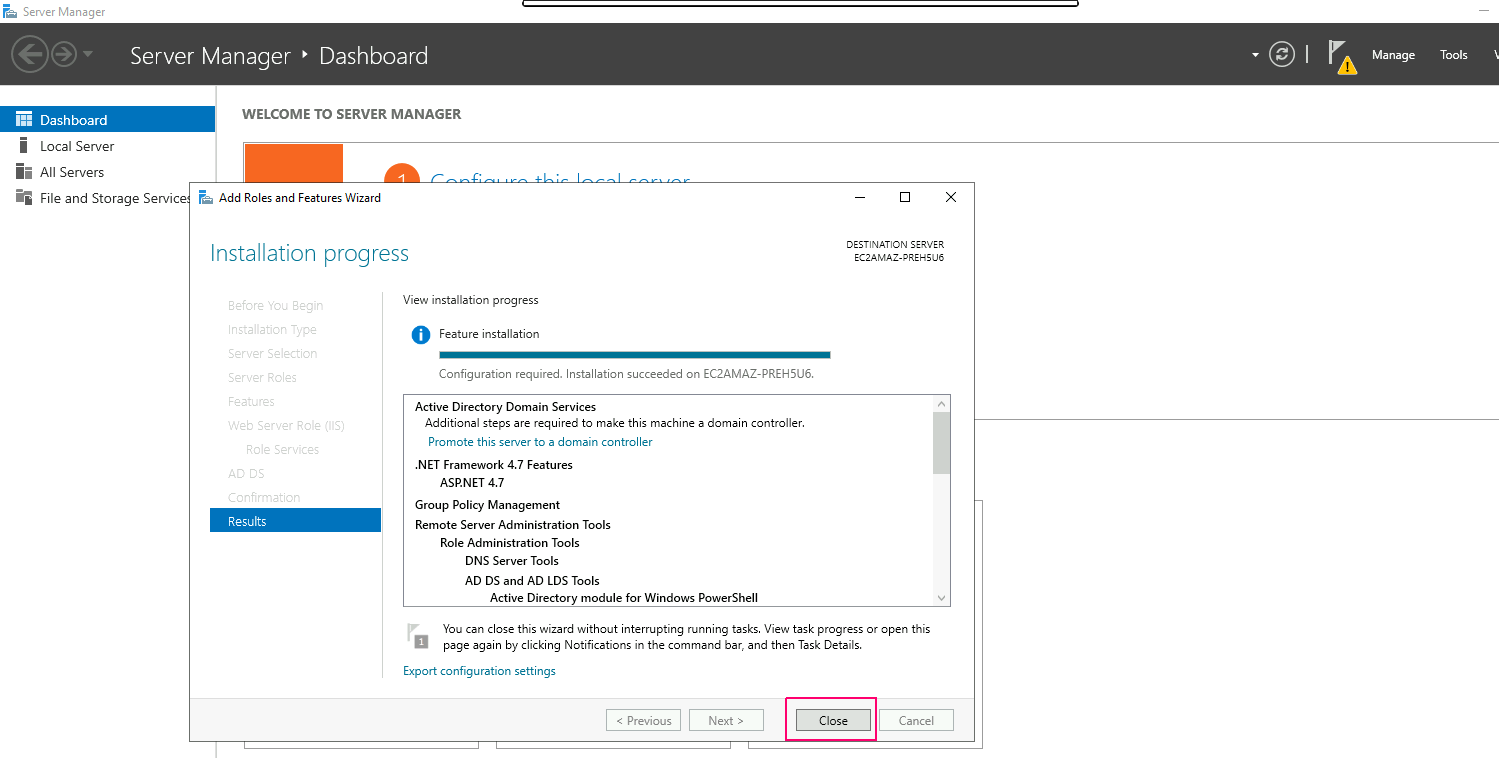
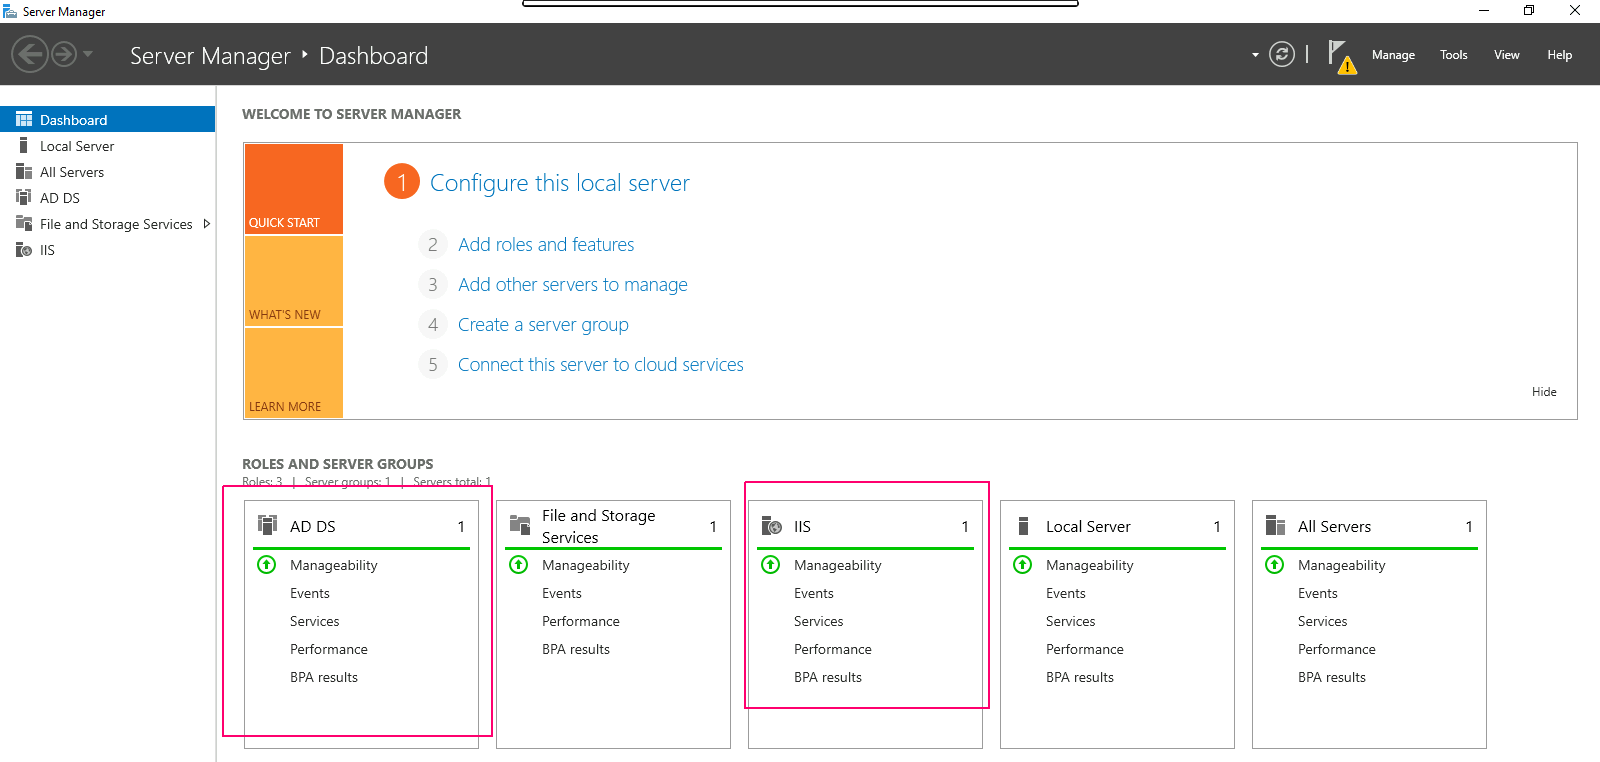
- Now, we can easily see the added roles & features on Server Manager wizard.