Andreas Bartel
- June 21, 2022
Steps to Launch a Window Server 2019 base Instance on Amazon Web Service(AWS).
Hello, In this Blog we are discussing about for Window Server 2019 Base.Here, we are creating a Instance using window server 2019 Base AMI.Window server is a high-performance, reliable, cost-effective, cloud computing platform.
There are some steps to create a instance on Amazon web Service(AWS).
- Go to Amazon Web Service(AWS) management console portal.
- Login to AWS Console.
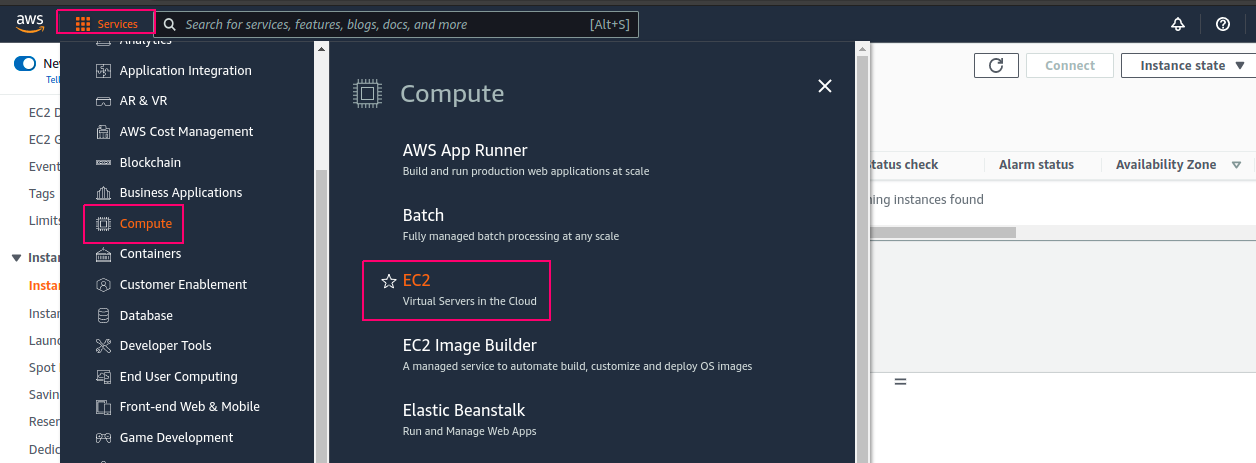
- Click on Services–>click on Compute–>Select EC2.
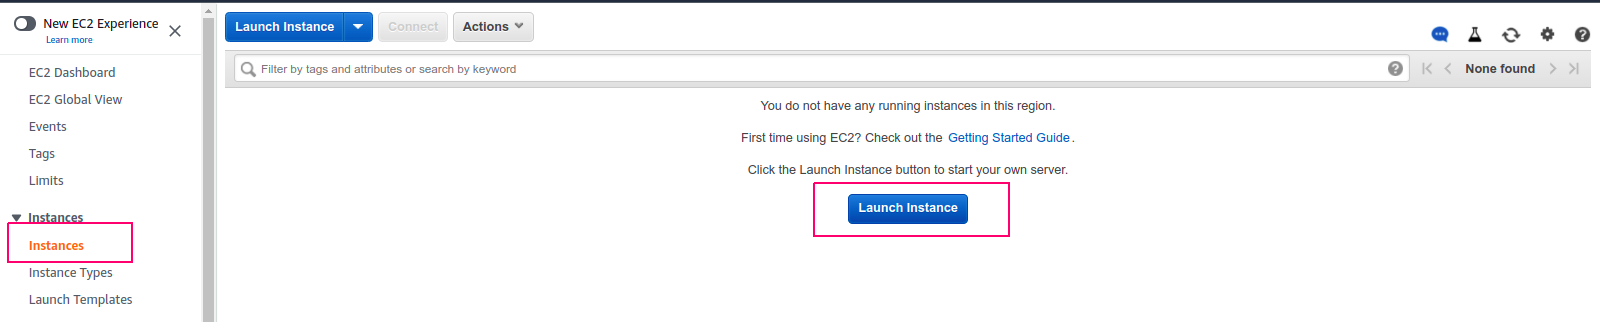
- Click on Instances & Click on Launch Instance.
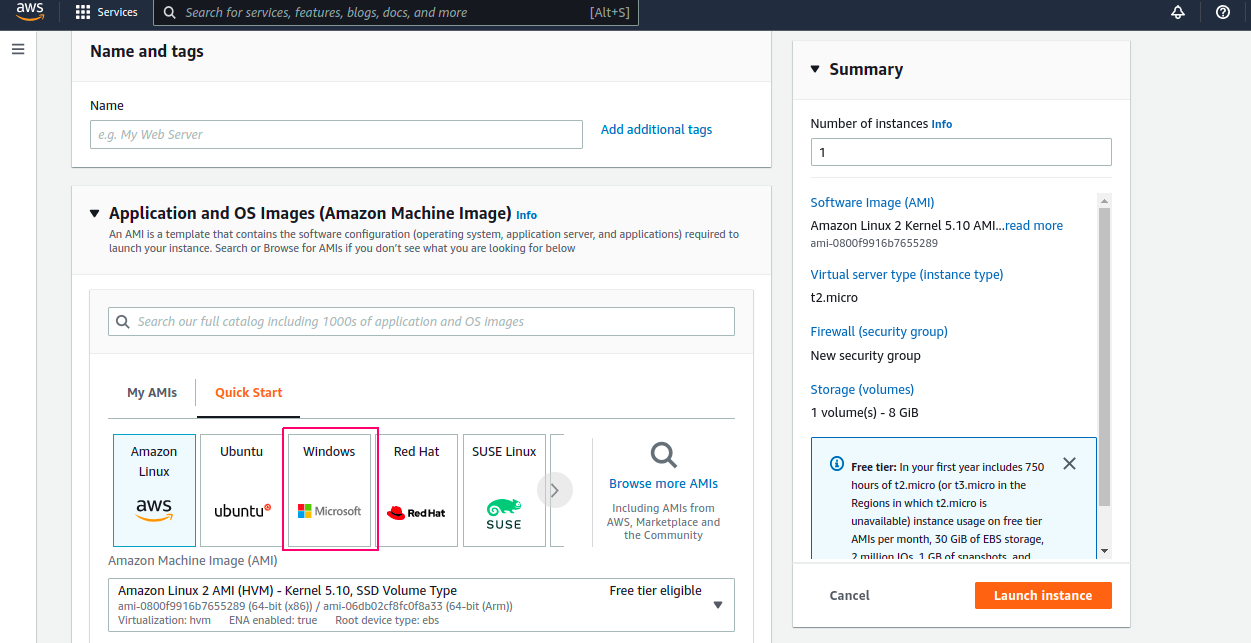
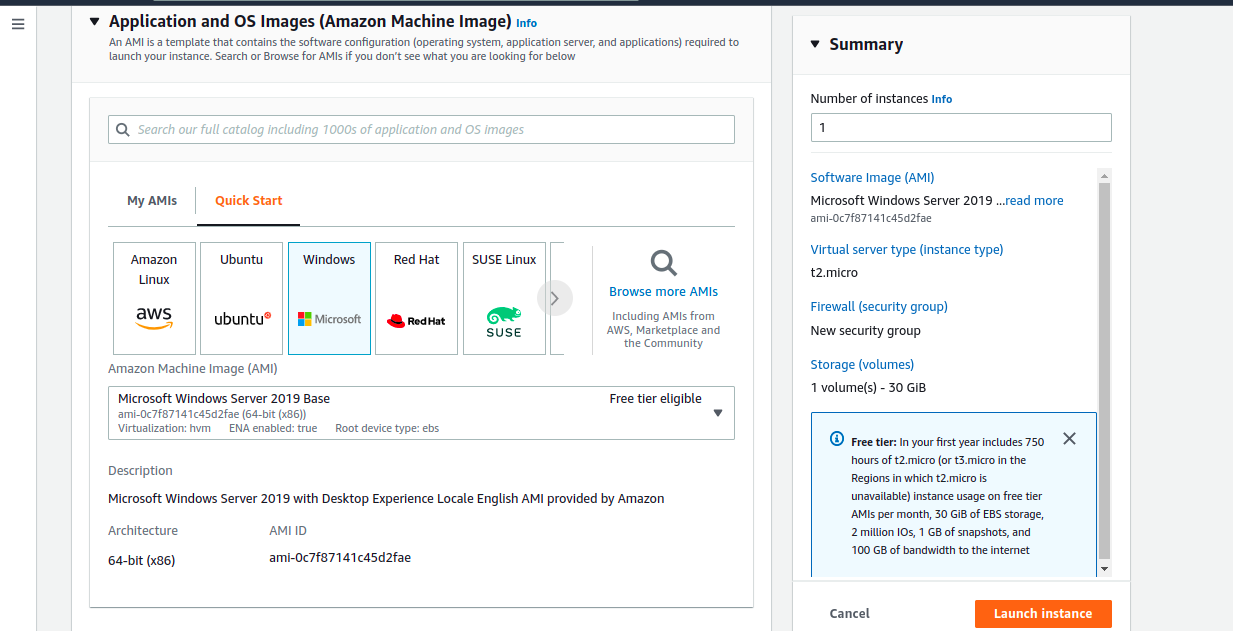
- Provide the Instance Name.
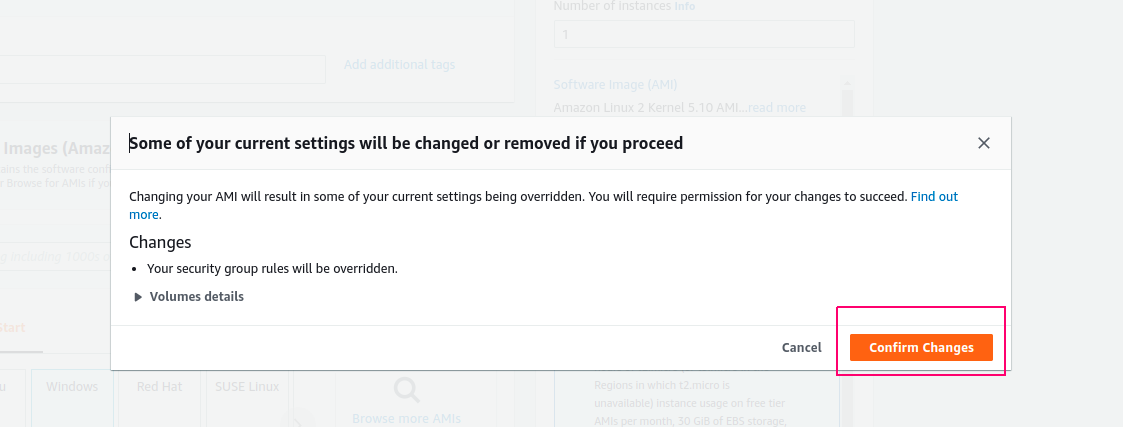
- Select Windows.
- Click on Confirm Changes.
- Then, Select Microsoft Windows Server 2019 Base.
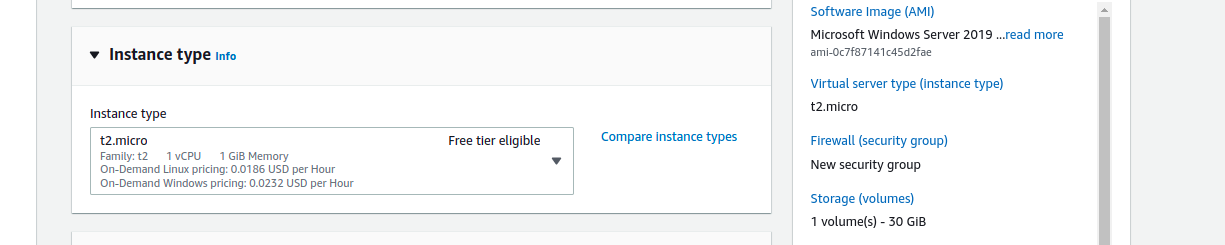
- Next, Select Instance Type.
- Create or select existing Key Pair.

- In Network Settings,Allow RDP Traffic from anywhere,& HTTP & HTTPS traffic from the Internet.
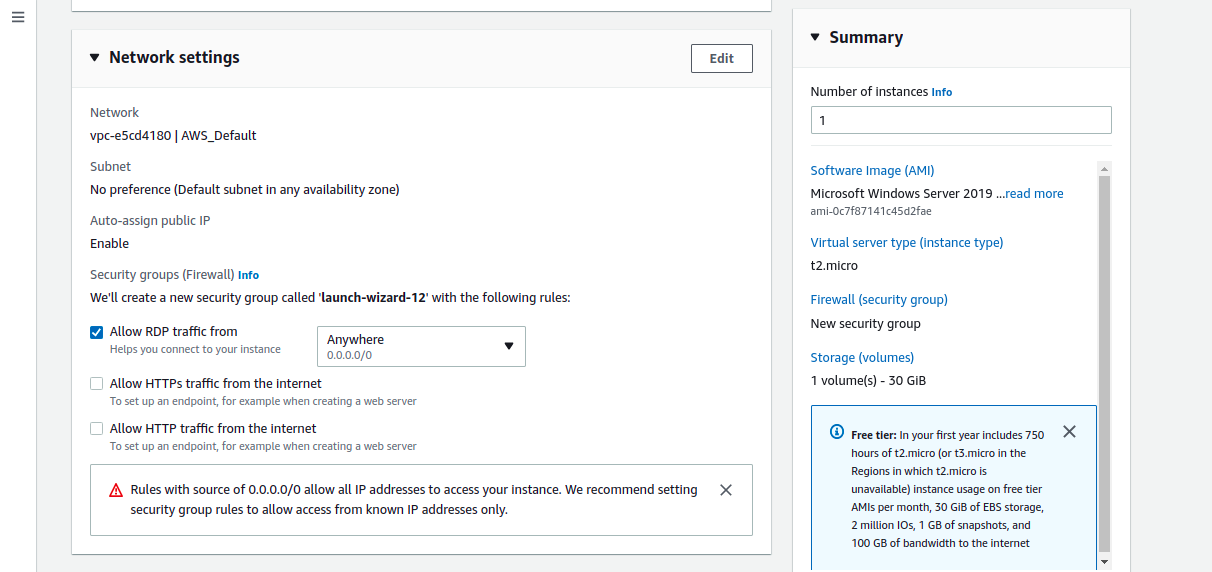
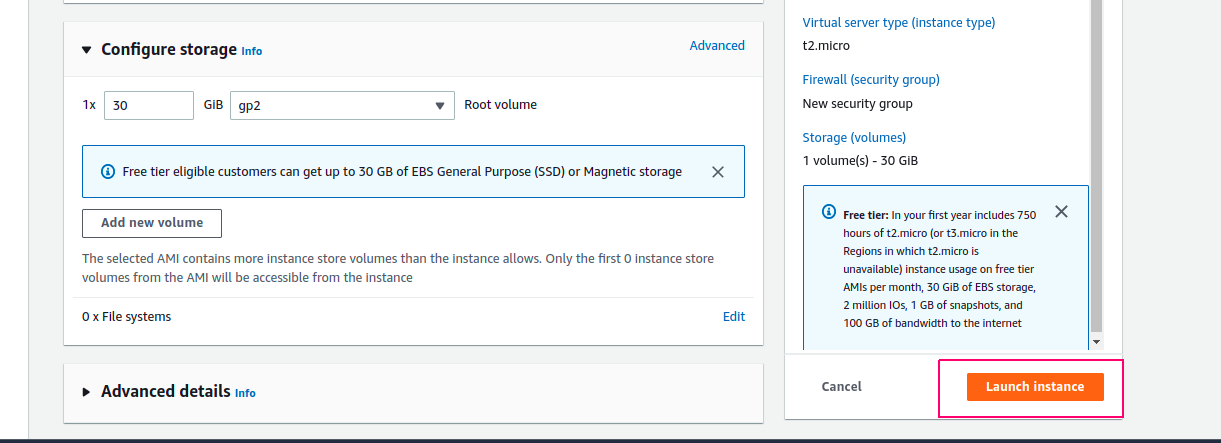
- Now, Configure the Storage.By default,storage(volume) size is 30 GB.
- Leave the other options.
- Click on Launch Instance.
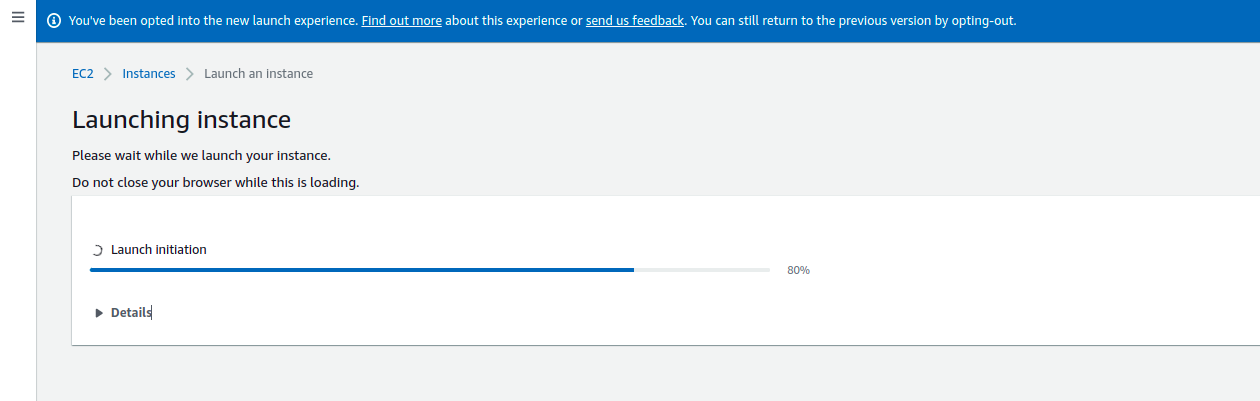
- Now. Launching the instance.
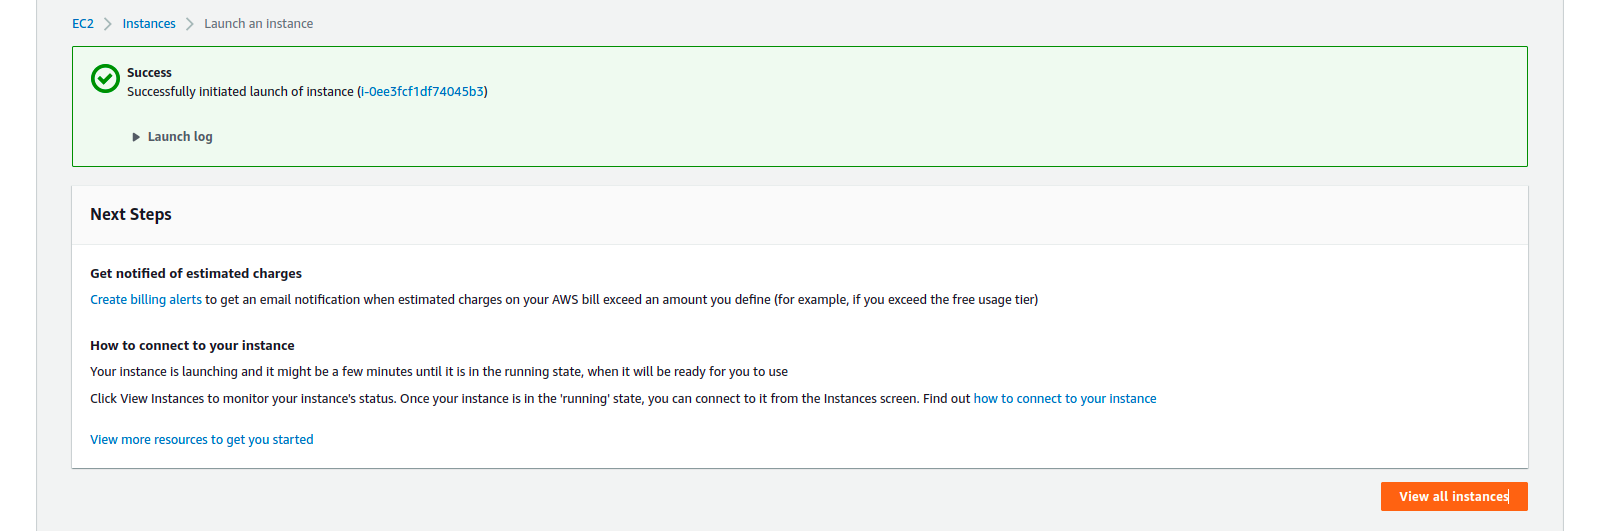
- After Sometime Successfully initialed the launch of instance.
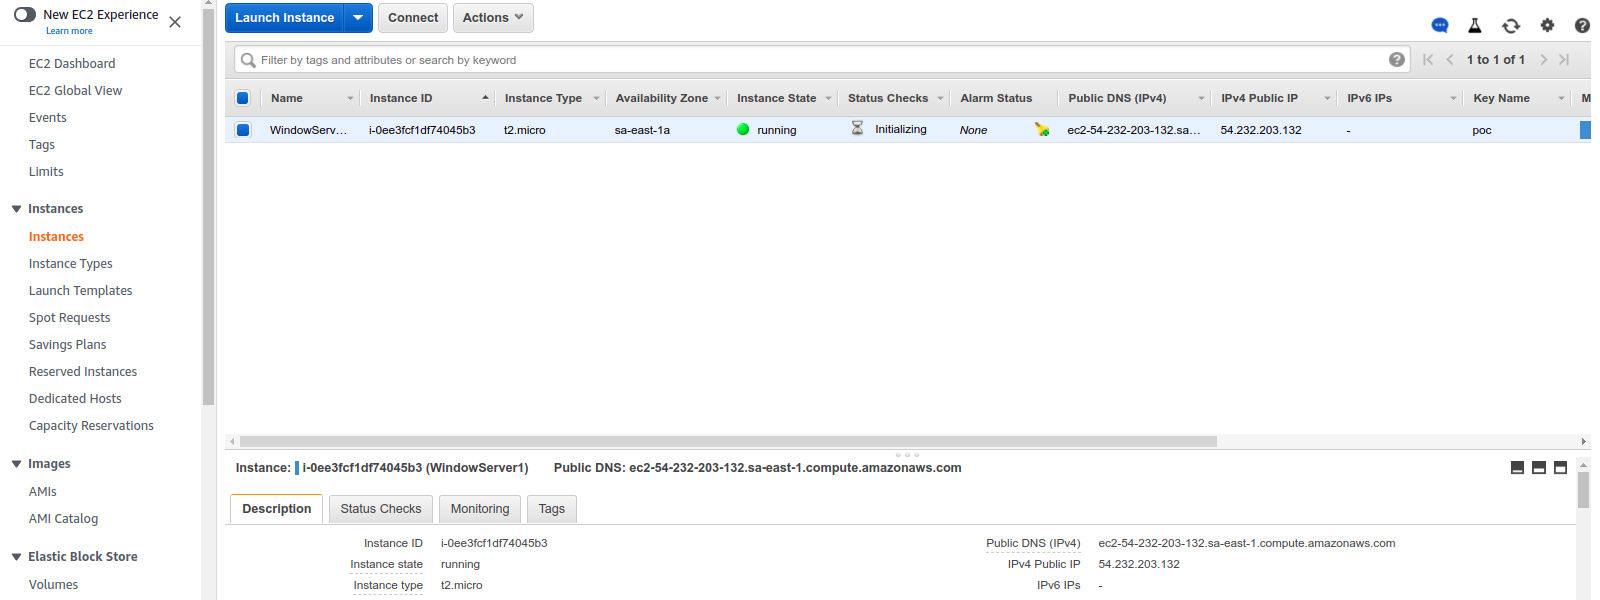
- Now. Instance is Running mode.
Method 1: Connect to the Server using Remote Desktop File.
- Click on Connect.

- Download the Remote Desktop File.
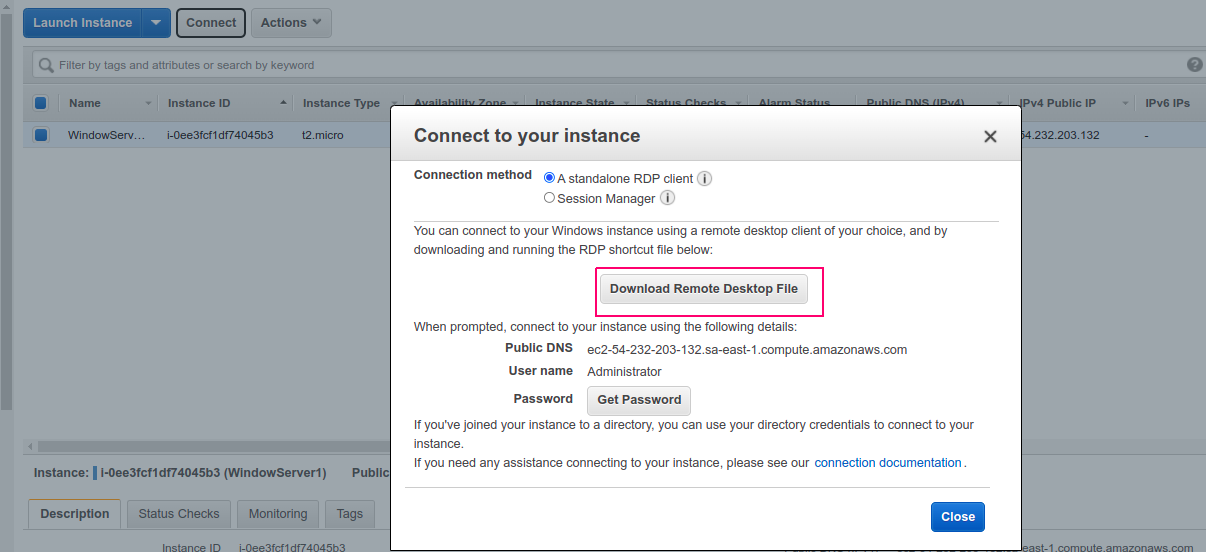
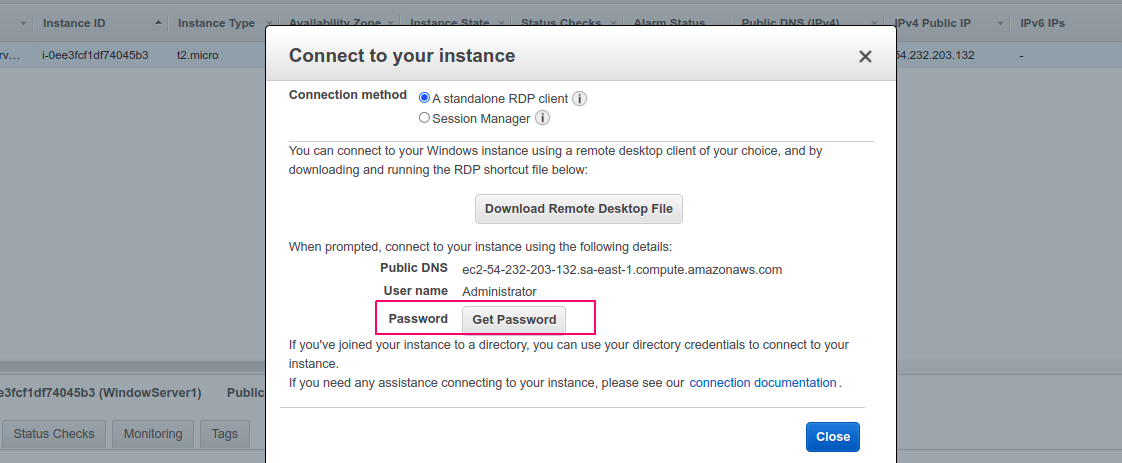
- Click on Get Password.
- Choose the Key pair file path.
- Click on Decrypt Password.
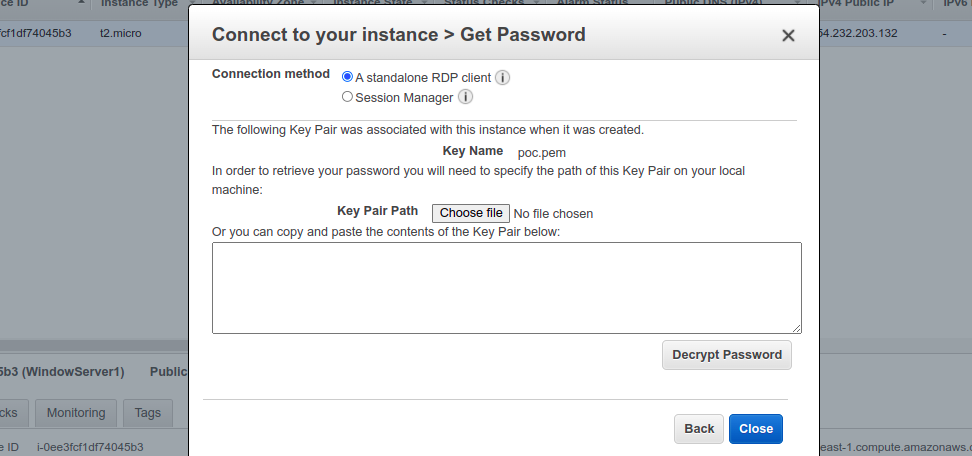
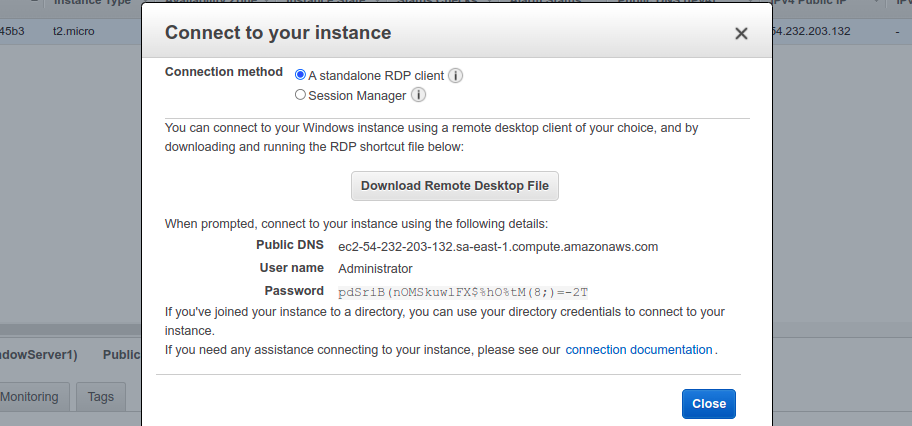
- Password is Decrypted.
- Now,Open the Downloaded Remote Desktop File.
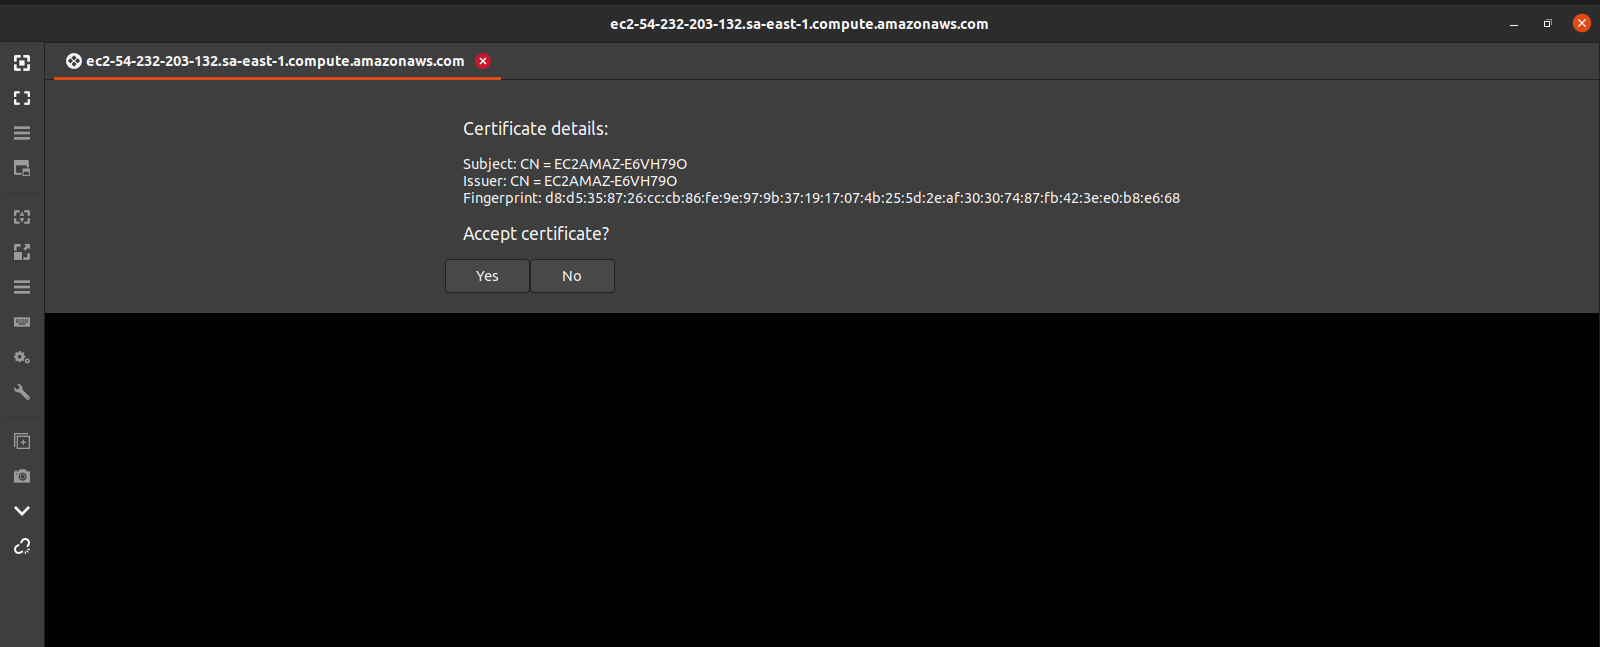
- Click on Yes for Accept the Certificate.
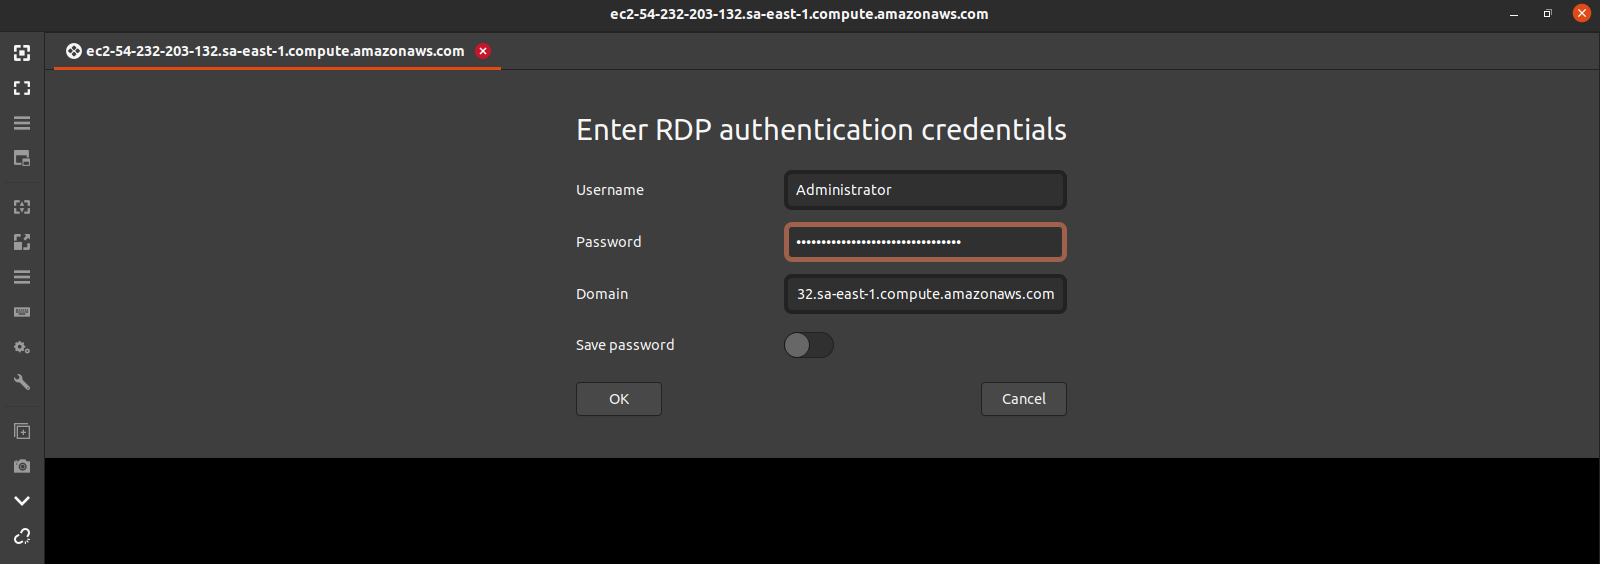
- Provide the RDP authentication credentials such as Username,Password & Domain.
- Click on OK.
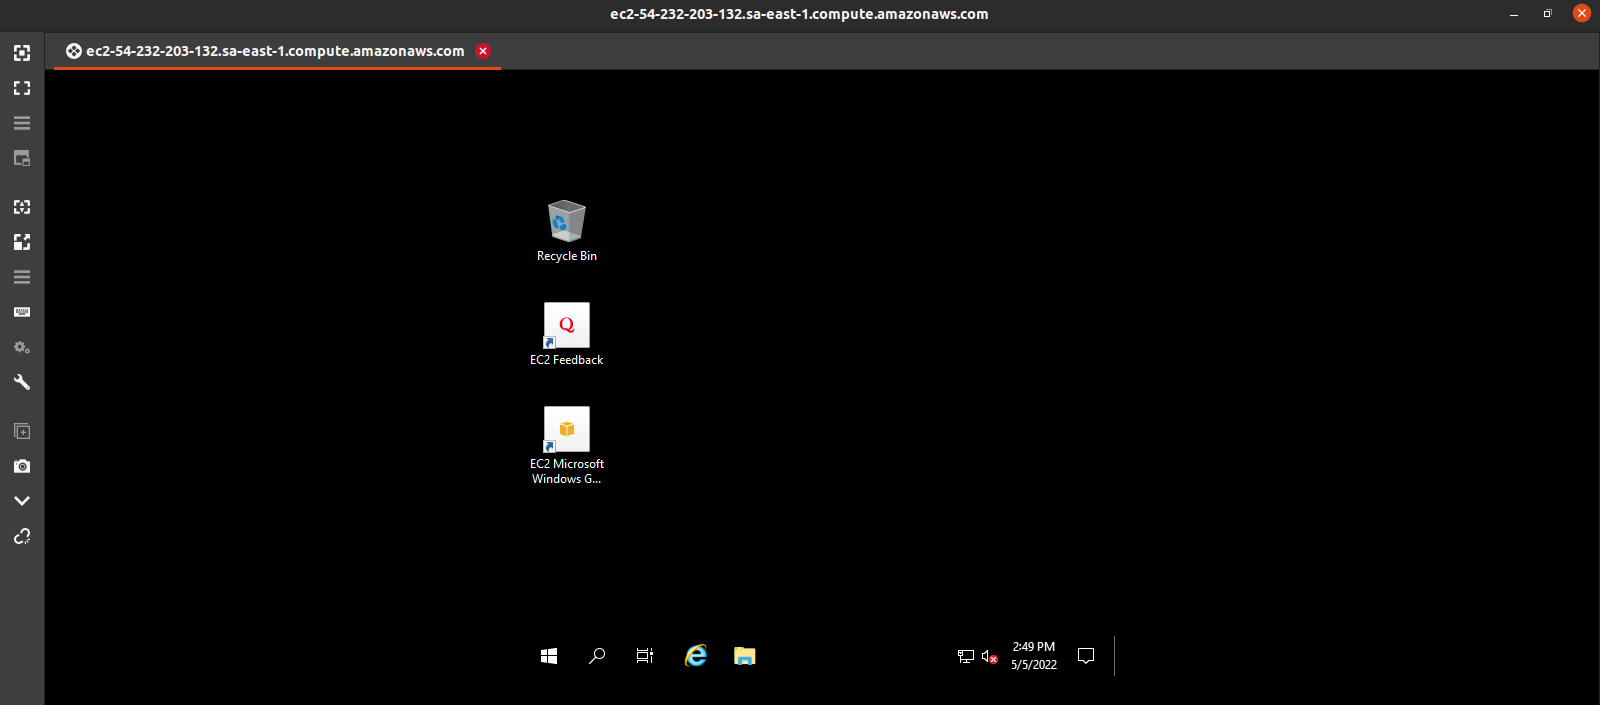
- Using RDP,Server is successfully connected.
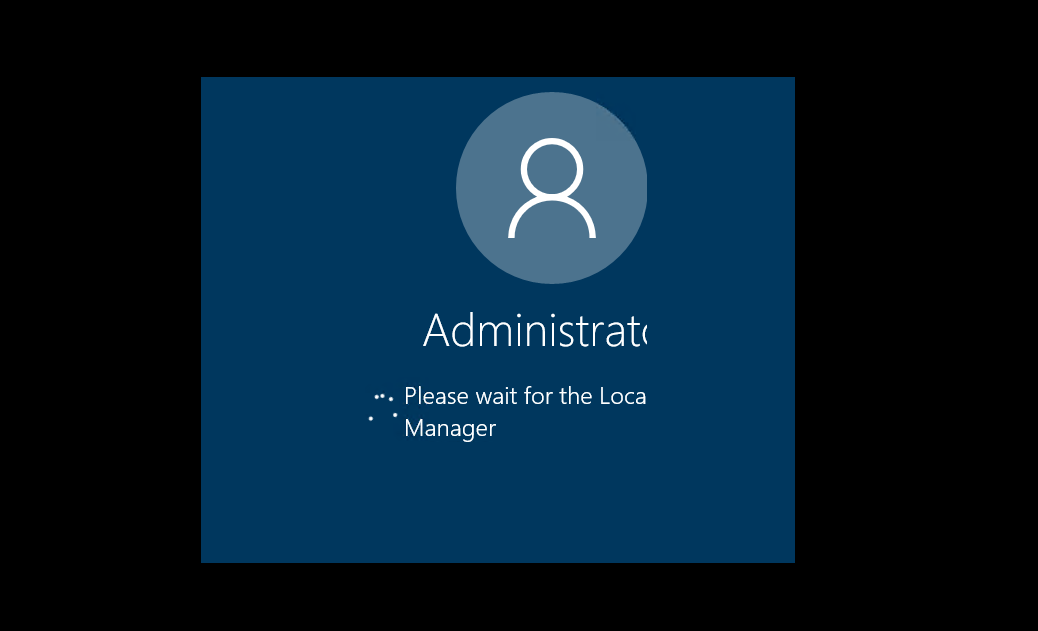
- Window Server 2019 is Ready.
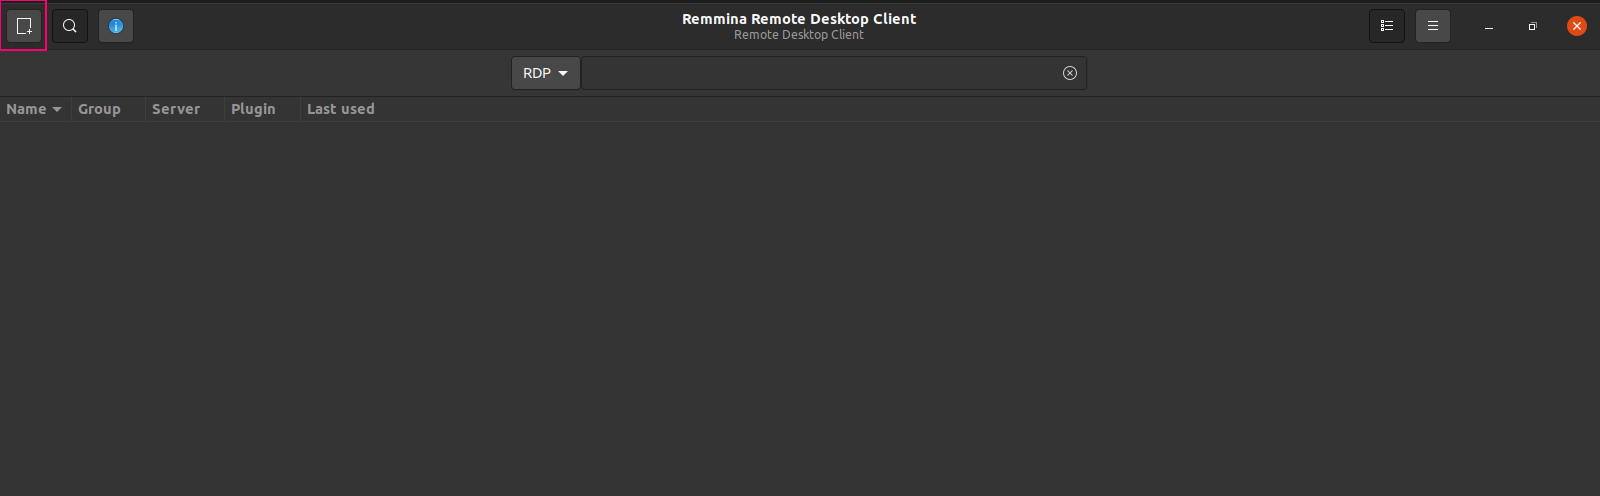
Method 2: Connect to Window Server Using RDP through Remmina
- Go to Local Ubuntu machine.
- Click on Show Applications.
- Now Search Remmina.

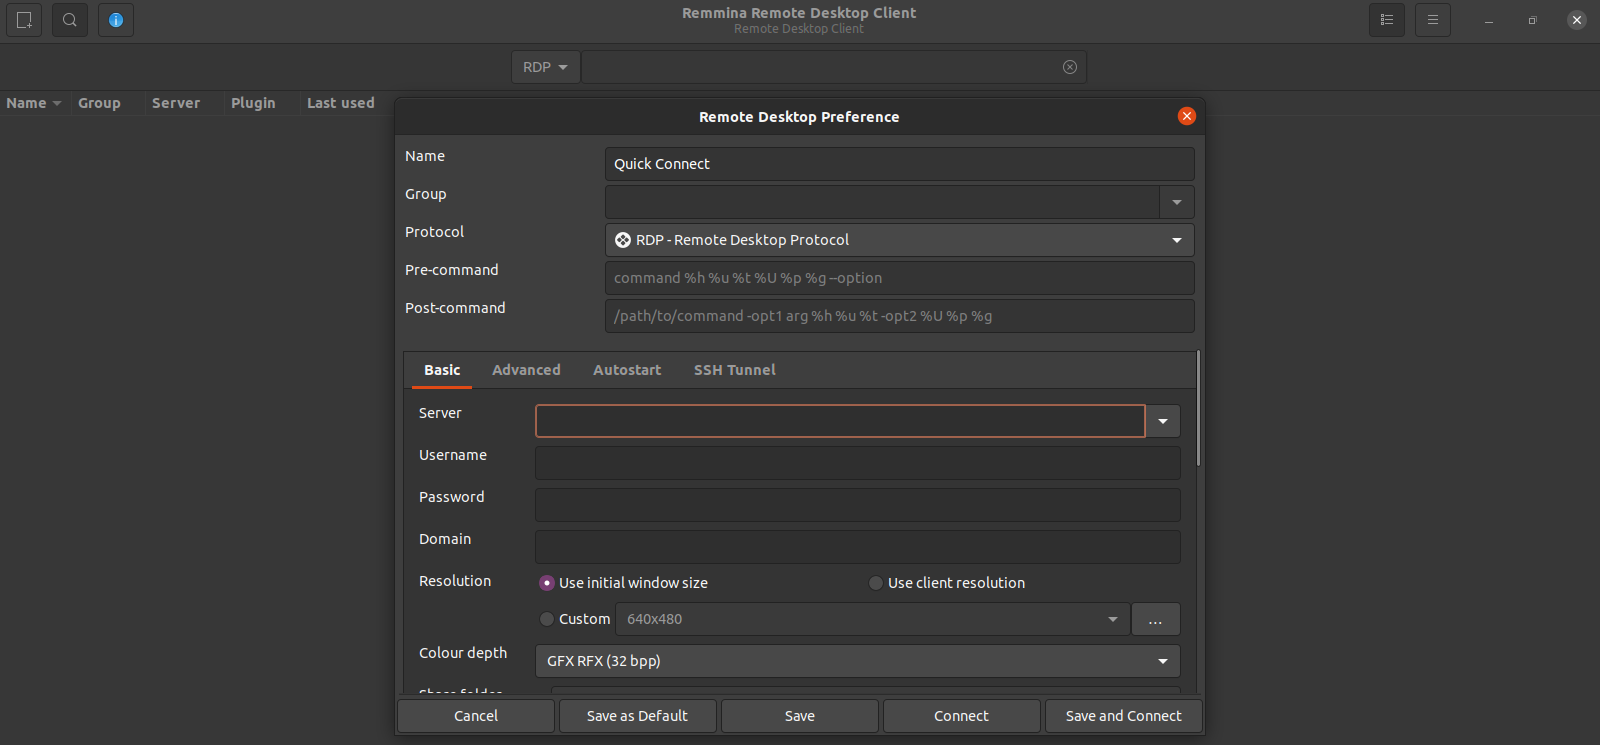
- Click on New Connection Profile.
- Provide the required information such as Server DNS, username & password.
- Window Server 2019 Base is Ready.