 Priya
Priya- June 29, 2022
Steps to Install & Configure Active Directory Domain Service in Window Server 2019
Hello,here we are discussing about for active directory domain service.In this Blog,we are installing & configuring active directory domain service.It is a window server role in Active Directory that manage users and allows to store information about resources from a network,& application data.
There are some steps to install & configure active directory domain service in window server 2019:
To Install Active Directory Domain Service
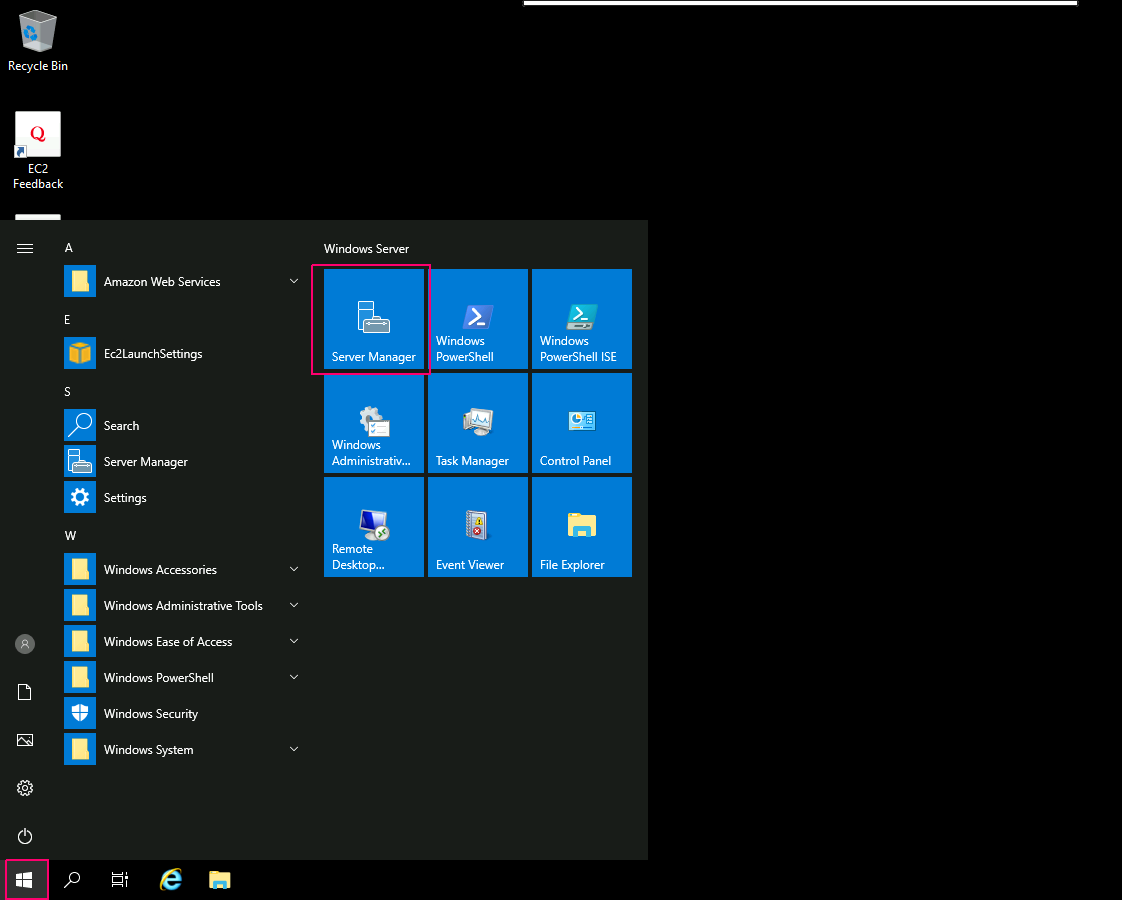
- Login to window server 2019 base.

- Click on Start Button then click on Server Manager.
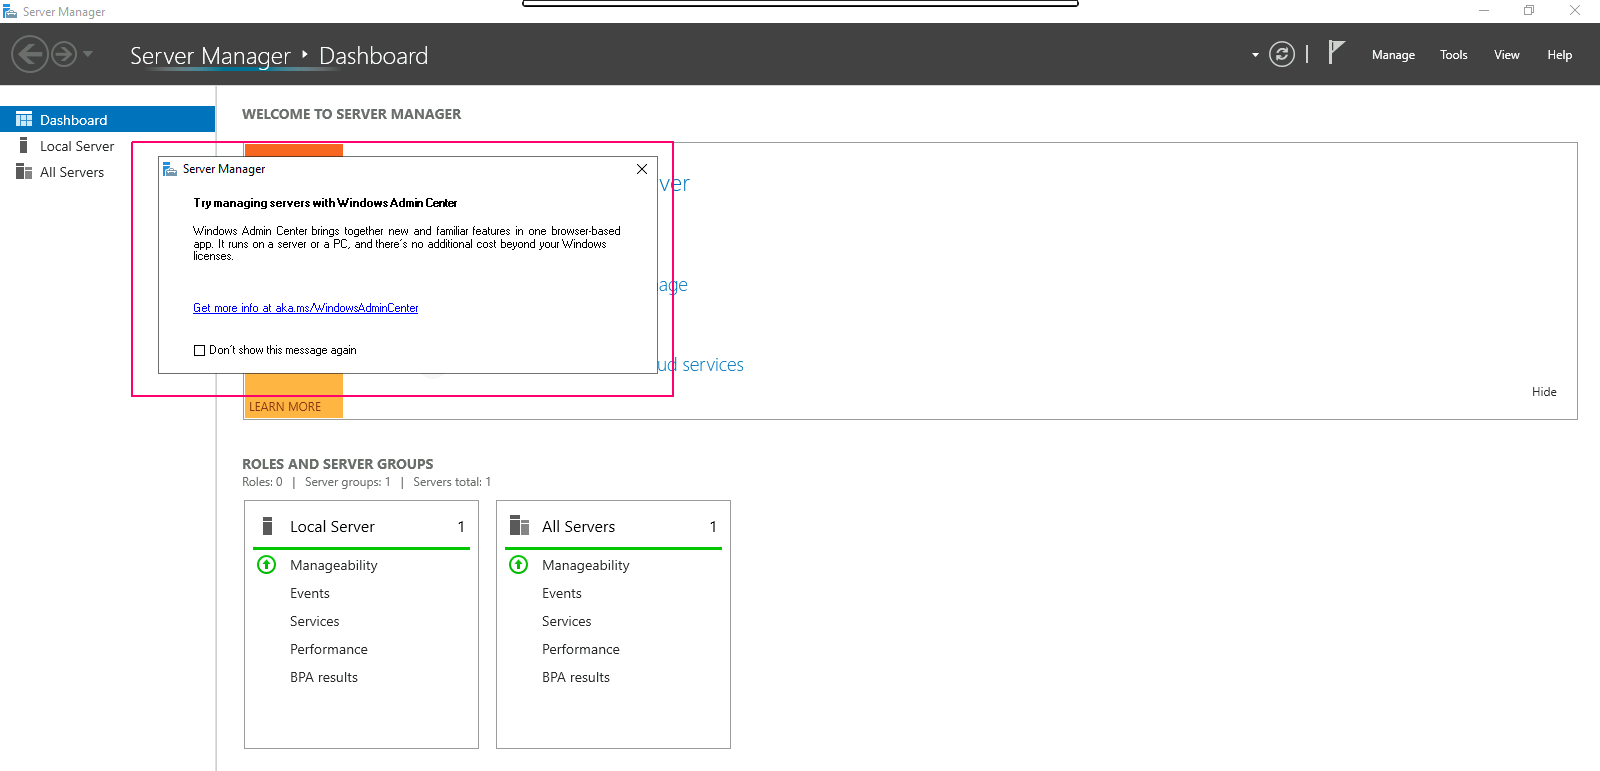
- Close the open wizard.
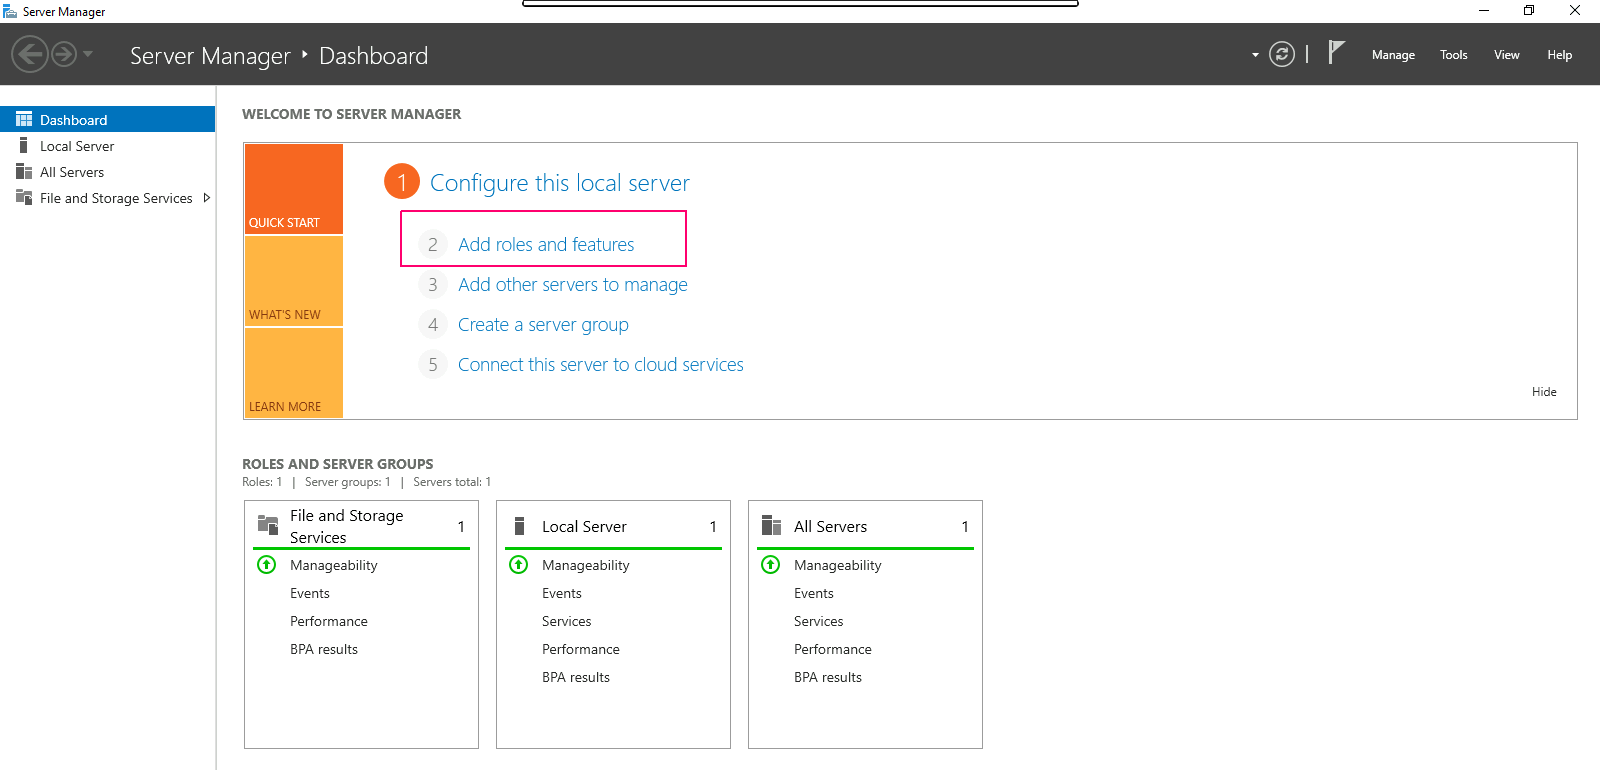
- Click on Add Roles & Features.
- In the Before you begin page,this wizard helps you install roles,features & role services.Click on Next.

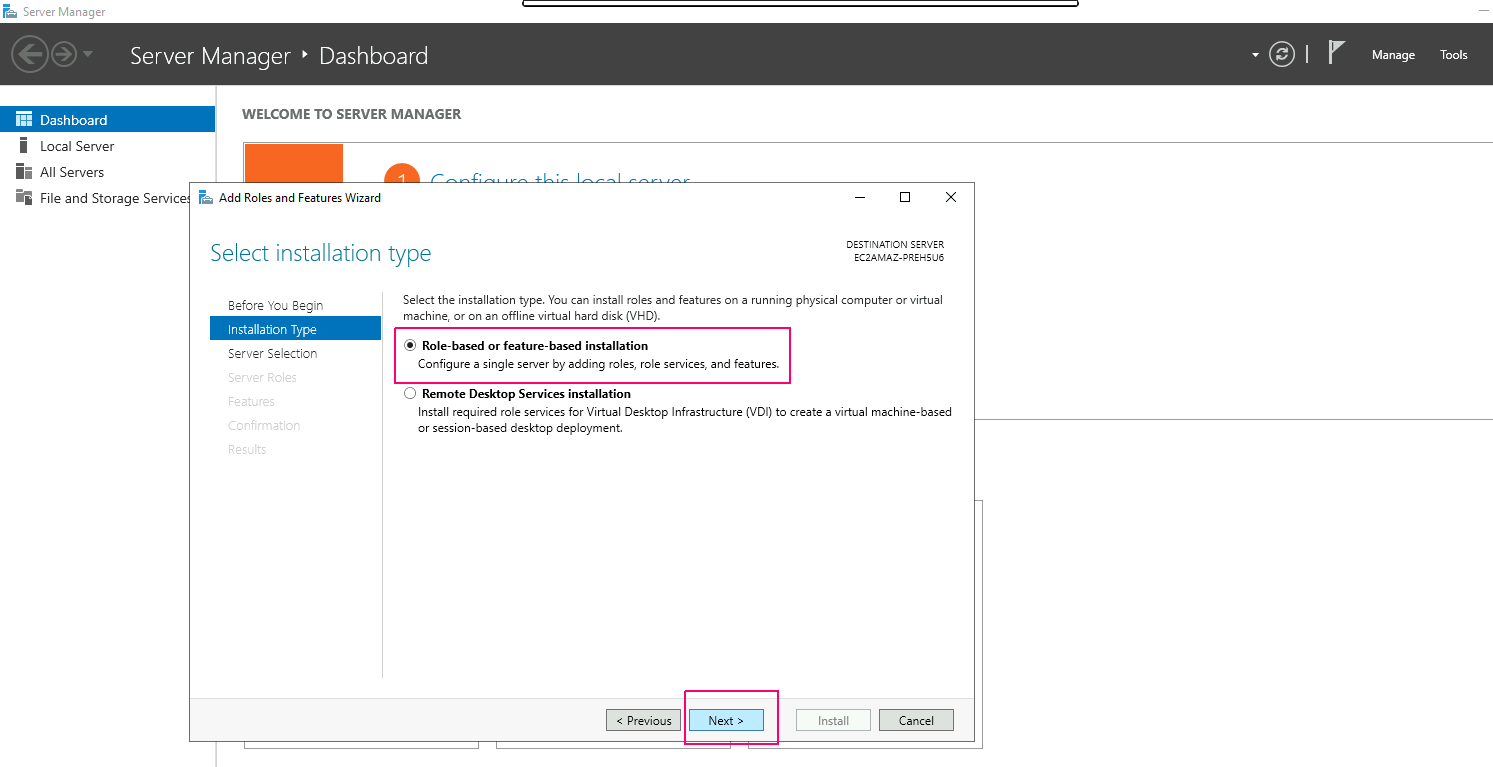
- In Installation type page,Select Role-based or Feature-based installation.Click on Next.
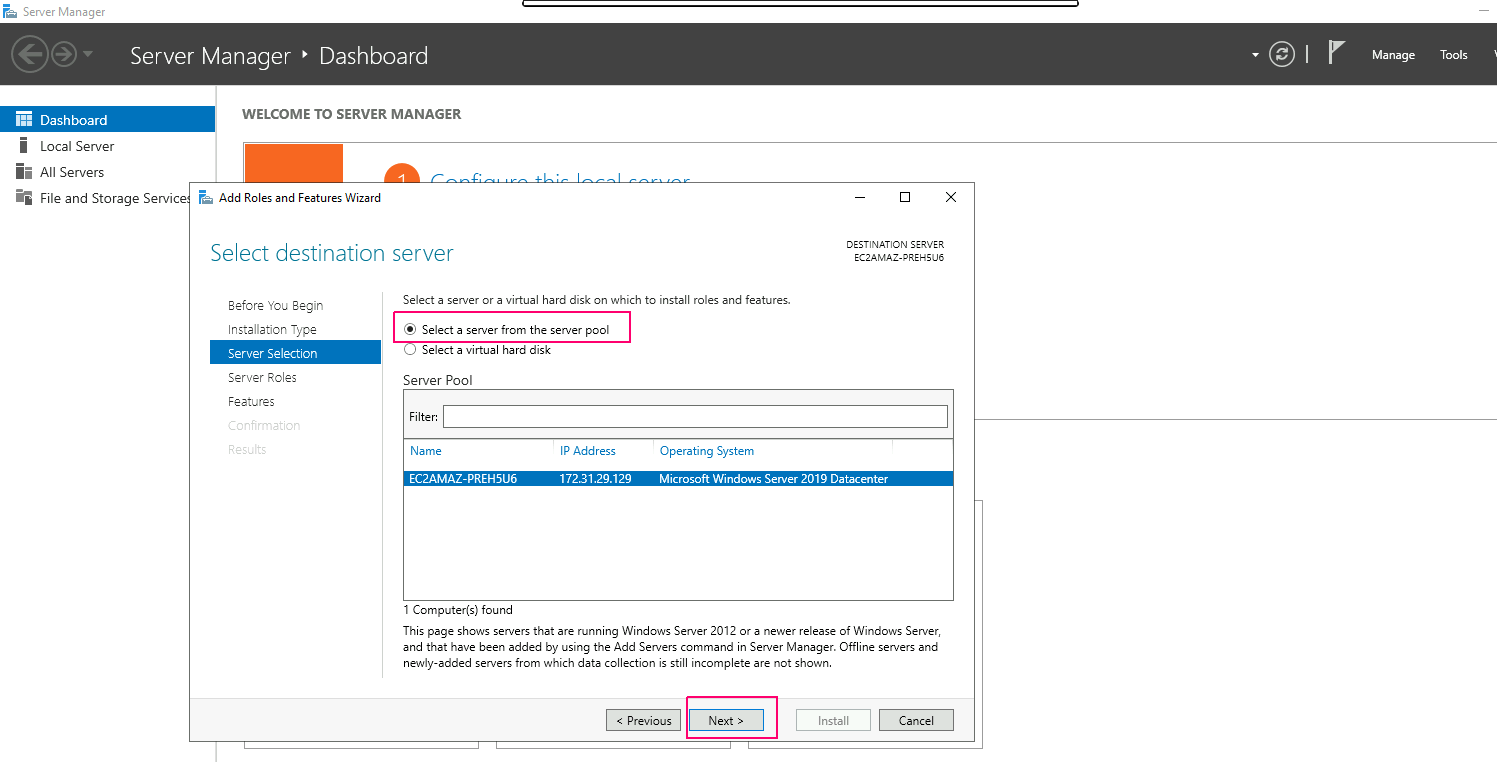
- In Server Selection page,select “select a server from the server pool”. Click on Next.
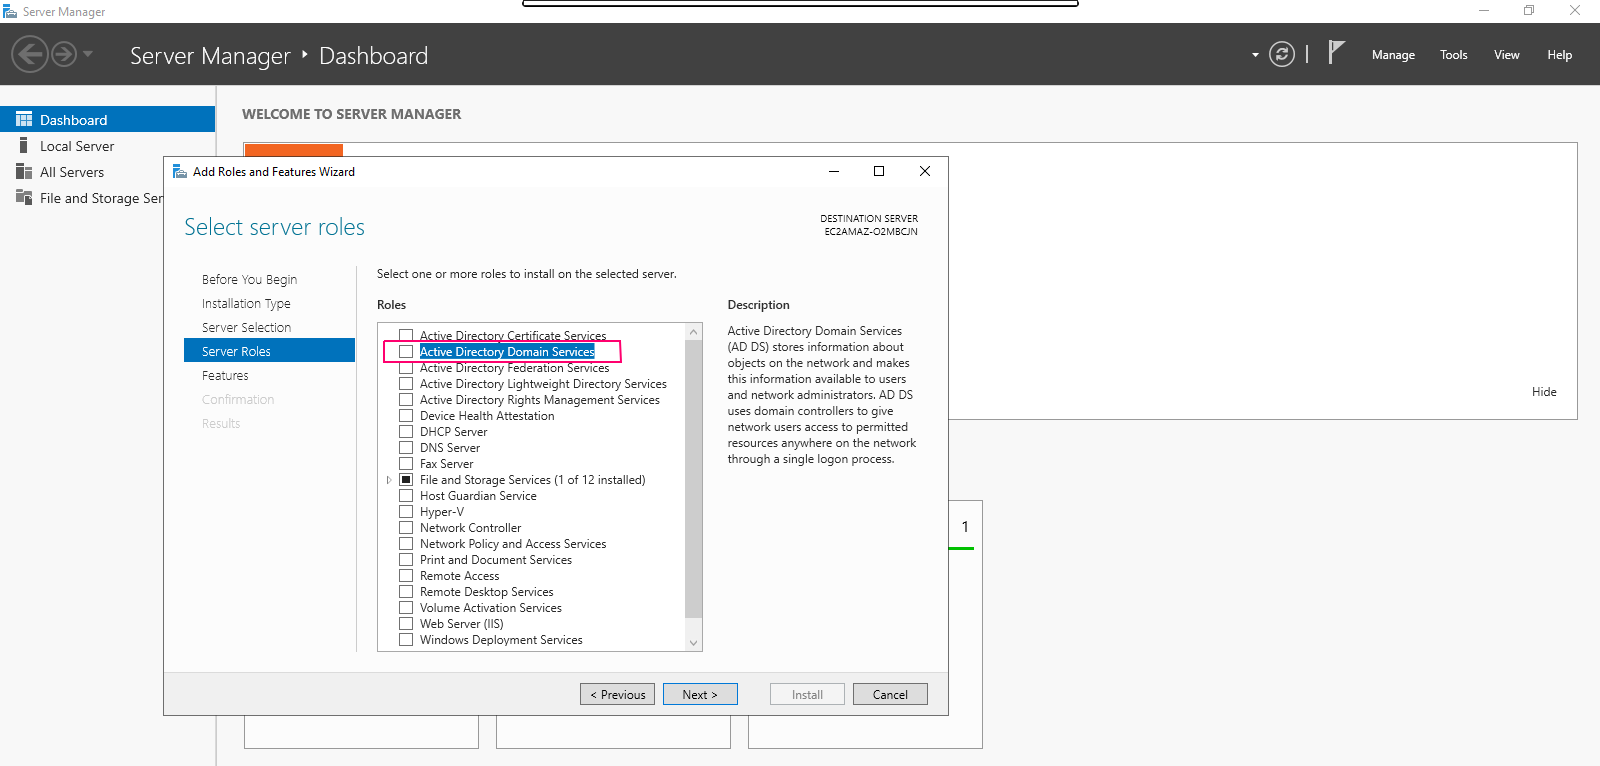
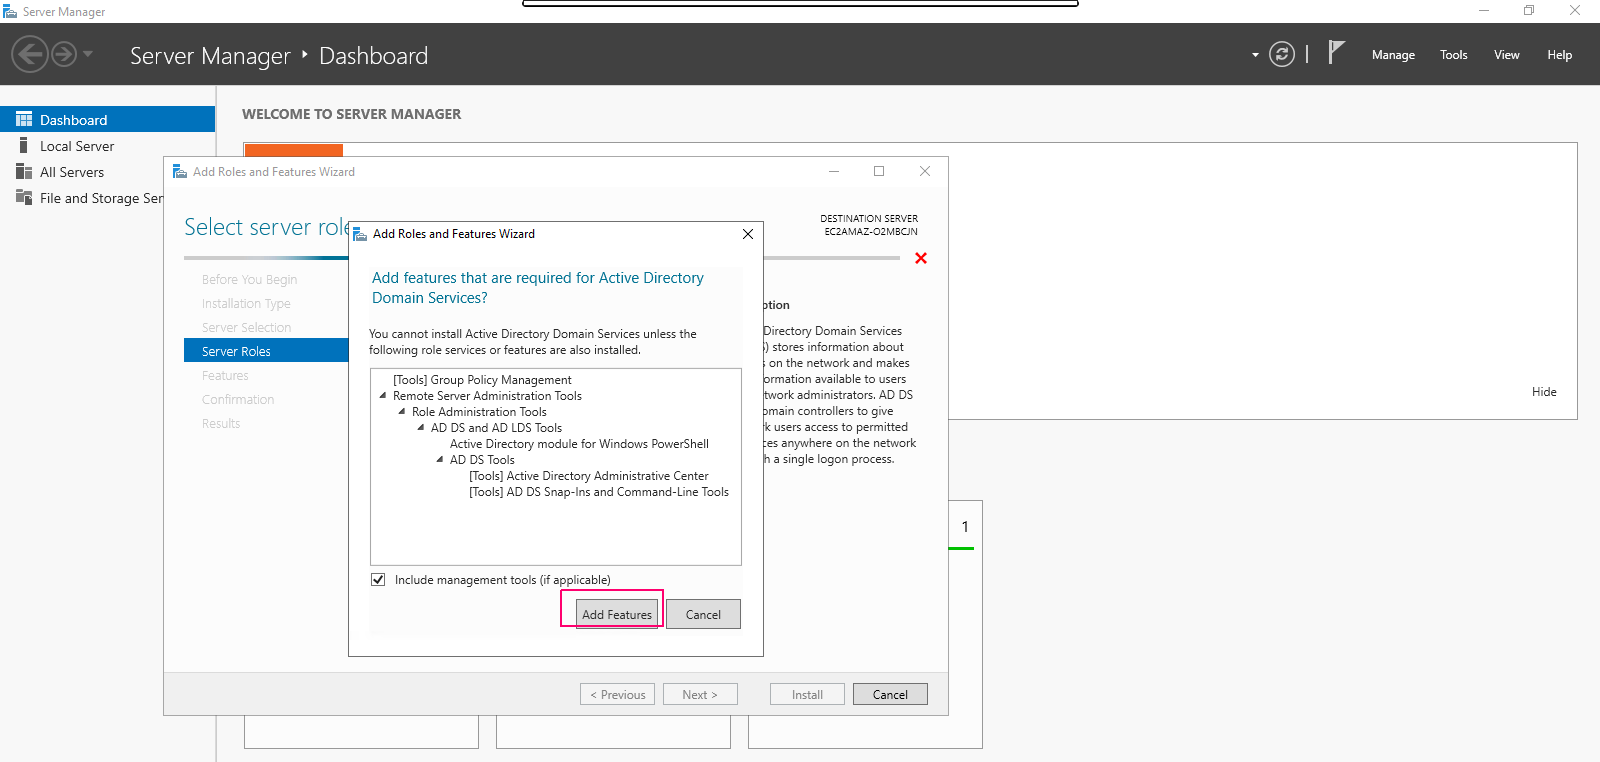
- In Server Roles page,Select “Active Directory Domain Services” role then Click on Add Features.
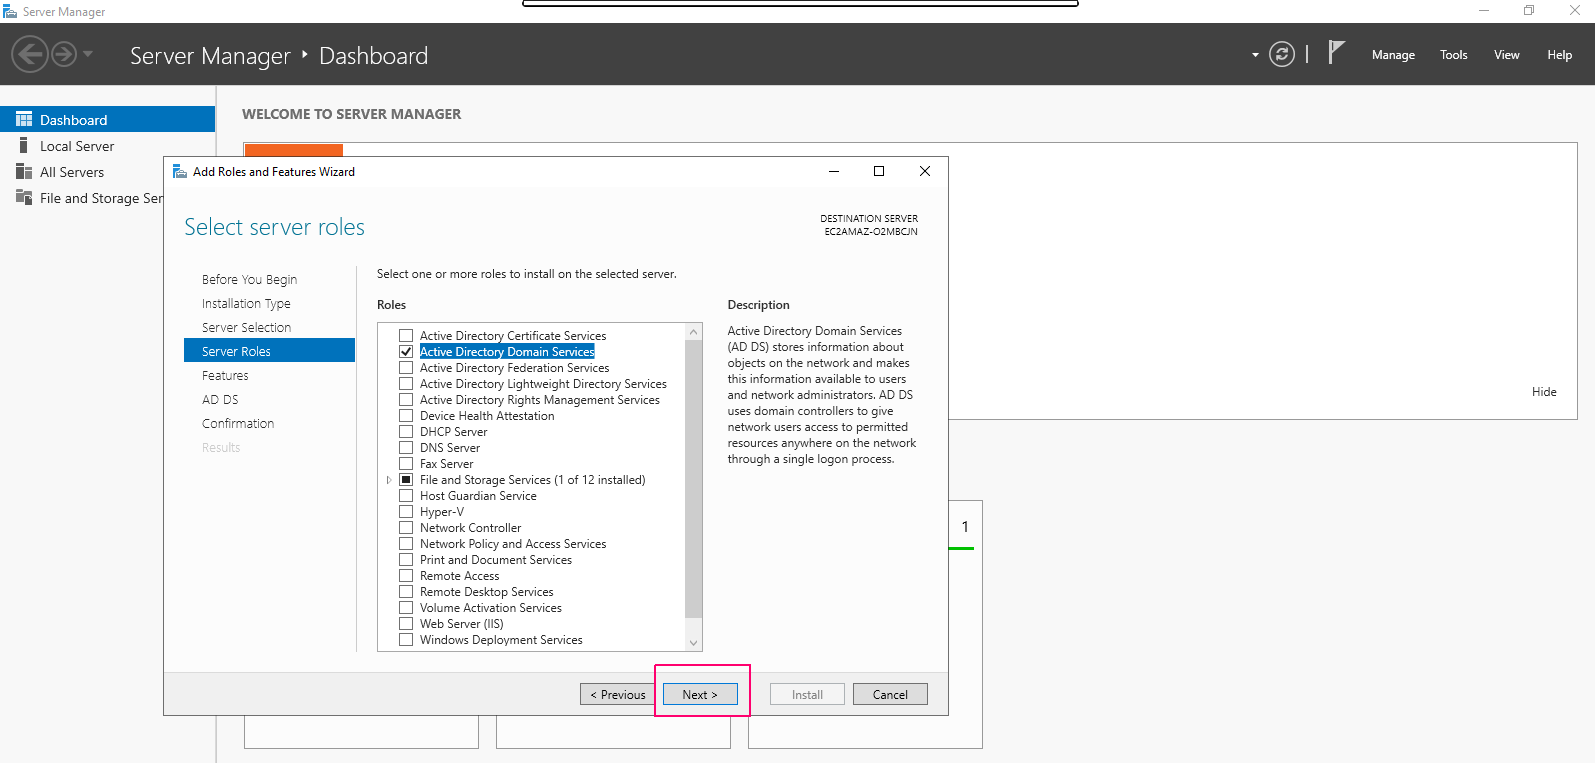
- Click on Next.
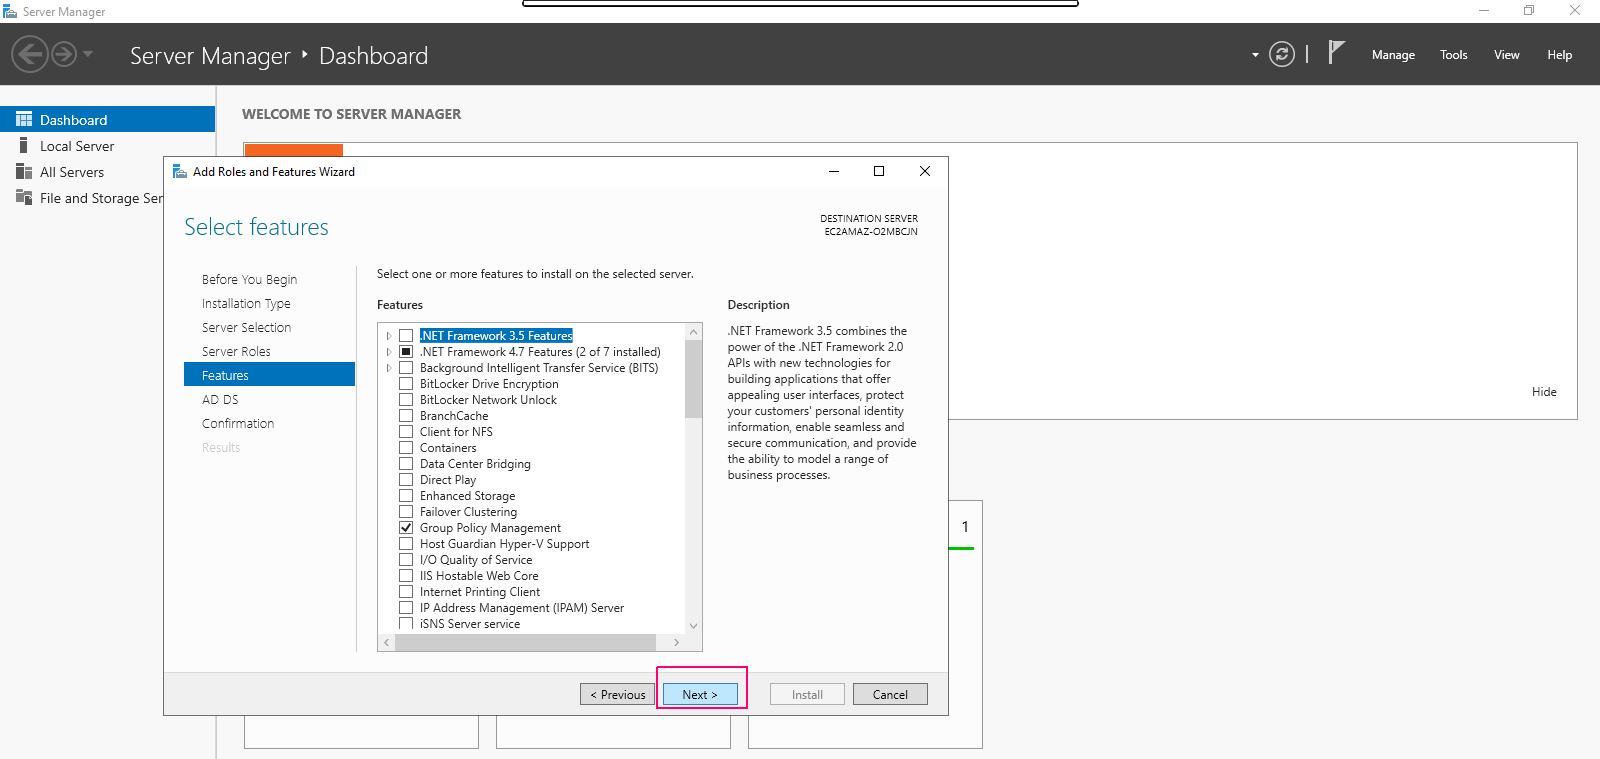
- In Features page,select features as per requirements.Click on Next.
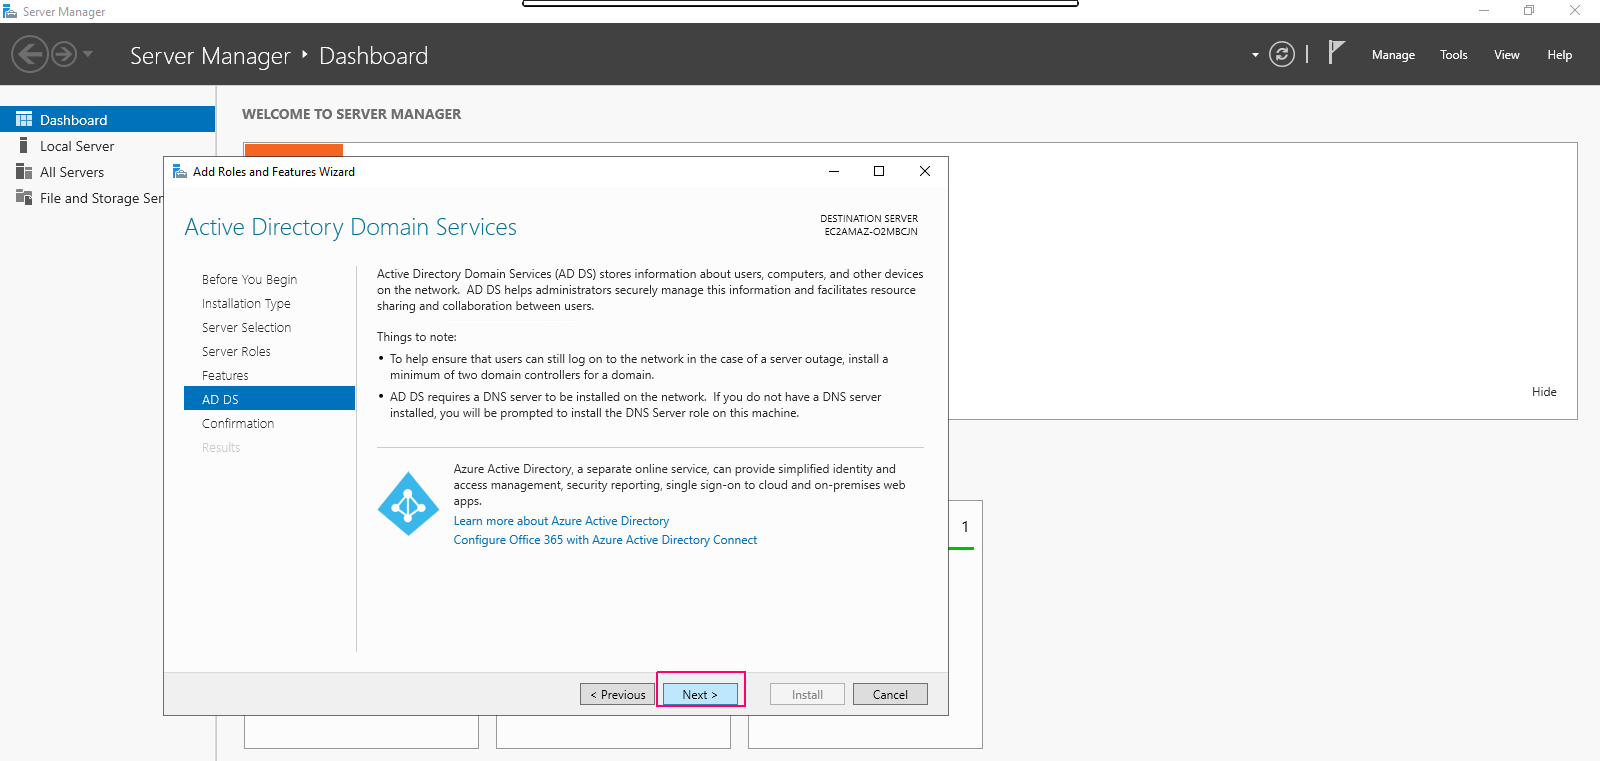
- In AD DS page,Click on Next.
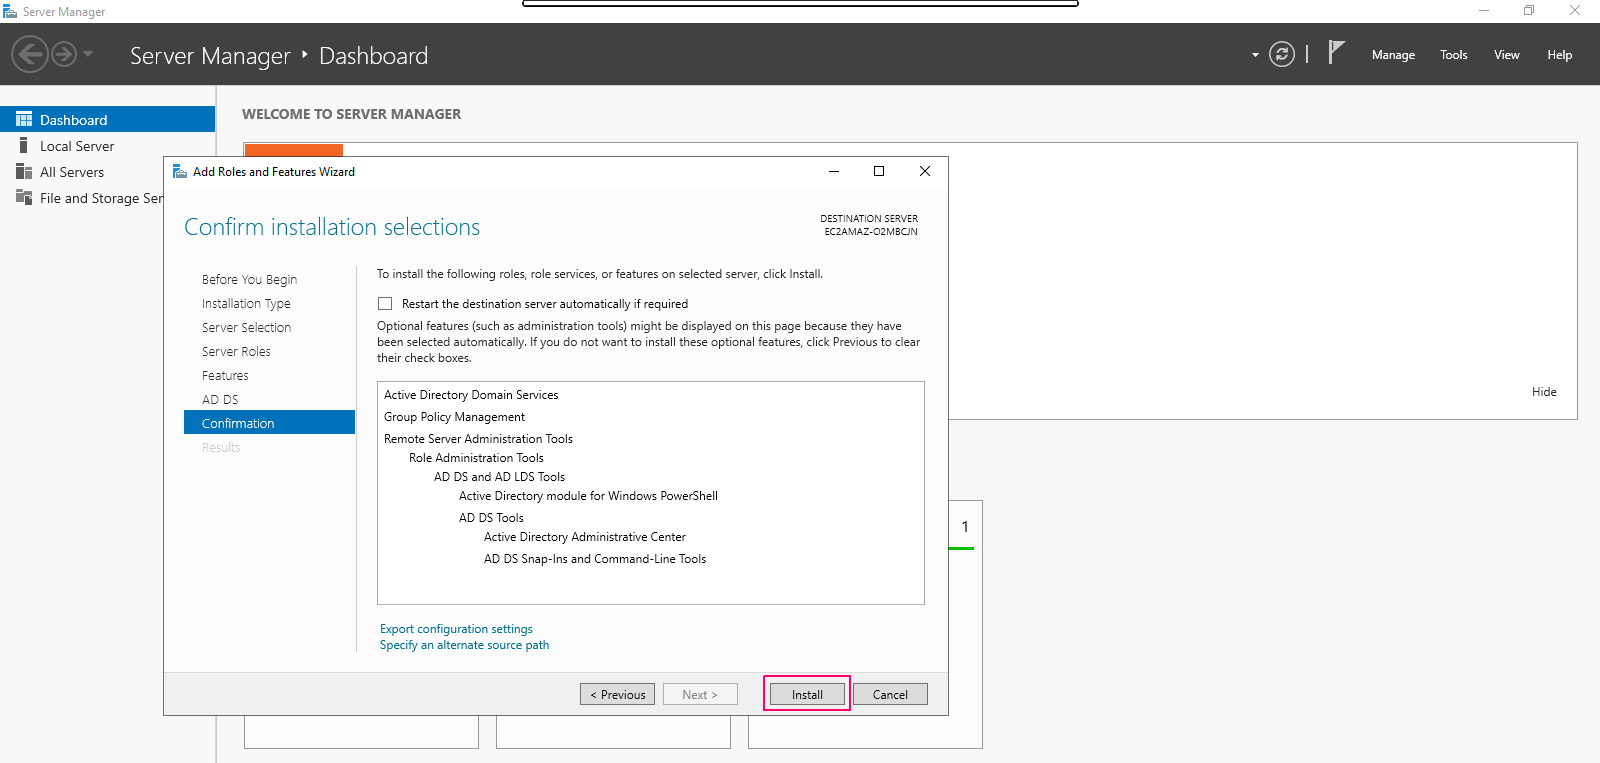
- In Confirmation page,review the added roles & features then click on Install.
- Once installation is done,click on close option to “Close the Add Roles & Feature wizard”.
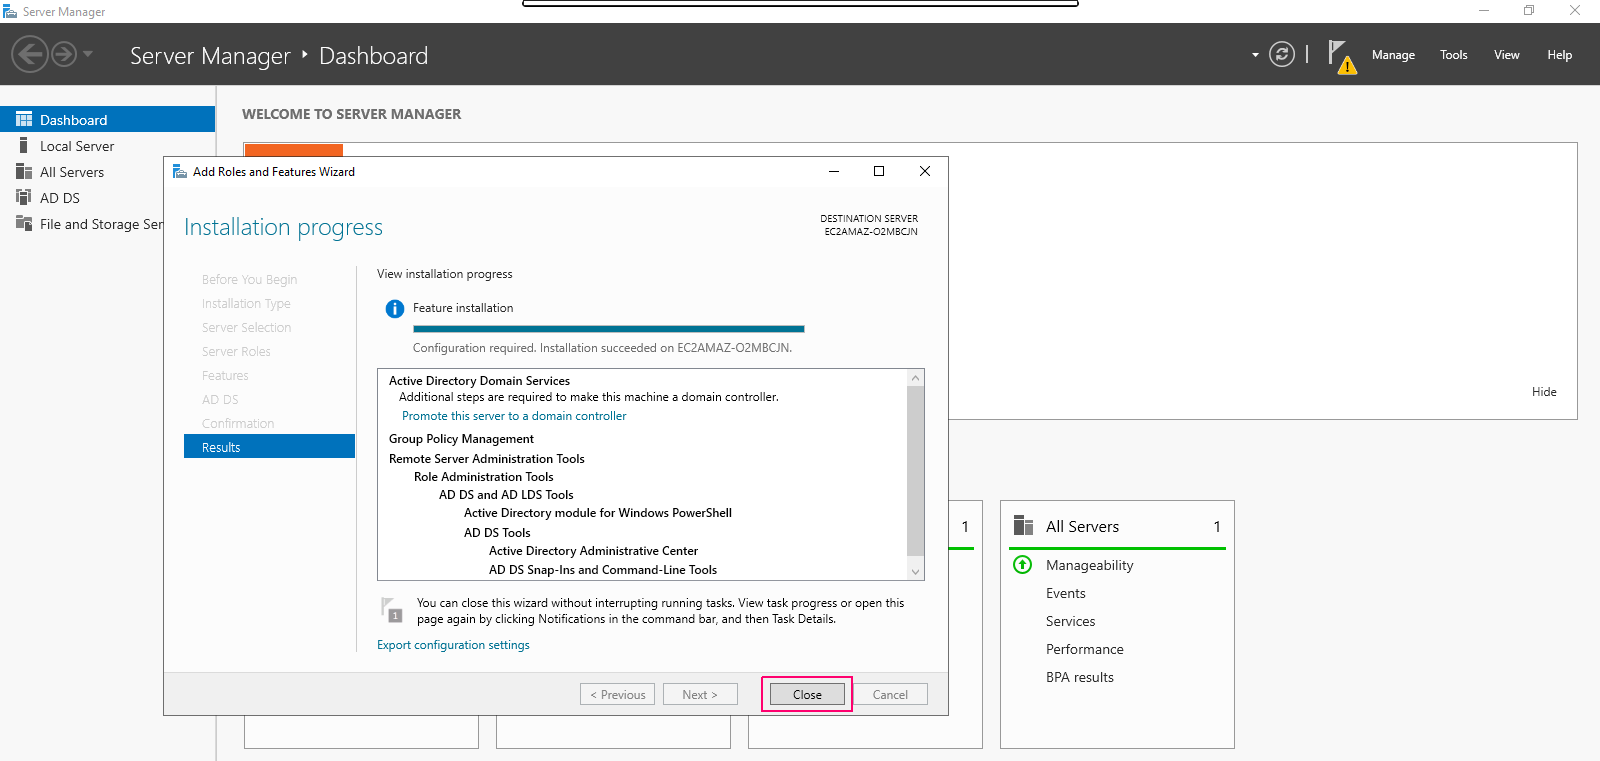
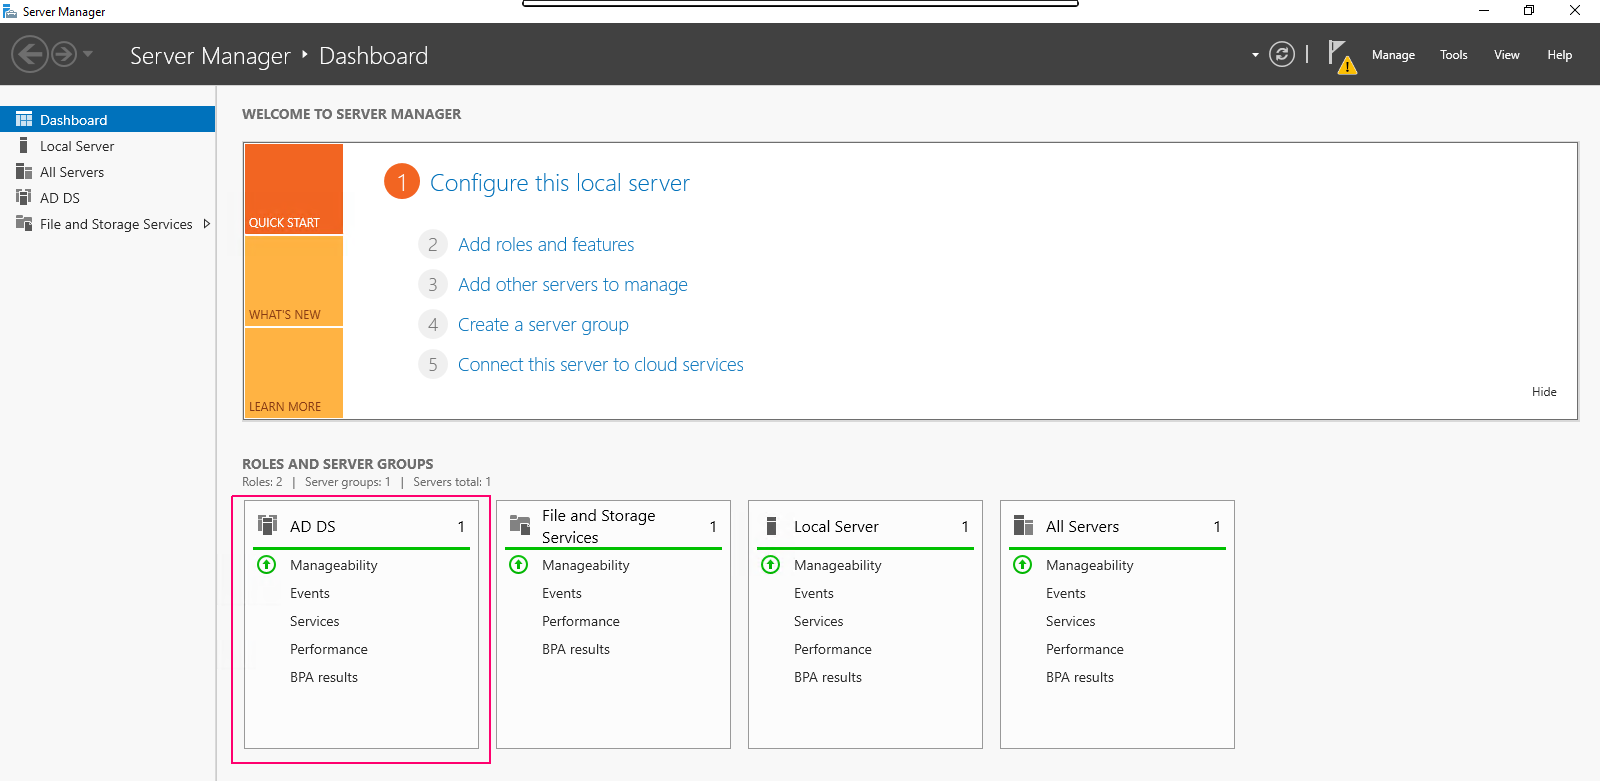
- Now, we can easily see the added roles & features on Server Manager wizard.
To Configure the Active Directory Domain Service
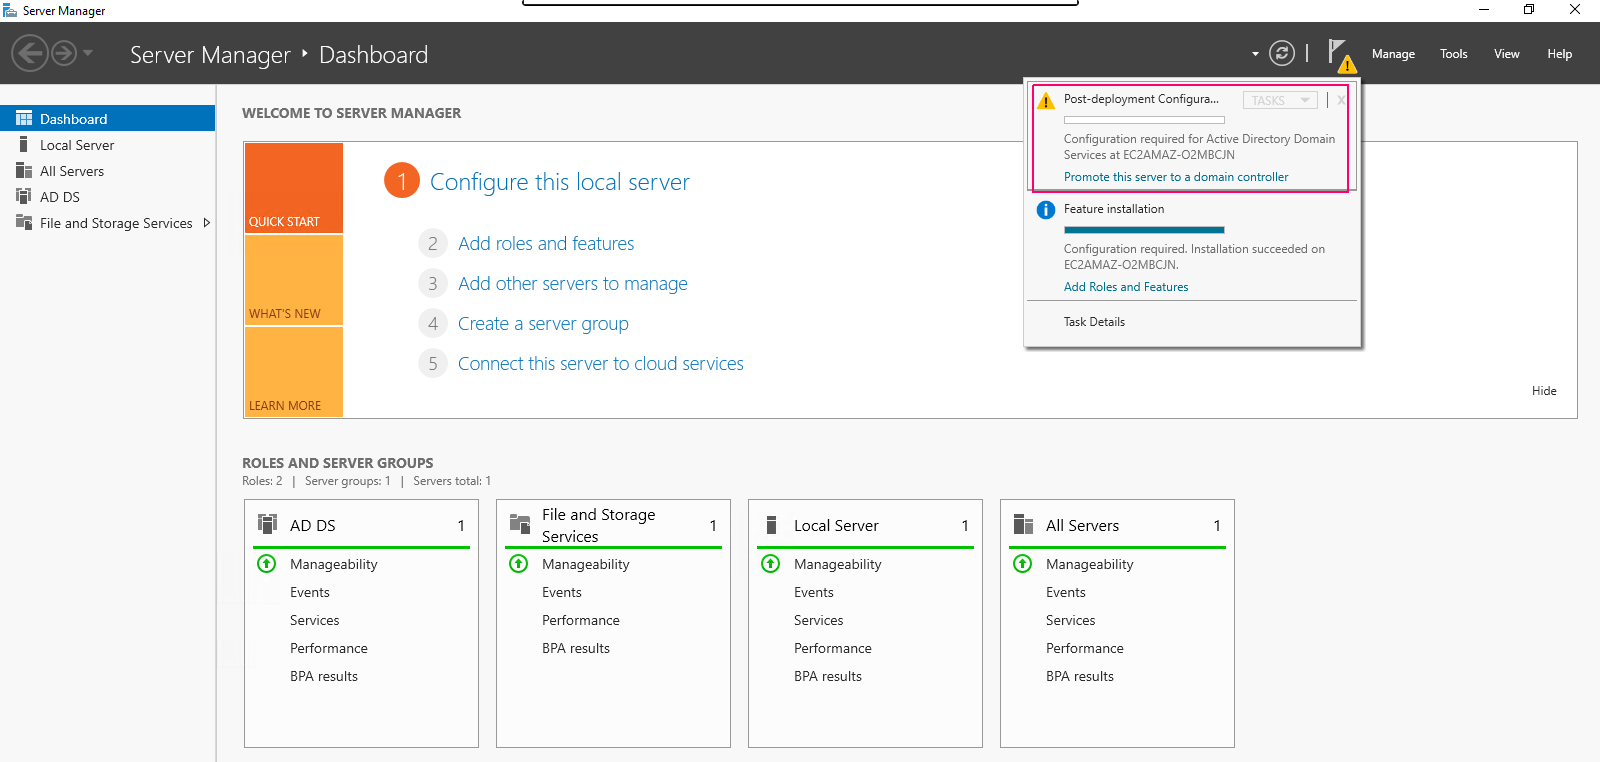
- In Server Manager page,Click on Notification icon.

- Click on “Promote this server to a domain controller”.
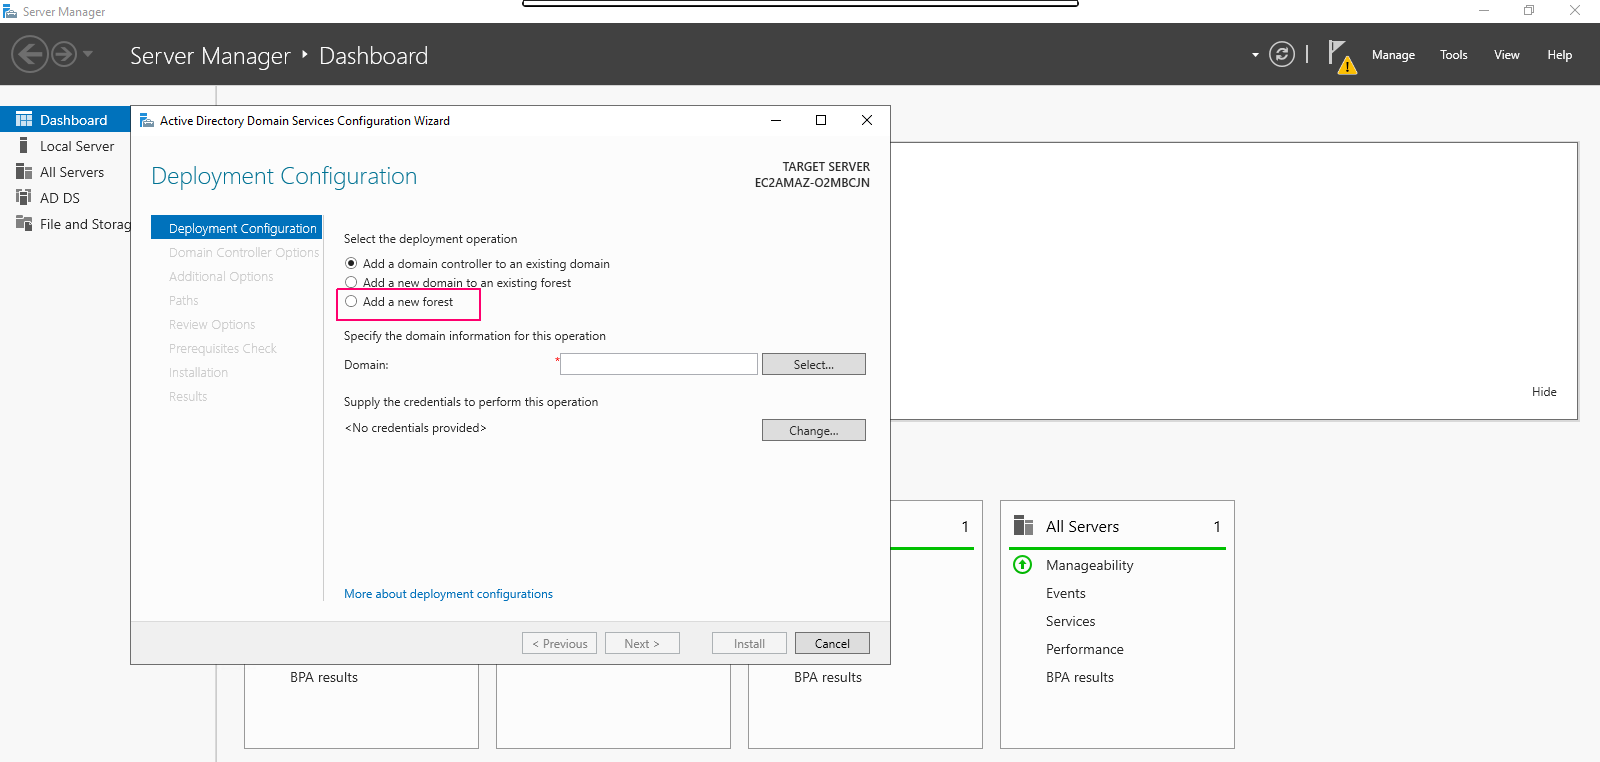
- In deployment configuration page,click on “Add a new forest”.
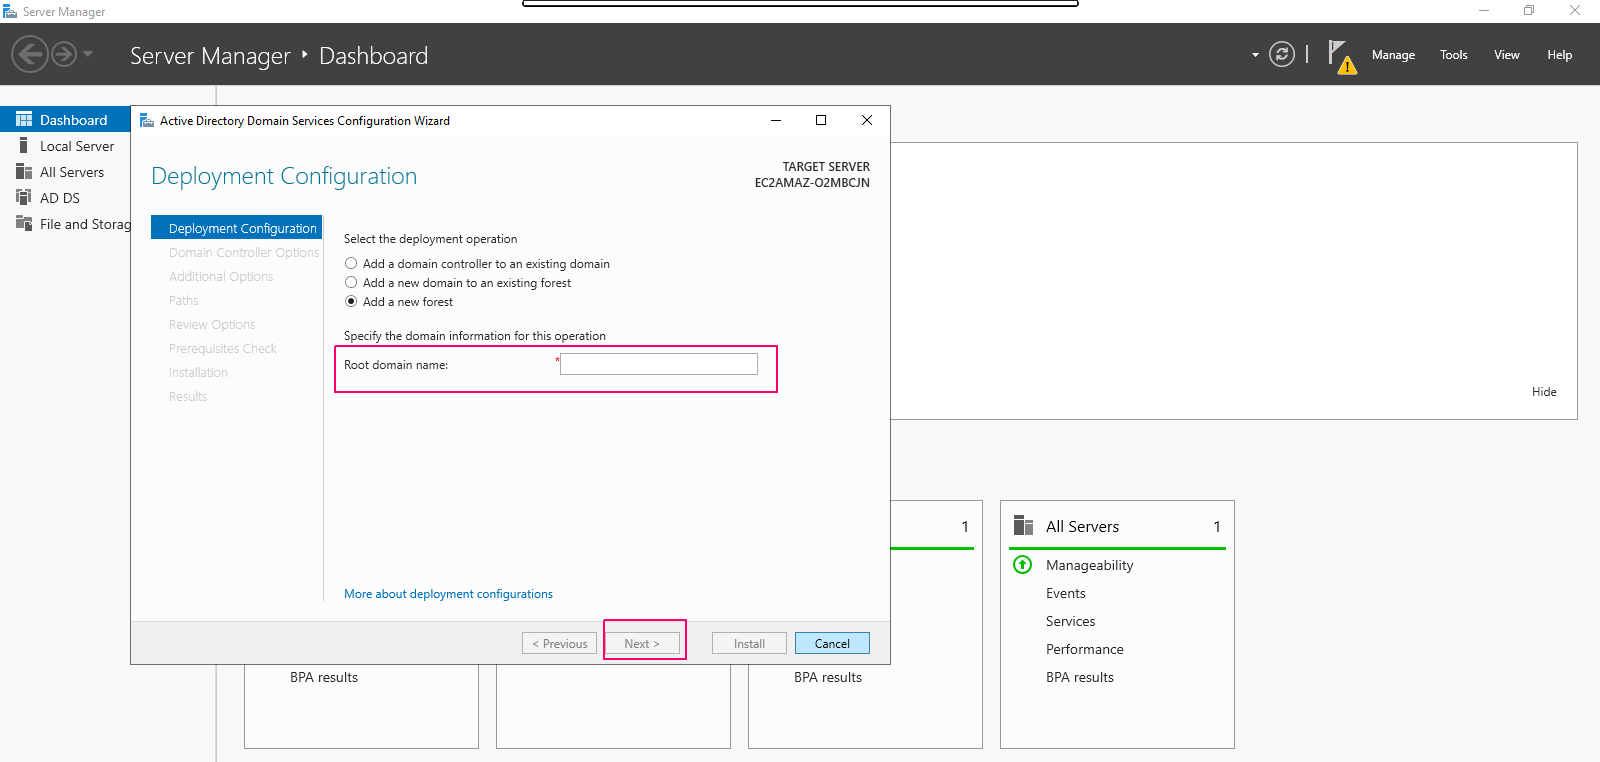
- Provide a Root domain name(Example.com). Click on Next.
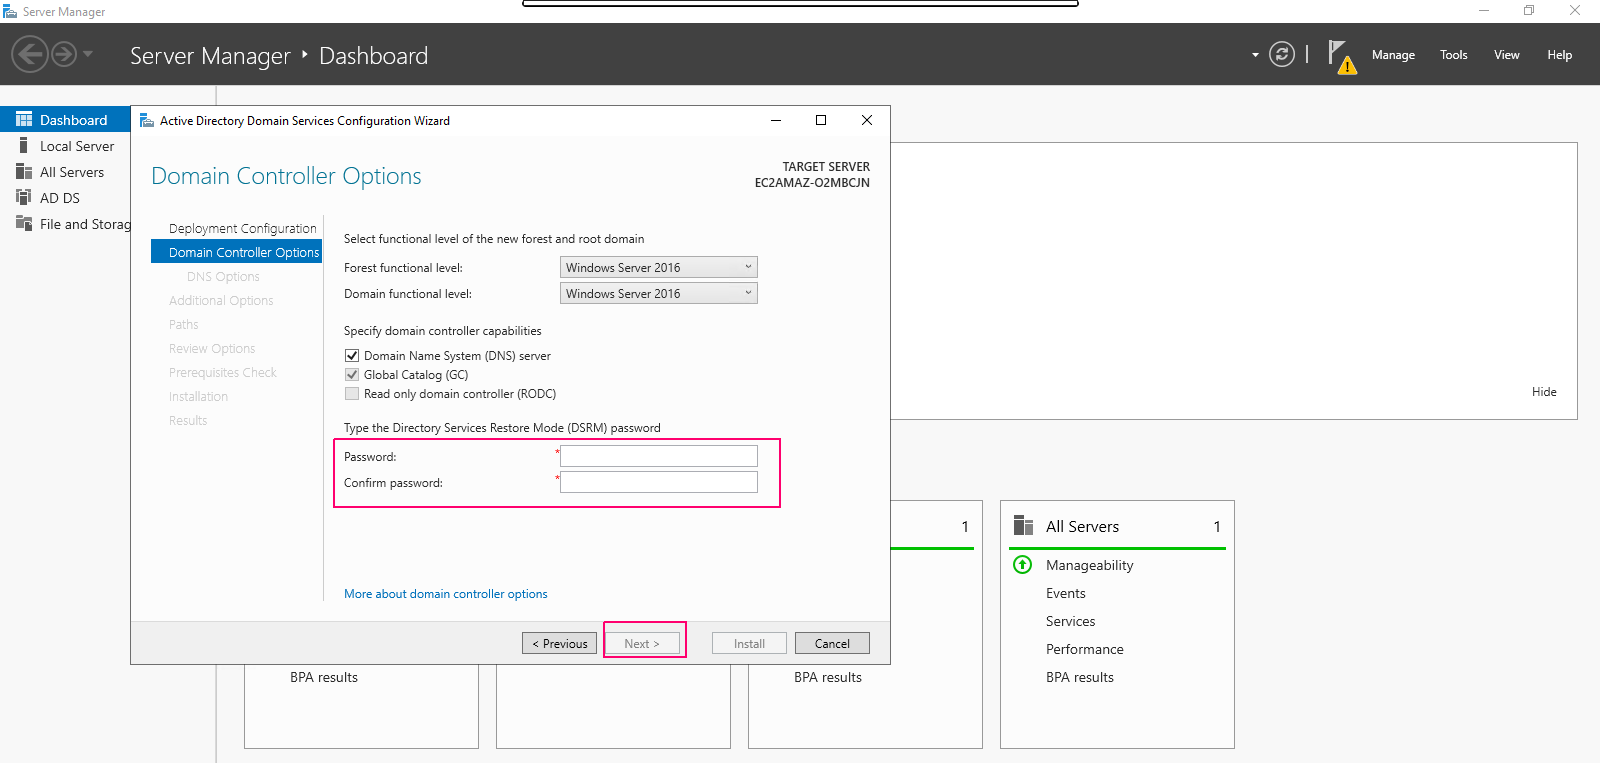
- Provide the Directory Services Restore Mode (DSRM) password,then click on Next.
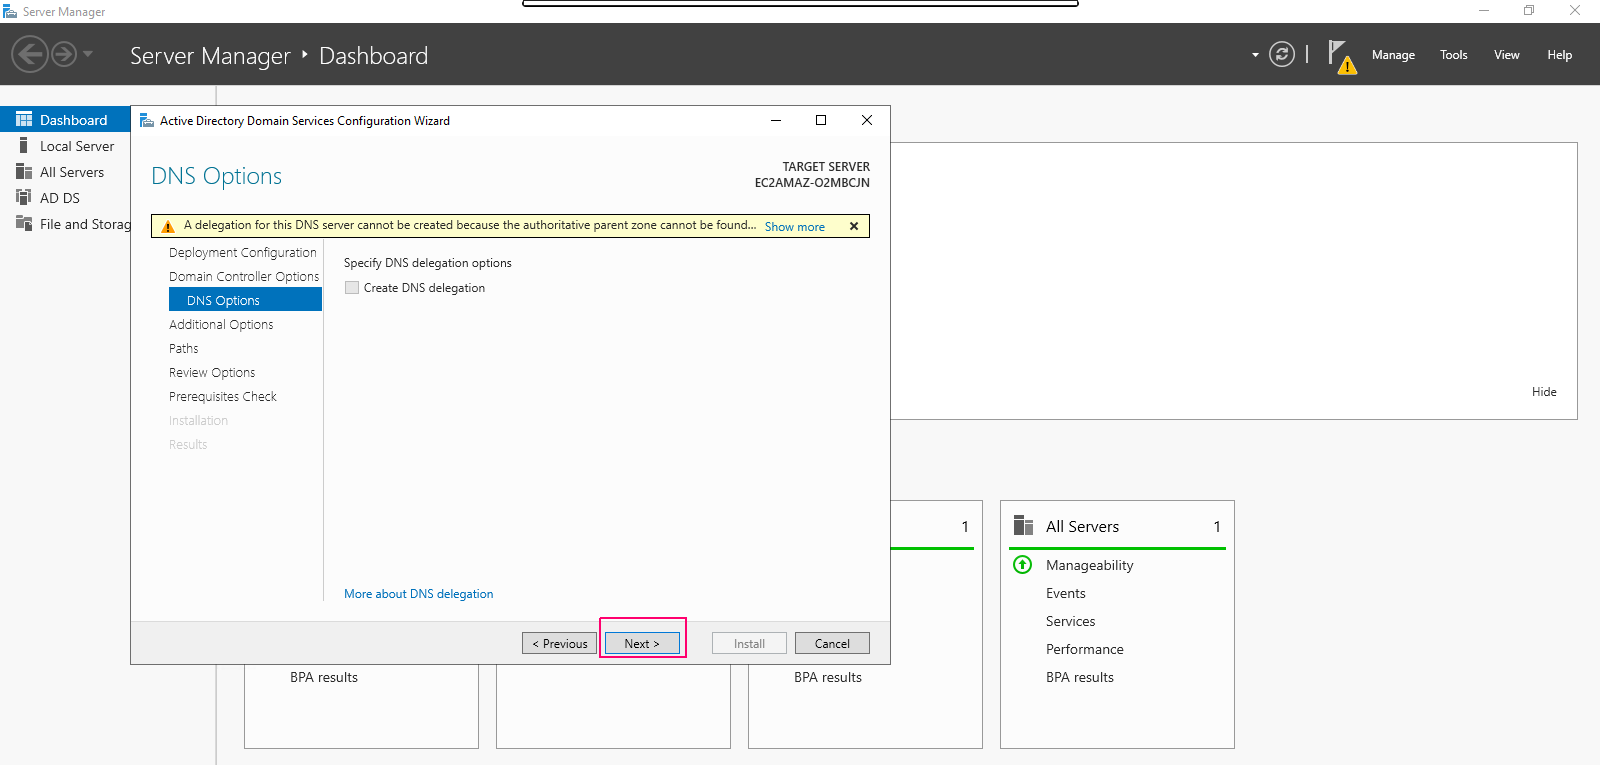
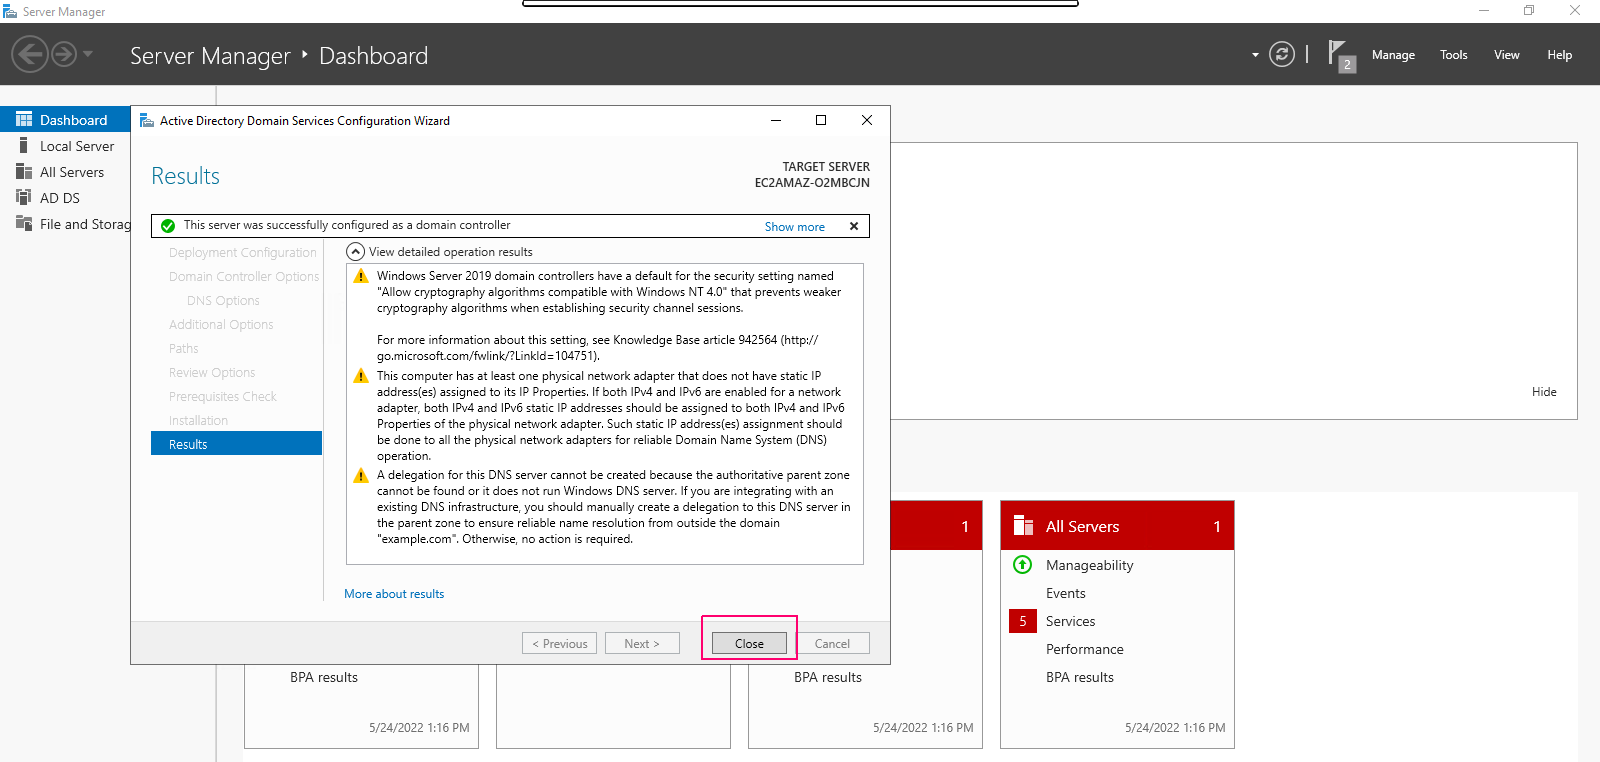
- In DNS option page,ignore this warning “A delegation for this DNS server cannot be created”. Click on Next.
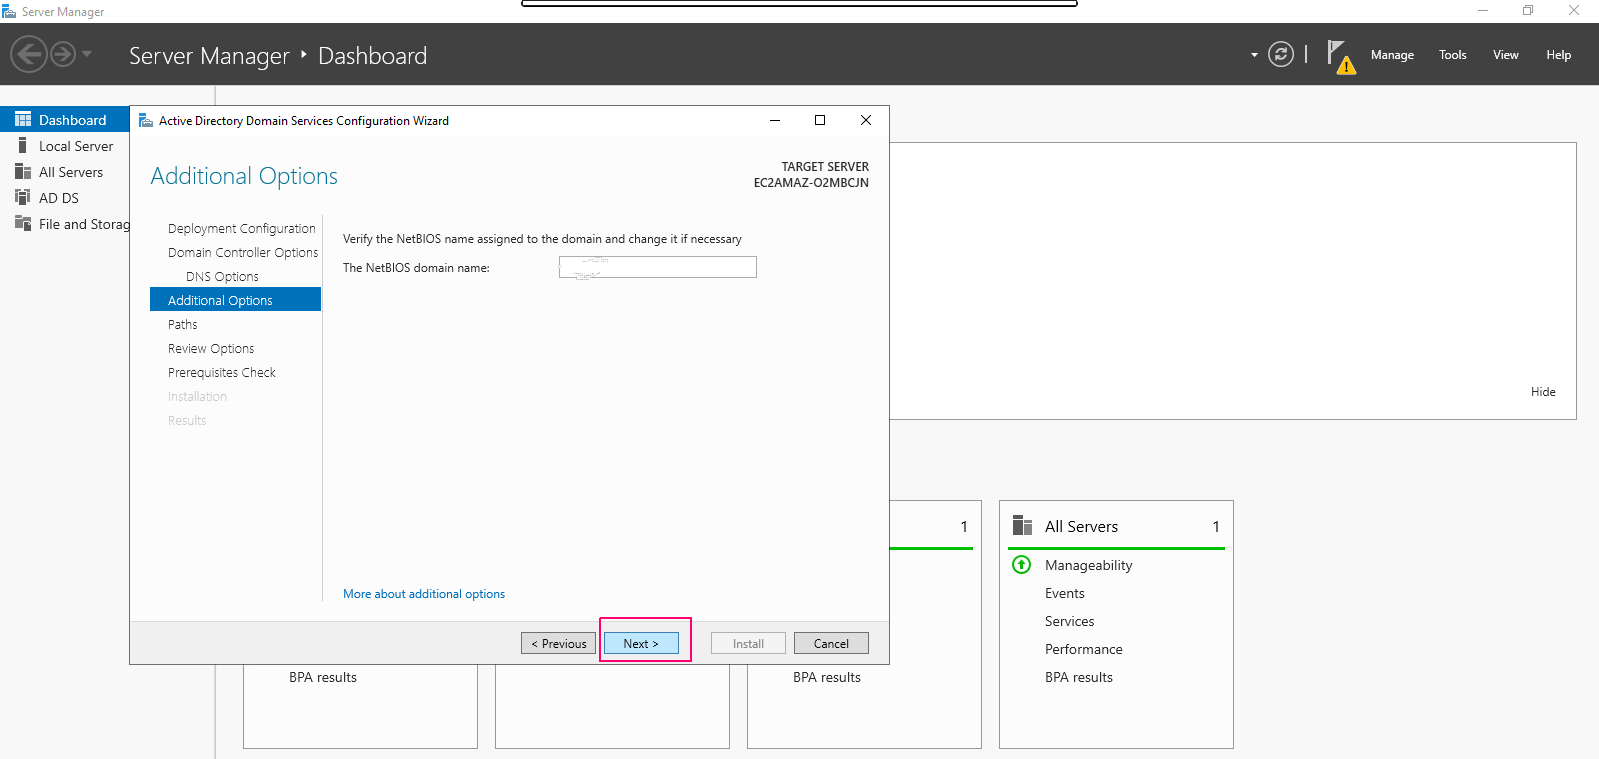
- Verify the NetBIOS name (Example) & click on Next.
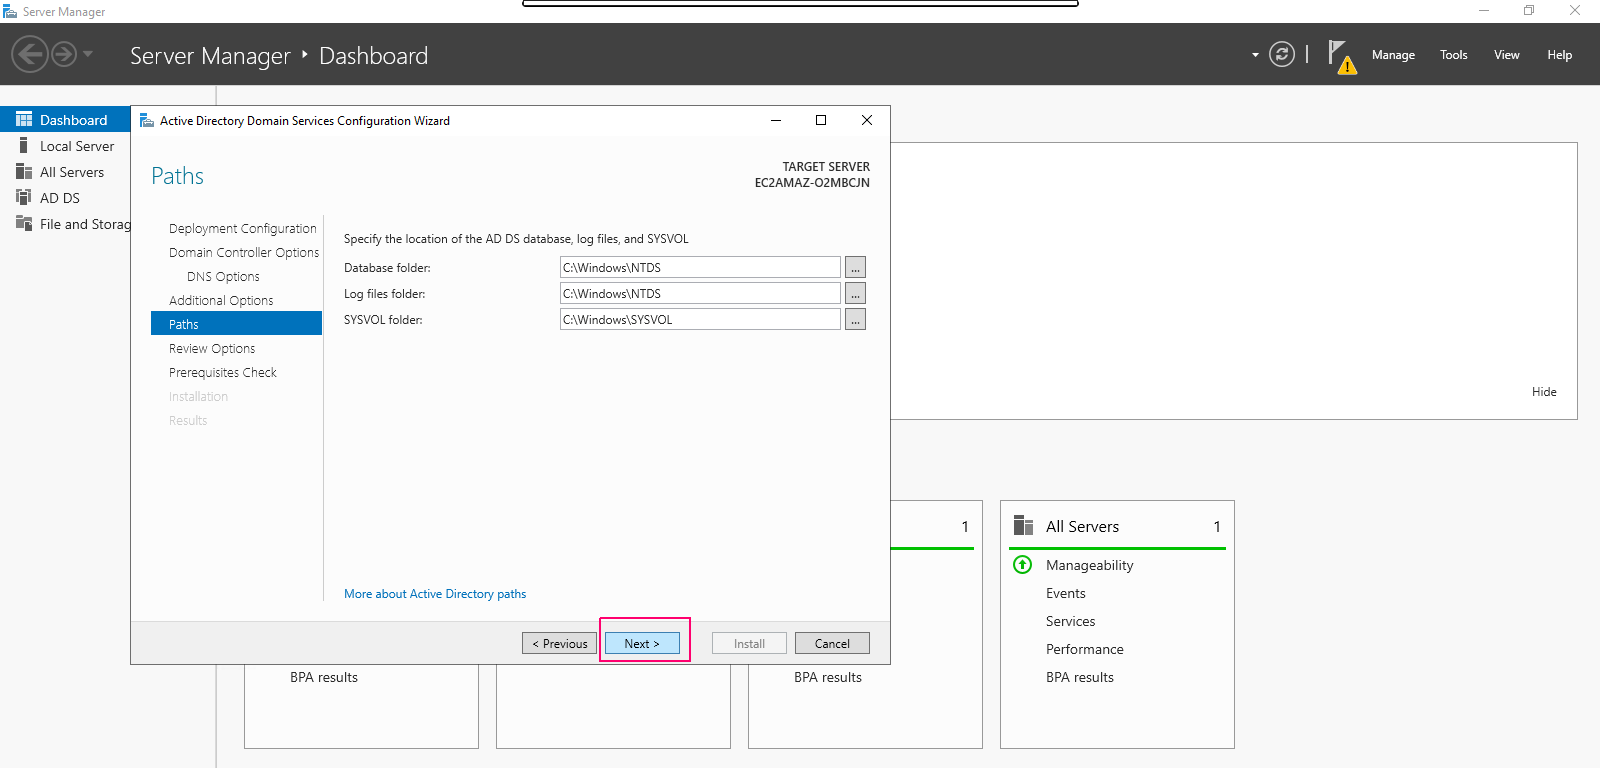
- Provide the location for AD DS database,log files & SYSVOL then click on Next.
- Review the selections.Click on Next.

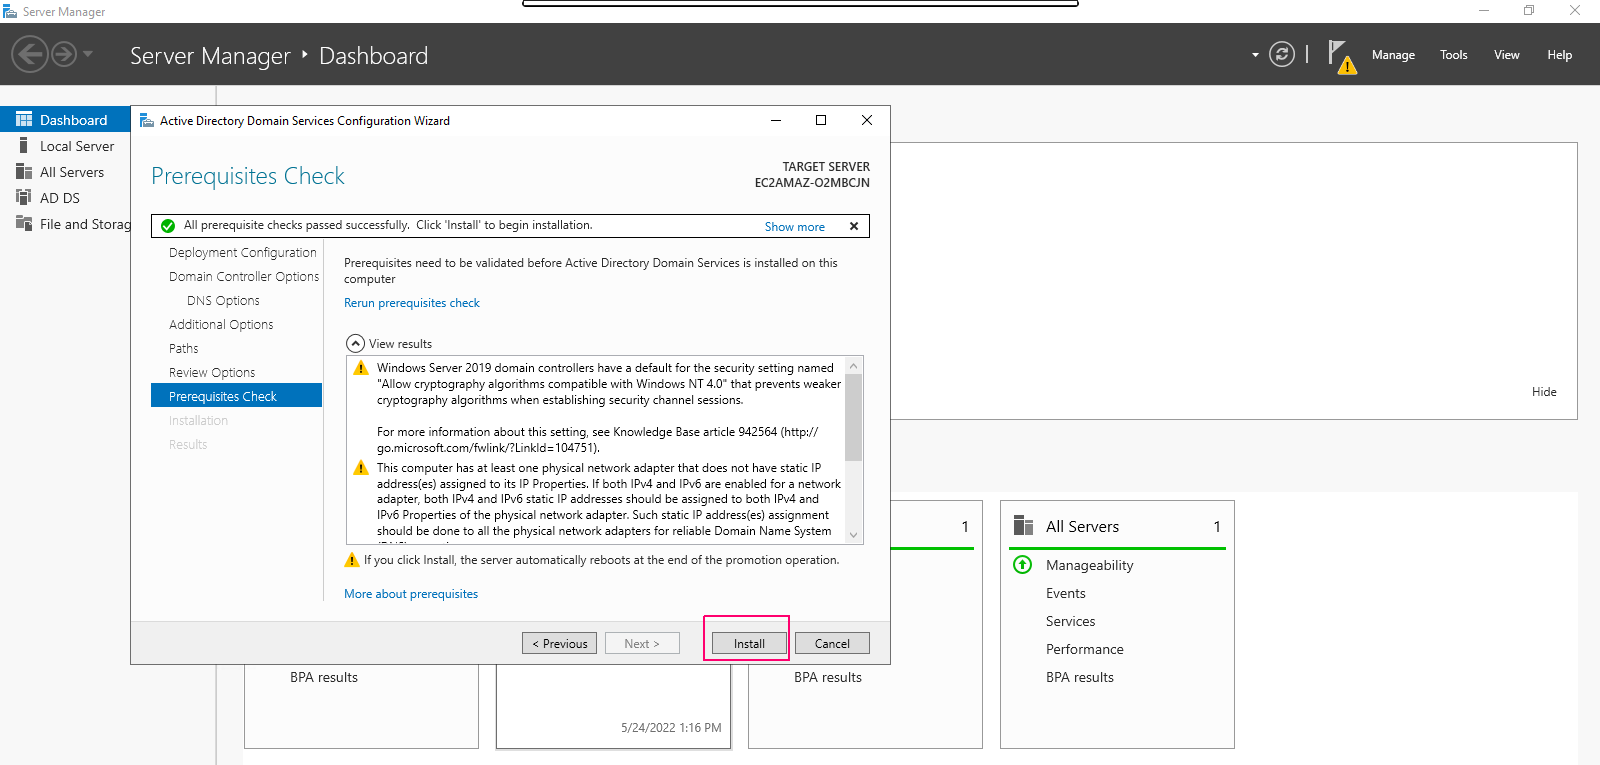
- Prerequisites needs to be validated before AD DS is installed so check the prerequisites then click on Install.
- Once Installation is completed then click on close option to “close the open wizard” & the system will be restarted or rebooted.
thank you very much for the help.
Thank you for your feedback.
We are here to support you just send mail to priya@hackerxone.com if any help required.
Regards
HX Team