 Nikhil Bhaskar
- May 4, 2022
How to Install MySQL 5.7 on Ubuntu 20.04 LTS
Installing MySQL 5.7 on Ubuntu 20.04
Install the required packages.
apt-get update
apt-get install wget
Download and install the MySQL repository package.
mkdir /downloads
cd /downloads
wget https://dev.mysql.com/get/mysql-apt-config_0.8.12-1_all.deb
dpkg -i mysql-apt-config_0.8.12-1_all.deb
Select the option UBUNTU BIONIC.

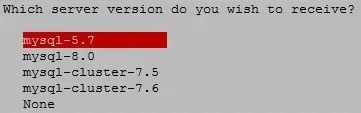
On the MySQL Server and Cluster screen, select the option MYSQL-5.7.
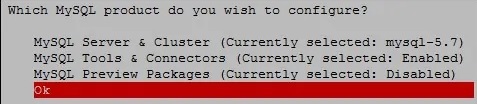
Verify the configuration summary and click on the OK button.
Update the MySQL packages repository.
apt-key adv --keyserver hkp://keyserver.ubuntu.com:80 --recv-keys 467B942D3A79BD29
apt-get update
Verify the Ubuntu policy for the MySQL package installation.
apt-cache policy mysql-serverHere is the command output.
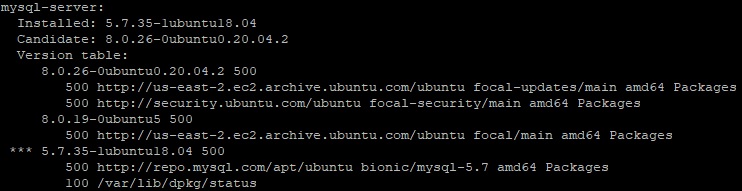
In our example, the system offers the option to install the MySQL version 5.7.35.
Note MySQL version which needs to install.
Simulate the installation of the MySQL 5.7 client package.
apt-get install -s mysql-client=5.7.38-1ubuntu18.04If not errors were detected, perform the installation of the MySQL 5.7 client package.
apt-get install mysql-client=5.7.38-1ubuntu18.04Optionally, simulate the installation of the remaining MySQL packages.
apt-get install -s mysql-community-server=5.7.38-1ubuntu18.04
apt-get install -s mysql-server=5.7.38-1ubuntu18.04
Install the MySQL server version 5.7.
apt-get install mysql-community-server=5.7.38-1ubuntu18.04
apt-get install mysql-server=5.7.38-1ubuntu18.04
Configure the password to the MySQL account named ROOT.

Verify the MySQL version installed.
mysql -VHere is the command output.
mysql Ver 14.14 Distrib 5.7.38, for Linux (x86_64) using EditLine wrapperAccess the MySQL service command-line.
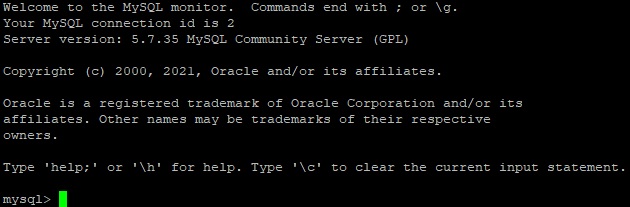
mysql -u root -pEnter the password of the account named ROOT.
Now installation of MySQL version 5.7 on Ubuntu Linux 20.04 is finished.