 Nikhil Bhaskar
- July 23, 2021
How To Setup Zabbix Monitoring tool on Ubuntu 20.04.
Zabbix is a free & open-source monitoring tool.It is used for networks, servers, virtual machines and cloud services.It provides monitoring metrics,network utilization, CPU load and disk space.
Install Zabbix Server on Ubuntu
Update the System.
apt-get update
Install apche2 web service.
apt-get install apache2Start & Enable Apache2 service.
systemctl start apache2
systemctl enable apache2
Install Mysql database.
Update the System.
apt-get updateInstall Mysql database.
apt-get install mysql-serverStart & Enable Mysql service.
systemctl start mysql
systemctl enable mysql
Login to Mysql database.
mysql -u rootPress Enter.
Here is the command output.

Create MySQL user & set the password on MySQL user.
CREATE USER 'zabbix_user'@'localhost' IDENTIFIED BY 'password';Create Database & provide the CHARSET.
CREATE DATABASE zabbix_db character set utf8 collate utf8_bin;Provide Grant all Privileges on database to user.
GRANT ALL PRIVILEGES ON zabbix_db.* TO 'zabbix_user'@'localhost' WITH GRANT OPTION;Flush the privileges.
FLUSH PRIVILEGES;
If we want to create MySQL user,database & Set the password without MySQL Login.Run the Following commands.
mysql -u root -e "CREATE USER 'zabbix_user'@'localhost' IDENTIFIED BY 'password';"
mysql -u root -e "CREATE DATABASE zabbix_db character set utf8 collate utf8_bin;"
mysql -u root -e "GRANT ALL PRIVILEGES ON zabbix_db.* TO'zabbix_user'@'localhost';"
mysql -u root -e "FLUSH PRIVILEGES;"
Install PHP
Update the system
apt-get updateInstall PHP.
apt-get install php php-mbstring php-gd php-xml php-bcmath php-ldap php-mysqlCheck PHP modules.
php -mCheck PHP version.
php -vHere is the command output.
PHP 7.4.3 (cli) ( NTS )
Copyright (c) The PHP Group
Zend Engine v3.4.0, Copyright (c) Zend Technologies
    with Zend OPcache v7.4.3, Copyright (c), by Zend Technologies
Open configure PHP file.
vim /etc/php/7.4/apache2/php.iniModify the following values:
memory_limit 256M
upload_max_filesize 16M
post_max_size 16M
max_execution_time 300
max_input_time 300
max_input_vars 10000
date.timezone = Asia/Kolkata
Restart the apache service.
systemctl restart apache2Download the zabbix repo.
wget https://repo.zabbix.com/zabbix/5.0/ubuntu/pool/main/z/zabbix-release
/zabbix-release_5.0-1+focal_all.deb
Enable the downloaded zabbix repository,
dpkg -i zabbix-release_5.0-1+focal_all.debUpdate the packages:
apt-get updateInstall Zabbix Server.
apt-get install zabbix-server-mysql zabbix-frontend-php zabbix-agent
apt-get install zabbix-apache-conf
Open the Configuration file of zabbix.
vim /etc/zabbix/zabbix_server.confModify the follwoing values:
DBHost=localhost
DBName=zabbix_db
DBUser=zabbix_user
DBPassword=password
Load the default parameter of the Zabbix database.
cd /usr/share/doc/zabbix-server-mysql
zcat create.sql.gz | mysql -u zabbix_user -p zabbix_db
Then Provide zabbix user password.
Enable & Restart the zabbix service.
systemctl enable zabbix-server
systemctl restart zabbix-server
Restart the apache service.
systemctl restart apache2Open the following port number on ufw firewall.
ufw allow 80/tcp
ufw allow 10050/tcp
ufw allow 10051/tco
Access Zabbix web-interface
http://server-ip/zabbixHere is the output.
- Click on Next step.

- Check pre-requisites.
- Click on Next step.

- Provide the zabbix db details: user-name ,db name & password.
- Click on Next Step.

- Provide the host name.
- Click on Next step.

- Check the configuration parameters.
- Click on Next step.

- zabbix.conf.php file is missing.
- Click on Download the configuration file.
- Set the file path /usr/share/zabbix/conf/zabbix.conf.php.
- Click on Finish.

- zabbix.conf.php file is successfully installed.
- Click on Finish.

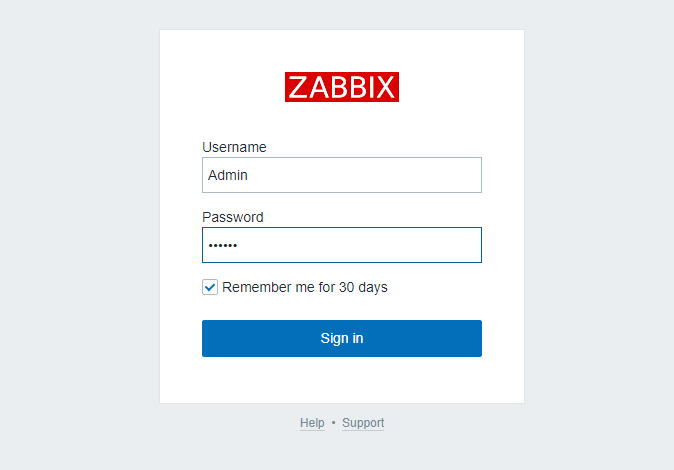
- Login to zabbix server.
- By default,user-name: Admin & Password is zabbix.
- Now Zabbix server is Ready.
