Andreas Bartel
- October 21, 2021
Steps to Setup FileZilla on Ubuntu 20.04 LTS
FileZilla is a free & open source data transfer tool. Filezilla is a ftp client & used for transfer files to and from an FTP site. Using FileZilla, we can also copy, rename, and delete files on the remote FTP server. It provides multiplatform solution supported on Linux, Windows, and MacOS. It supports some protocols such as FTP, SFTP, and FTPS.
There are few steps to setup Filezilla ftp client on ubuntu:
Step 1: Update the System.
apt-get update
Step 2: Install the FileZilla on system.
apt install filezilla
- Check the filezilla version.
filezilla --version
- Here is the command output.
root@ip-172-12-16-176:/home/ubuntu# filezilla --version

Reading locale option from /home/ubuntu/.config/filezilla/filezilla.xml

FileZilla 3.46.3, compiled on 2020-02-08
Step 3: Open the Filezilla.
- Method 1: Run the following command to open FileZilla.
filezilla
- Here is the command output.
root@ip-172-12-16-176:/home/ubuntu# filezilla

Reading locale option from /home/ubuntu/.config/filezilla/filezilla.xml

wxD-Bus: Signal from /org/freedesktop/DBus, member NameAcquired

wxD-Bus: Reply with serial 2

wxD-Bus: Reply to RegisterClient, our object path is /org/gnome/SessionManager/Client32
- Method 2: Open the FIleZilla using GUI.
- Click on Show Application & Then select Filezilla application.
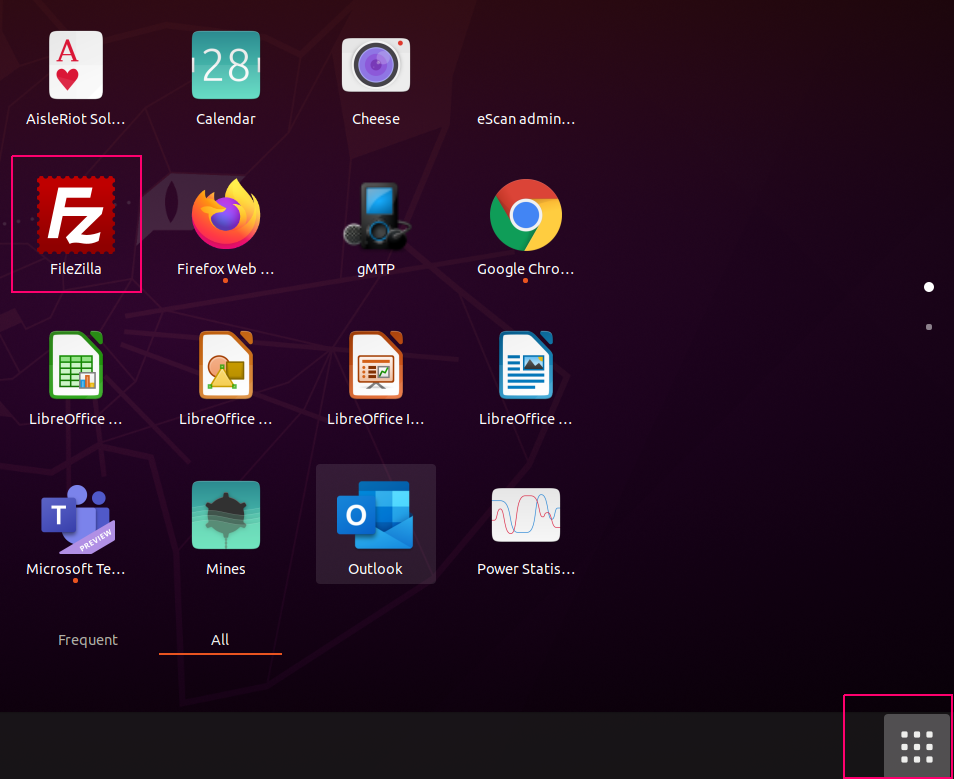
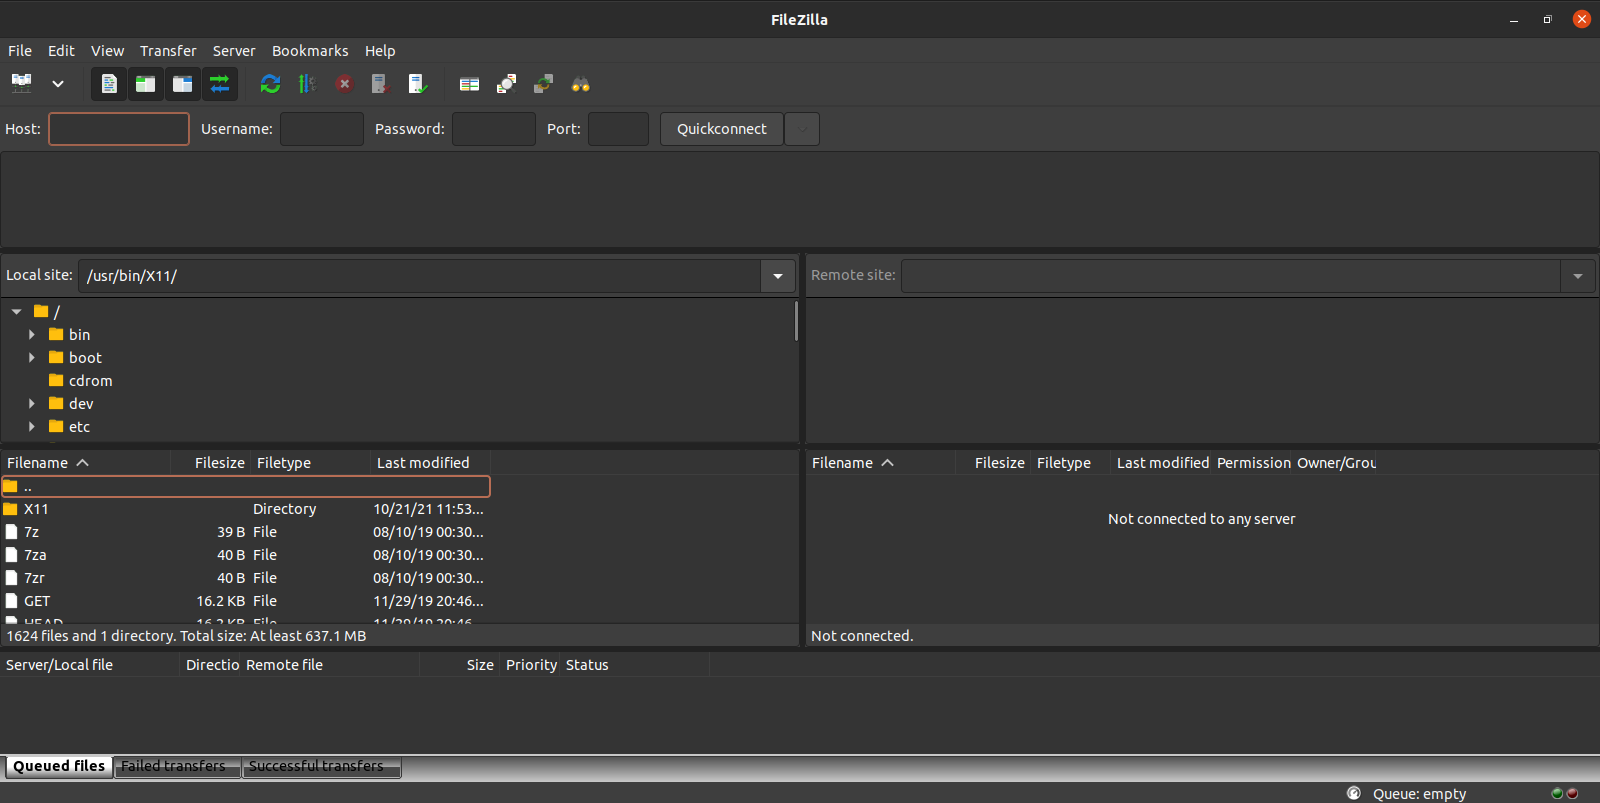
- Now FileZilla is Ready.
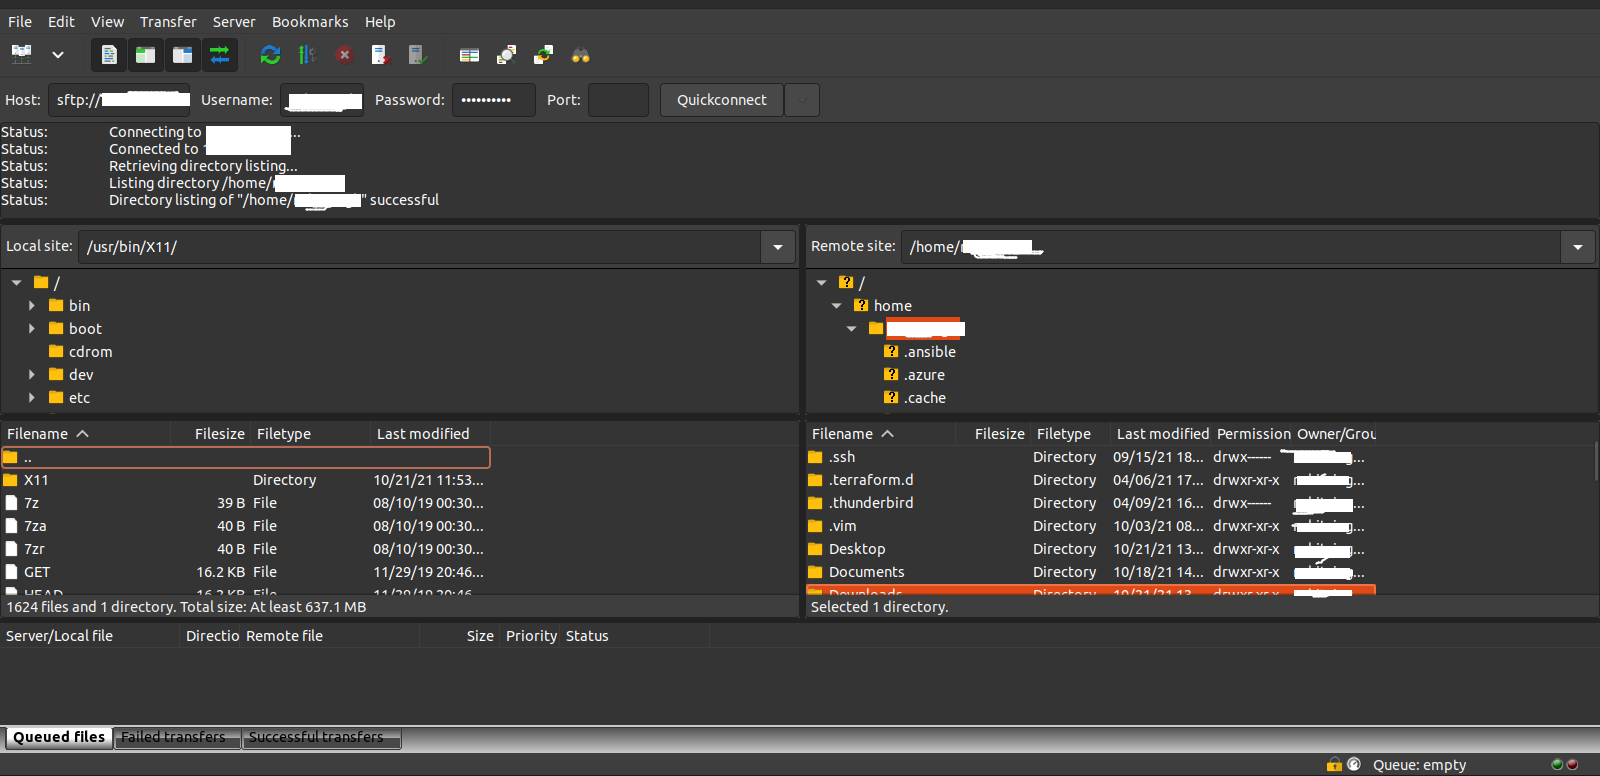
- Connect a Remote machine using FTP.
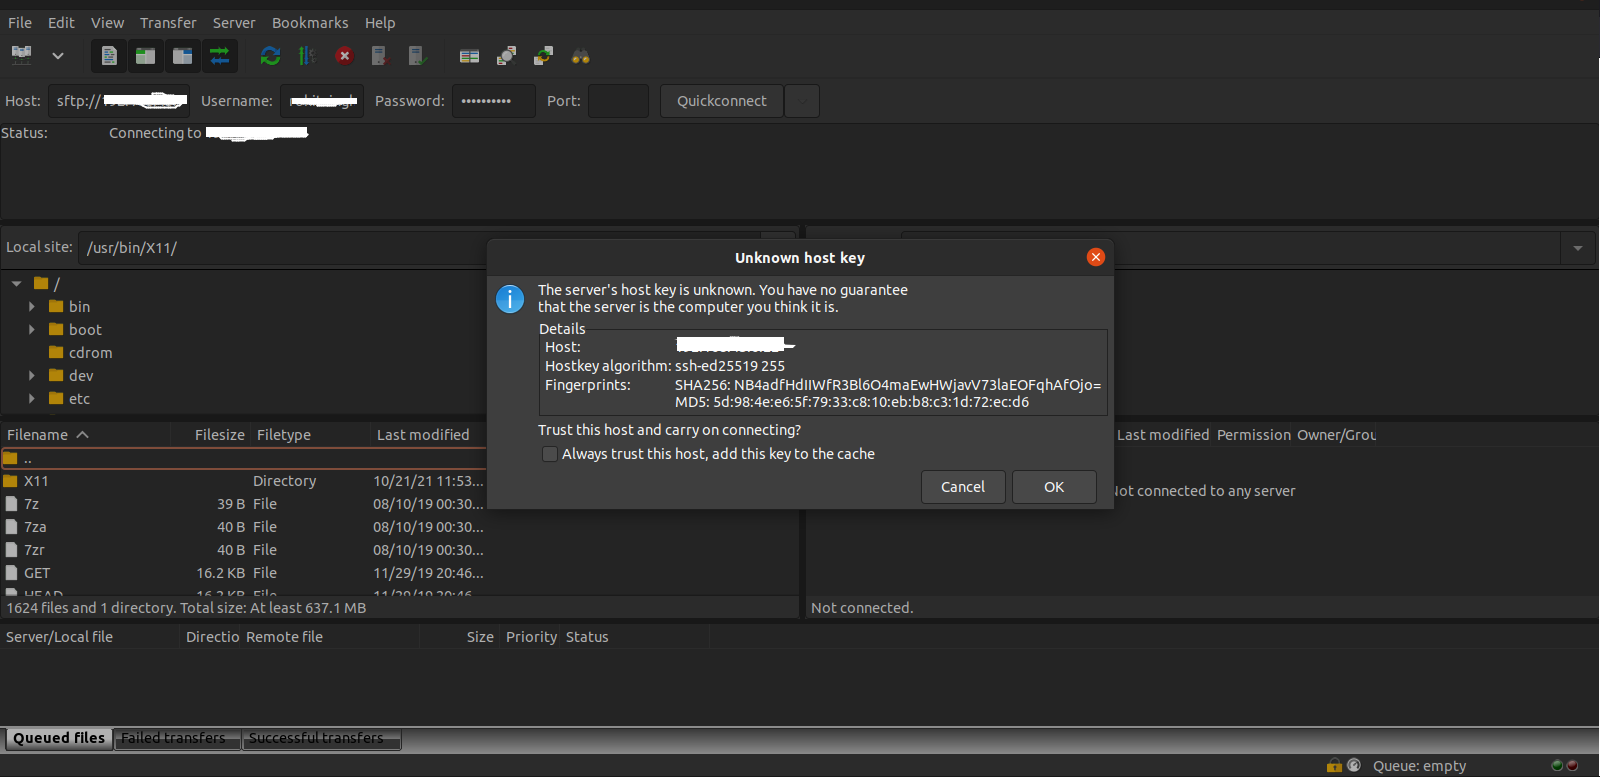
- Provide the Remote machine IP address,username,password & Port number.
- Click on QuickConnect.
- Click on Checkbox “Allow always trust this host,addthis key to the cache”
- Click on OK.
- Remote machine is successfully connected.