Priya
Priya- January 23, 2022
Steps to Install & Configure Salt/SaltStack Master & Minion on Ubuntu 20.04 LTS
Hello, In this Blog we are going to discuss How to Setup Salt master & Salt Minion on Ubuntu server. Salt is a free & open source python-based configuration management platform. Salt Master is used to manage/control a number of Salt minions. We can easily install & configure commands on salt minion from salt master.
There are some steps to install & configure Salt/SaltStack master & minion on Ubuntu:
Prerequisite:
- Two Ubuntu Server with sudo privileges.
Install & Configure Salt Master on Server-1.
Step 1: Update the system.
apt-get update
Step 2: Install Python.
- Add the Repository.
add-apt-repository ppa:deadsnakes/ppa
- Update the packages.
apt-get update
- Run the following command.
apt-get install python3.7
Step 3: Install Salt Master using Salt Bootstrap.
- Salt Bootstrap is a configuration script that automatically detects operating system & set correct repositories.
curl -L https://bootstrap.saltstack.com -o install_salt.sh

sh install_salt.sh -P -M -N
- Here is the command output.
root@ip-172-31-16-66:/home/ubuntu# curl -L https://bootstrap.saltstack.com -o install_salt.sh

% Total   % Received   % Xferd  Average Speed Time Time   Time    Current

Dload Upload Total   Spent   Left   Speed

0      0      0        0      0          0          0            0      --:--:-- --:--:-- --:--:-- 0

100   295k  100 295k 0           0         250k      0     0:00:01 0:00:01 --:--:-- 626k

root@ip-172-31-16-66:/home/ubuntu# sh install_salt.sh -P -M -N

* INFO: Running version: 2021.09.17

* INFO: Executed by: sh

* INFO: Command line: 'install_salt.sh -P -M -N'

* INFO: System Information:

* INFO: CPU: GenuineIntel

* INFO: CPU Arch: x86_64

* INFO: OS Name: Linux

* INFO: OS Version: 5.11.0-1022-aws

* INFO: Distribution: Ubuntu 20.04

* INFO: Installing master

* INFO: Found function install_ubuntu_stable_deps

* INFO: Found function config_salt

* INFO: Found function preseed_master

* INFO: Found function install_ubuntu_stable

....

Processing triggers for libc-bin (2.31-0ubuntu9.2) ...

* INFO: Running install_ubuntu_stable_post()

* INFO: Running install_ubuntu_check_services()

* INFO: Running install_ubuntu_restart_daemons()

* INFO: Running daemons_running()

* INFO: Salt installed!
Step 4: Configure Salt Master.
- Open the salt master configuration file.
vim /etc/salt/master
- By default, the Salt master listens on ports 4505 and 4506 on all interfaces (0.0.0.0).
# The address of the interface to bind to:

#interface: 0.0.0.0
- If we want to to bind Salt to a specific IP, change the “interface” in the master configuration file.
- Change the following line.
interface: ip-address
- Provide the Salt master IP address.
- Restart the salt master service.
systemctl restart salt-master.service
Step 5: Open the following port number in UFW firewall.
ufw allow proto tcp from any to any port 4505,4506
- Here is the command output.
root@ip-172-31-16-66:/home/ubuntu# ufw allow proto tcp from any to any port 4505,4506

Rules updated

Rules updated (v6)
Install & Configure Salt Minions on Server-2
Step 6: Update the system.
apt-get update
Step 7: Install Python.
- Add the Repository.
add-apt-repository ppa:deadsnakes/ppa
- Update the packages.
apt-get update
- Run the following command.
apt-get install python3.7
Step 8: Once Python is installed then run bootstrap script to install salt minion.
curl -L https://bootstrap.saltstack.com -o install_salt.sh

sh install_salt.sh -P
- Here is the command output.
root@ip-172-31-19-108:/home/ubuntu# curl -L https://bootstrap.saltstack.com -o install_salt.sh

% Total % Received % Xferd Average Speed Time Time Time Current

Dload Upload Total Spent Left Speed

0 0 0 0 0 0 0 0 --:--:-- --:--:-- --:--:-- 0

100 295k 100 295k 0 0 237k 0 0:00:01 0:00:01 --:--:-- 237k

root@ip-172-31-19-108:/home/ubuntu# sh install_salt.sh -P

* INFO: Running version: 2021.09.17

* INFO: Executed by: sh

* INFO: Command line: 'install_salt.sh -P'

* INFO: System Information:

* INFO: CPU: GenuineIntel

* INFO: CPU Arch: x86_64

* INFO: OS Name: Linux

* INFO: OS Version: 5.11.0-1022-aws

* INFO: Distribution: Ubuntu 20.04

* INFO: Installing minion

* INFO: Found function install_ubuntu_stable_deps

* INFO: Found function config_salt

* INFO: Found function preseed_master

* INFO: Found function install_ubuntu_stable

* INFO: Found function install_ubuntu_stable_post

* INFO: Found function install_ubuntu_restart_daemons

....

* INFO: Running install_ubuntu_stable_post()

* INFO: Running install_ubuntu_check_services()

* INFO: Running install_ubuntu_restart_daemons()

* INFO: Running daemons_running()

* INFO: Salt installed!
Step 9: Open the Host file.
vim /etc/hosts
- Add the Salt master ip address.
127.0.0.1 localhost

salt-master-ip-address salt
Step 10: Open the following file to set the minion ID.
vim /etc/salt/minion_id
- Provide a salt minion Id name.(Please remove the already mentioned text)
For example : ubuntu-1
Step 11: Now,Go to Salt master server & Run the following command to print the master key fingerprint.
salt-key -F master
- Here is the command output.
root@ip-172-31-16-66:/home/ubuntu# salt-key -F master

Local Keys:

master.pem: 0f:01:d2:67:d5:91:ca:54:17:fb:61:06:a2:56:f4:8d:9a:0f:52:1e:49:4b:bb:16:0b:5a:f8:24:68:ba:9b:ab

master.pub: 64:31:ab:33:84:e1:3b:21:c3:5a:d7:c3:aa:14:0e:3c:cc:2b:5a:ee:88:38:56:d3:f9:1b:cc:3d:4f:43:26:4c
- Copy the master.pub fingerprint.
- Go to Salt minion server.
- Open the /etc/salt/minion file.
vim /etc/salt/minion
- find/search the master_finger & Paste the master.pub key.
# Fingerprint of the master public key to validate the identity of your Salt master

# before the initial key exchange. The master fingerprint can be found by running

# "salt-key -f master.pub" on the Salt master.

master_finger: '64:31:ab:33:84:e1:3b:21:c3:5a:d7:c3:aa:14:0e:3c:cc:2b:5a:ee:88:38:56:d3:f9:1b:cc:3d:4f:43:26:4c'
- Restart the salt minion server.
systemctl restart salt-minion
Step 12: Again Go to Salt Master Server.
- To check Accepted Keys.
salt-key -L
- Here is the command output.
root@ip-172-31-16-66:/home/ubuntu# salt-key -L

Accepted Keys:

Denied Keys:

Unaccepted Keys:

ubuntu-1

Rejected Keys:
- Now Accept the Key on the Salt Master.
salt-key --accept='ubuntu-1'
- Press y.
- Here is the command output.
root@ip-172-31-16-66:/home/ubuntu# salt-key --accept='ubuntu-1'

The following keys are going to be accepted:

Unaccepted Keys:

ubuntu-1

Proceed? [n/Y] y

Key for minion ubuntu-1 accepted.
- Again check Accepted Keys.
salt-key -L
- Here is the command output.
- The key has been successfully added to the Accepted keys list.
root@ip-172-31-16-66:/home/ubuntu# salt-key -L

Accepted Keys:

ubuntu-1

Denied Keys:

Unaccepted Keys:

Rejected Keys:
- If we want to accept for all of the salt Minion servers.
- Run the following command with -A option.
salt-key -A
Step 13: Go to Salt Minion Server & run the following command to check Minion Key Fingerprint.
salt-call --local key.finger
- Here is the command output
root@ip-172-31-19-108:/home/ubuntu# salt-call --local key.finger

local:

1c:2e:46:02:94:12:84:49:3b:c6:90:43:9f:ab:a9:e2:b1:50:93:d3:a7:ed:44:c0:ec:9e:87:23:05:d4:8e:6c
Step 14: Compare this salt Minion Key Fingerprint to the salt Minion Key Fingerprint present on the Salt master server.
- Run the command on salt master server.
salt-key --finger ubuntu-1
- Here is the command output
root@ip-172-31-16-66:/home/ubuntu# salt-key --finger ubuntu-1

Accepted Keys:

ubuntu-1: 1c:2e:46:02:94:12:84:49:3b:c6:90:43:9f:ab:a9:e2:b1:50:93:d3:a7:ed:44:c0:ec:9e:87:23:05:d4:8e:6c
Step 15: Test the Salt Master & Salt Minion Communication.
salt ubuntu-1 test.ping
- Here is the command output
root@ip-172-31-16-66:/home/ubuntu# salt ubuntu-1 test.ping

ubuntu-1:

True
- To test communication between Salt Master and all Salt Minions.
salt '*' test.ping
Step 16: Now Run the commands on Salt Minions From Salt Master Server.
- To check disk space on One or all salt minions.
salt 'ubuntu-1' disk.usage

or

salt '*' disk.usage
- Here is the command output
root@ip-172-31-16-66:/home/ubuntu# salt 'ubuntu-1' disk.usage

ubuntu-1:

----------

/:

----------

1K-blocks:

8065444

available:

6102896

capacity:

25%

filesystem:

/dev/root

used:

1946164

/dev:

----------

1K-blocks:

489496

available:

489496

capacity:

0%

filesystem:

devtmpfs

used:

0

/dev/shm:

----------

1K-blocks:

496100

available:

496020

capacity:

1%

filesystem:

tmpfs

used:

80
- To Install Nginx on Salt minion server.
salt ubuntu-1 pkg.install nginx
- Here is the command output
root@ip-172-31-16-66:/home/ubuntu# salt ubuntu-1 pkg.install nginx

ubuntu-1:

----------

fontconfig-config:

----------

new:

2.13.1-2ubuntu3

old:

fonts-dejavu-core:

----------

new:

2.37-1

old:

libfontconfig1:

----------

new:

2.13.1-2ubuntu3

old:

libgd3:

----------

new:

2.2.5-5.2ubuntu2.1

old:

libjbig0:

----------

new:

2.1-3.1build1

old:

libjpeg-turbo8:

----------
- To run shell commands on salt minions.
salt 'ubuntu-1' cmd.run 'ls -l /etc'

or

salt '*' cmd.run 'ls -l /etc'
- Here is the command output
root@ip-172-31-16-66:/home/ubuntu# salt 'ubuntu-1' cmd.run 'ls -l /etc'

ubuntu-1:

total 820

drwxr-xr-x 3 root root 4096 Nov 29 23:32 NetworkManager

drwxr-xr-x 2 root root 4096 Nov 29 23:33 PackageKit

drwxr-xr-x 4 root root 4096 Nov 29 23:32 X11

drwxr-xr-x 4 root root 4096 Nov 29 23:37 acpi

-rw-r--r-- 1 root root 3028 Nov 29 23:31 adduser.conf

drwxr-xr-x 2 root root 4096 Nov 29 23:33 alternatives

drwxr-xr-x 3 root root 4096 Nov 29 23:32 apparmor

drwxr-xr-x 7 root root 4096 Nov 29 23:33 apparmor.d

drwxr-xr-x 3 root root 4096 Nov 29 23:33 apport

drwxr-xr-x 7 root root 4096 Jan 24 13:46 apt

-rw-r----- 1 root daemon 144 Nov 12 2018 at.deny

-rw-r--r-- 1 root root 2319 Feb 25 2020 bash.bashrc

-rw-r--r-- 1 root root 45 Jan 26 2020 bash_completion

drwxr-xr-x 2 root root 4096 Nov 29 23:33 bash_completion.d

-rw-r--r-- 1 root root 367 Apr 14 2020 bindresvport.blacklist

drwxr-xr-x 2 root root 4096 Apr 22 2020 binfmt.d

drwxr-xr-x 2 root root 4096 Nov 29 23:32 byobu
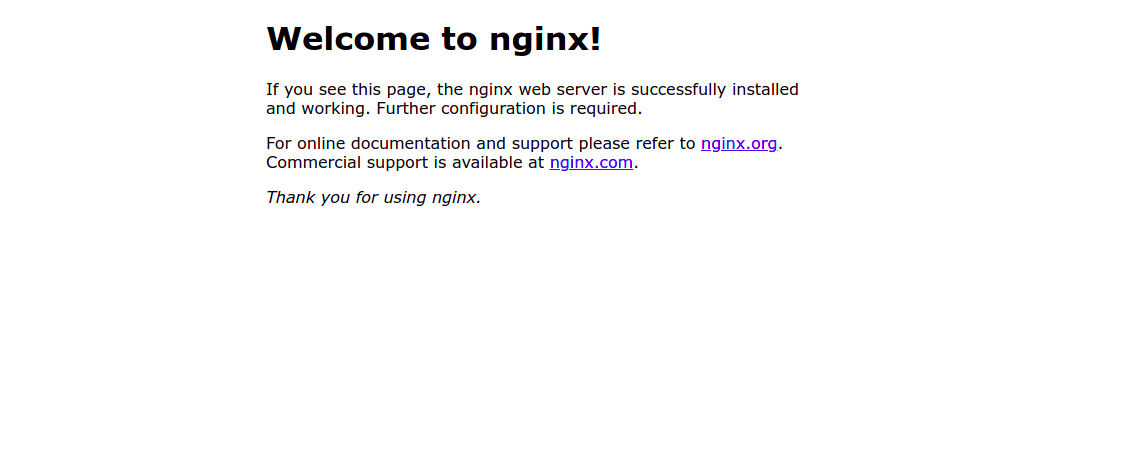
Step 17: Open the Nginx Web interface using Salt minion ip address.
http://server-ip
- Here is the output.