 Andreas Bartel
- March 15, 2022
Steps to Install & Configure Packer on Ubuntu 20.04 LTS
Packer is a free & HashiCorp’s open-source tool. It is used for creating identical machine images from a single configuration file. We can configure packer images with an operating system and application for the specific use-case. Using packer, we can easily build the images for multiple cloud hosting platform.
There are some steps to Install & configure Packer on Ubuntu:
Step 1: Update the System.
apt-get update
Step 2: Install Docker.
apt-get install docker.io
- Start docker service.
systemctl start docker
Step 3: Install Packer on System.
- Add Key.
curl -fsSL https://apt.releases.hashicorp.com/gpg | sudo apt-key add -
- Add the Repository.
apt-add-repository "deb [arch=amd64] https://apt.releases.hashicorp.com $(lsb_release -cs) main"
- Update the packages.
apt-get update
- Install Packer.
apt-get install packer
- Check Packer version.
packer -version
- Here is the command output.

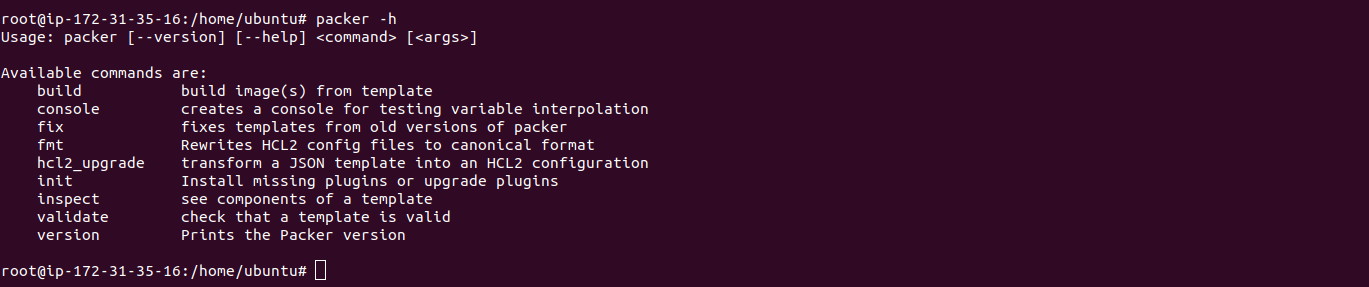
- List the available options in packer.
packer -h
- Here is the command output.
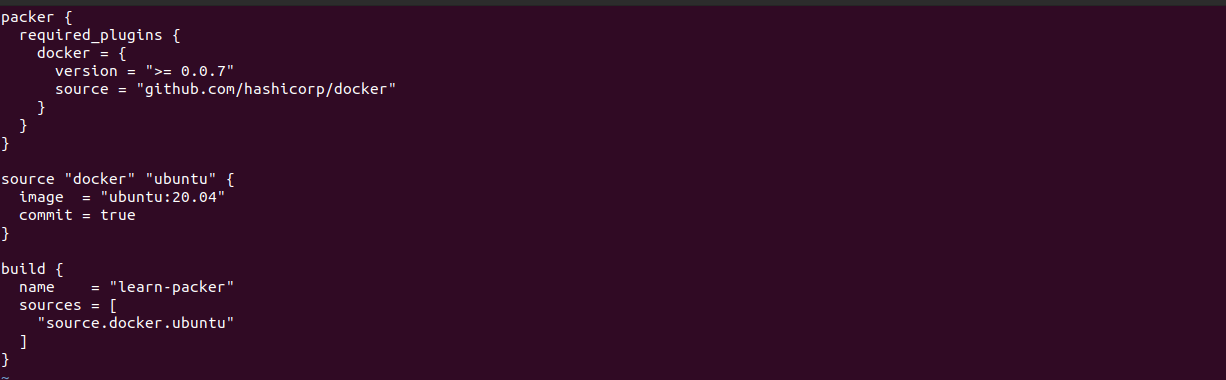
Step 4: Create a Packer Template.
- Create a directory & navigate into the directory.
mkdir project

cd project
- Create a file.
vim docker-ubuntu.pkr.hcl
- Here is the command output.

- Add the following lines:
packer {

required_plugins {

docker = {

version = ">= 0.0.7"

source = "github.com/hashicorp/docker"

}

}

}

source "docker" "ubuntu" {

image = "ubuntu:20.04"

commit = true

}

build {

name = "learn-packer"

sources = [

"source.docker.ubuntu"

]

}
- Here is the output.
Step 5: Now,Run the following commands:
- Initialize the packer configuration.
packer init .
- Here is the command output.

- Validate the file.
packer validate .
- Here is the command output.

- Build the packer image.
packer build docker-ubuntu.pkr.hcl
- Here is the command output.

- List the docker image.
docker images
- Here is the command output.

- Delete the docker image.
docker rmi Image_Id
- Here is the command output.
