 Priya
Priya- August 16, 2021
Step by Step Guide To Install MySQL 8.0 on RHEL 8/7 and CentOS 8/7
MySQL is an open-source free relational database management system (RDBMS).
We will install MySQL step by step.
Step 1 – Download and add below Yum repository as per the Linux distribution system’s repository list.
[For RHEL/Centos 8]
# wget https://repo.mysql.com/mysql80-community-release-el8-1.noarch.rpm
[For RHEL/Centos 7]
# wget https://repo.mysql.com/mysql80-community-release-el7-1.noarch.rpm
Step 2 – Once the package will download we will install downloaded package with below commands.
[For RHEL/Centos 8]
# yum localinstall mysql80-community-release-el8-1.noarch.rpm
[For RHEL/Centos 7]
# yum localinstall mysql80-community-release-el7-1.noarch.rpm
These above commands adds MySQL Yum repository to Linux operating system repository list.
Now we will verify that MySQL repository added successfully with below commands.
# yum repolist enabled | grep "mysql.*-community.*"

Step 3 – Now install MySQL.
# yum install mysql-community-server
Above command will install MySQL server mysql-community-server, mysql-community-client and mysql-community-common
After successful installation of MySQL we need to restart MySQL.
# service mysqld restart
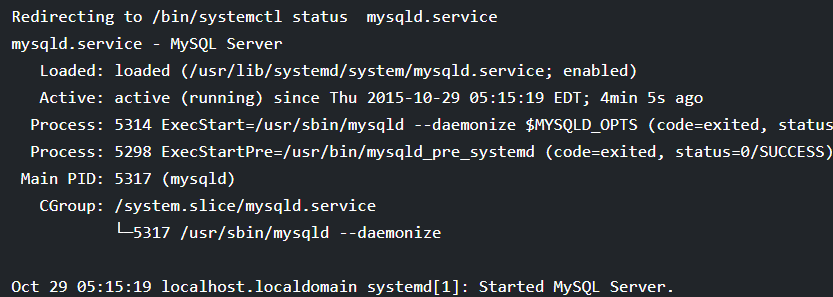
To verify the status of service run below command.
# service mysqld status
Below is the output of above command.
Step 4 – Now check MySQL version.
# mysql --version

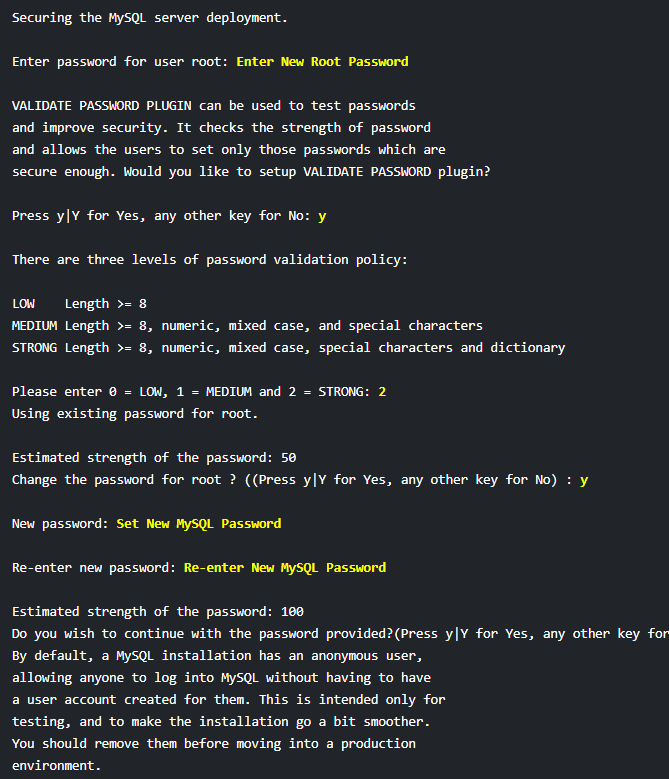
Step 5 – Setting MySQL root password.
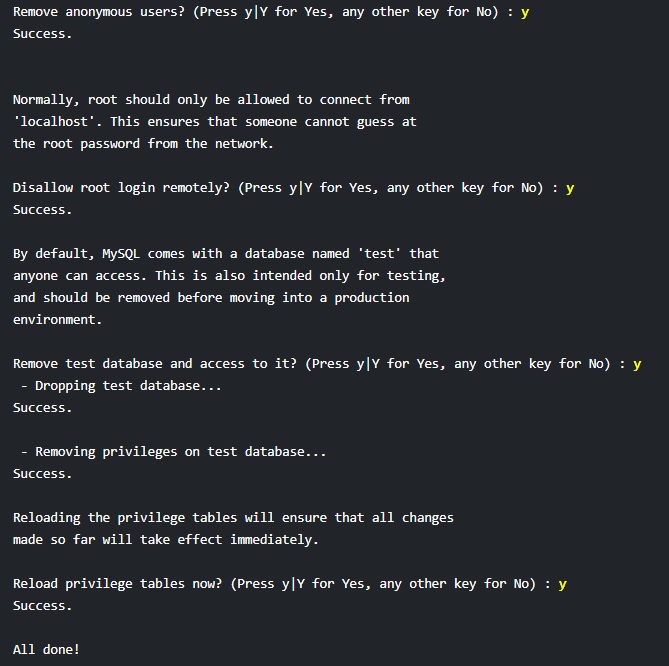
Using mysql_secure_installation we can set the root password, removing anonymous users, removing root login etc.
Use below command to grab password before running MySQL secure command.
# grep 'temporary password' /var/log/mysqld.logOnce will get the password run below command to secure your MySQL installation.
# mysql_secure_installationEnter existing root password which we have got from /var/log/mysqld.log.
Now follow the instruction as shown in screenshot below.
Step 6 – Now connect mysql.
# mysql -u root -p

Its done.