Joshua Mukonyi
- September 1, 2021
Step by Step Guide to Install Ubuntu Server
Introduction
Ubuntu is an is open source Linux Distribution for running application likes such as the web server database server and many more.
The Ubuntu server ISO image can be download from here This is different from the Desktop version since desktop is majorly used on home and school basis tasks such as Word processing etc.
Requirements
GNU/Linux supports the minimum hardware available.
- Atleast 2GB of free storage space
- Having the bootable medium ready that contains Ubuntu server
- USB port or DVD drive.
The medium should be plugged into the machine and start the booting process.
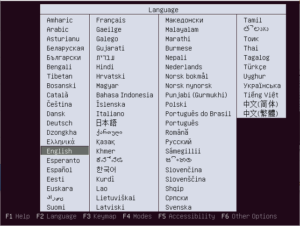
a. On the first image select the Language
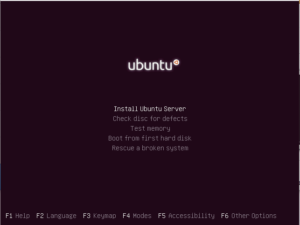
b. Select install Ubuntu server
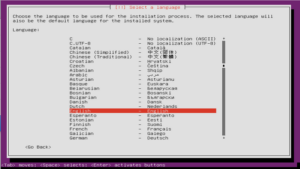
c. Select language again used for installation process. The highlighted part in red is the language to used.
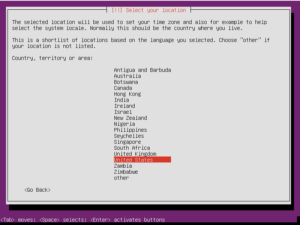
d. Select your current geographical location , it provides list for like all the countries in the world.
e. Configure your keyboard, by default no is select not to detect layout keyboard manually.

f. Choose language for the country.
g. Configure the keyboard by choosing the layout. i.e choose English(US)
– It loads additional components such as partitions manager and many more tools
– It then tries DHCP on the any connected network
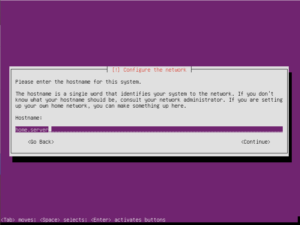
h. Set the host name of the server.
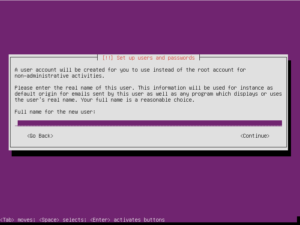
i. Set the users full name and password. The user created will have administrative power instead of the root user who cannot be used on non administrative tasks.
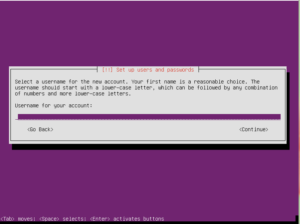
j. Set the username of the administrative account/new account.
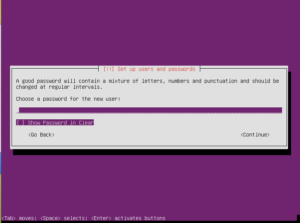
k. Set the password of the user , password is required twice for confirmation. Weak password is supported but not recommended.
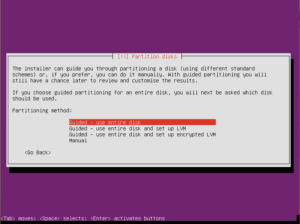
l. Select the partitioning disks, there Four ways, Manual for experts, Guided – use entire disk majorly for beginners. Encryption should be avoided in case failure occurs home directory can be recovered easily.
System can create swap automatically or user should create depending with the method he/she for partitioning.
m. Configure clock and time zone. It can automatically detect your time zone for you is just to accept.
n. Installation begins, all it does is unpack files from kernel to other programs.
o. Configuration of proxies, if you not on any proxy just continue.
p. Software selection, user is expected to select software the server is supposed to run. All can selected and be installed.
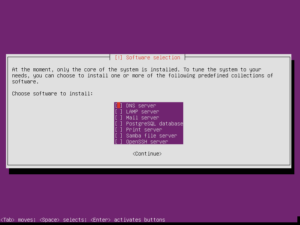
Depending with software to be installed several other configurations can be made
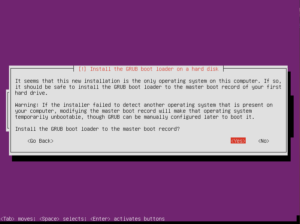
Installation complete with user expected to allow grub (Grand Unified Bootloader) which detects if any other operating systems is available on the hard disk
In conclusion, we have seen the installation of Ubuntu server which has no GUI(Graphical User Interface) but only CUI (Commandline User Interface) which is for experts. For GUI you must download the Ubuntu desktop.