 Priya
Priya- September 6, 2021
Steps to install ClamAV Antivirus Software on Ubuntu 20.04 LTS
ClamAV is a free & open-source antivirus software. It is used for detection of viruses, trojans, and many other types of malware. We can scan the files, directories, emails, personal info,& any kind of malicious files.
There are few steps to install ClamAV on ubuntu:
Step 1: Update the System.
apt-get update
Step 2: Install ClamAV on system.
apt-get install clamav clamav-daemon
- Check the ClamAV version.
clamscan -V
- Here is the command output.

Step 3: Start the ClamAV .
systemctl start clamav-freshclam
- Check the ClamAV status.
systemctl status clamav-freshclam
- Here is the command output.

Step 4: Stop & Update the ClamAV database.Before updating the ClamAV database,we need to stop the ClamAV.
- Stop the ClamAV.
systemctl stop clamav-freshclam
- Download the latest version of ClamAV.
freshclam
- Here is the command output.

- Start & Enable the ClamAV.
systemctl start clamav-freshclam

systemctl enable clamav-freshclam
- List all the database files.
ls /var/lib/clamav/
- Here is the command output.

Step 5: ClamAV syntax & Examples.
clamscan [options] [files-or-directories]
- We can use the following options when scanning the system.
–infected : To display a list of all infected files.

–remove : To removes all infected files from system.

–recursive : To scan all directories and sub-directories.
- For example, scan the /etc directory.
clamscan --infected --remove --recursive /etc
- Here is the command output.

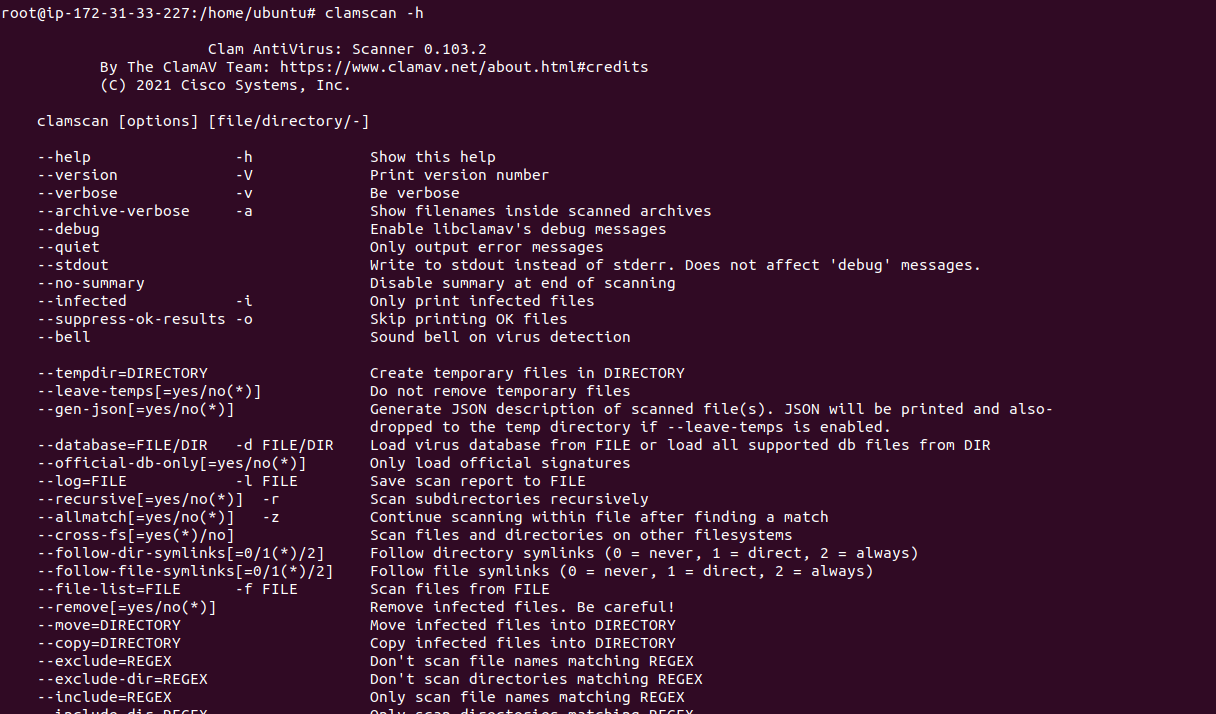
- Run the following command to list all the available options.
clamscan -h
- Here is the command output.
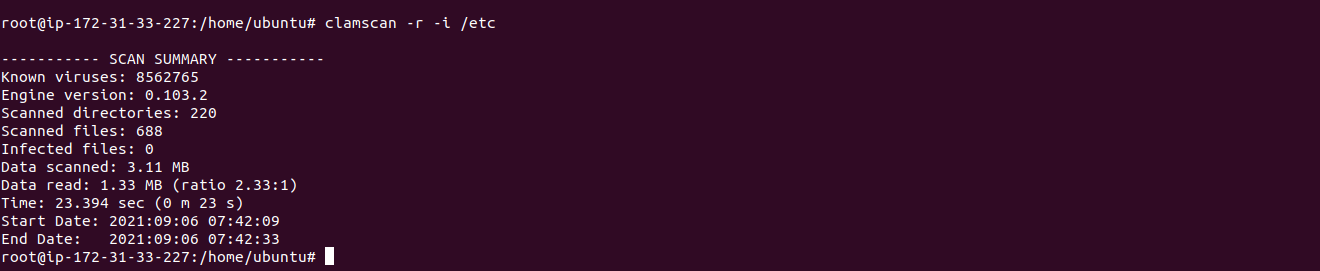
- To Scan the files & show infected files.
clamscan -r -i /[path-to-folder]
- Here is the command output.
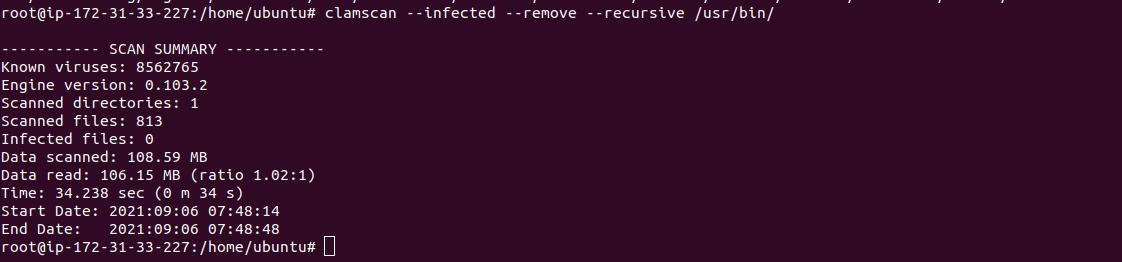
- To scan specific directory recursively and then remove the infected files.
clamscan --infected --remove --recursive /usr/bin
- Here is the command output.
- To scan the infected files and copy infected files to a different directory path.
clamscan -r --move=/[path-to-folder] /[path-to-quarantine-folder]
- To scan the infected files & only send outputs of infected files to a new text file.
clamscan -r /[path-to-folder] | grep FOUND >> /[path-folder]/[file].txt.
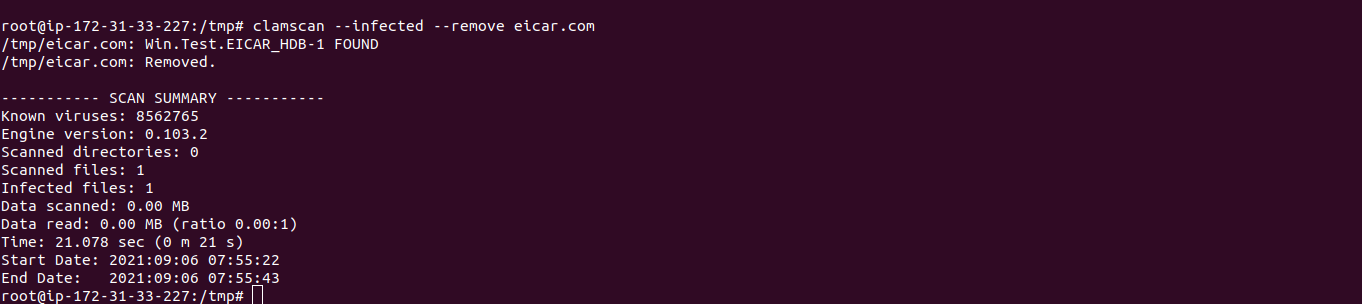
Step 6: Test the ClamAV.Download a test virus & scan the virus using ClamAV software.
cd /tmp

wget http://www.eicar.org/download/eicar.com
- Here is the command output.

clamscan --infected --remove eicar.com
- Here is the command output.
Step 7: Setup a Daily Schedule scanning & send a scan report to mail address.
- Create a bash script.
vim vim /usr/local/bin/clamscan_daily.sh
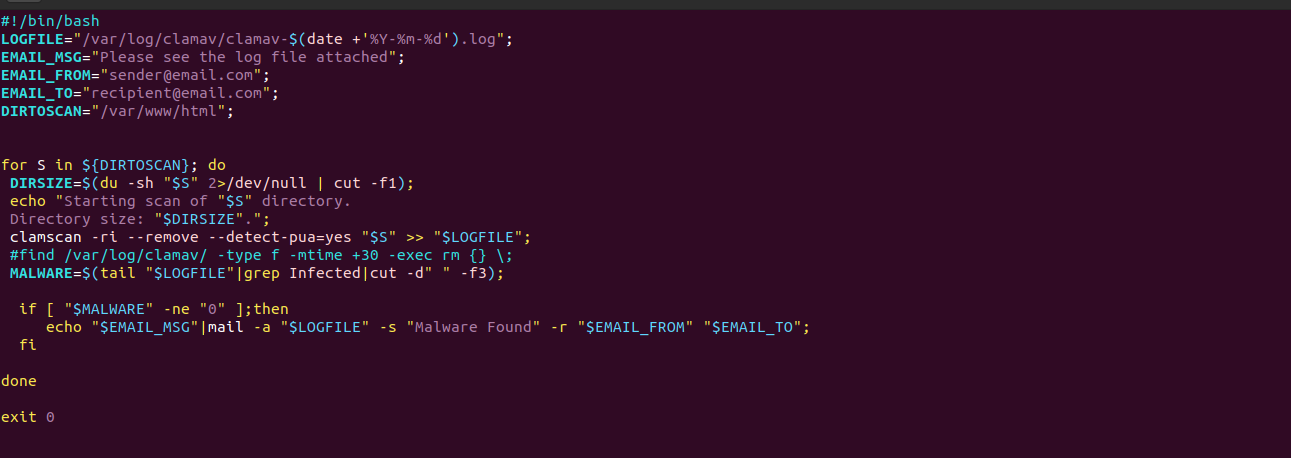
- Add the following lines:
#!/bin/bash

LOGFILE="/var/log/clamav/clamav-$(date +'%Y-%m-%d').log";

EMAIL_MSG="Please see the log file attached";

EMAIL_FROM="sender@email.com";

EMAIL_TO="recipient@email.com";

DIRTOSCAN="/var/www/html";

for S in ${DIRTOSCAN}; do

DIRSIZE=$(du -sh "$S" 2>/dev/null | cut -f1);

echo "Starting scan of "$S" directory.

Directory size: "$DIRSIZE".";

clamscan -ri --remove --detect-pua=yes "$S" >> "$LOGFILE";

#find /var/log/clamav/ -type f -mtime +30 -exec rm {} \;

MALWARE=$(tail "$LOGFILE"|grep Infected|cut -d" " -f3);

if [ "$MALWARE" -ne "0" ];then

echo "$EMAIL_MSG"|mail -a "$LOGFILE" -s "Malware Found" -r "$EMAIL_FROM" "$EMAIL_TO";

fi

done

exit 0
- Here is the command output.
- Provide the following permission to created bash file.
chmod u+x /usr/local/bin/clamscan_daily.sh
- Create a Cron job.
crontab -e
- Add the following lines:
1 1 * * * /usrlocal/bin/clamscan_daily.sh > /dev/null 2>&1
- Create a another bash script for daily scanning purpose.
vim /etc/cron.daily/clamscan_daily
- Add the following lines:
#!/usr/bin/env bash

clamscan -r /usr/bin
- Provide the following permission to created bash file.
chmod +x /etc/cron.daily/clamscan_daily
Step 8: Install ClamTK web interface.
apt-get install clamtk