 shivani singh
- January 2, 2022
Steps to Install & Configure TeamCity on Ubuntu
In this blog we are going to discuss how to install & configure Teamcity on Ubuntu 20.04. Teamcity is a commercial tool & it is a build management and continuous integration server from JetBrains. It is a CI server, written in Java & helps to easily build docker images, and the support of Jira.
There are some steps to install & configure Teamcity on Ubuntu 20.04
Step 1: Update the System.
apt-get update
Step 2: Install JAVA.
apt-get install default-jdk
- Here is the command output.
root@ip-172-31-41-48:/home/ubuntu# apt-get install default-jdk

Reading package lists... Done

Building dependency tree

Reading state information... Done

The following additional packages will be installed:

at-spi2-core ca-certificates-java default-jdk-headless default-jre default-jre-headless

....

0 upgraded, 93 newly installed, 0 to remove and 16 not upgraded.

Need to get 304 MB of archives.

After this operation, 890 MB of additional disk space will be used.

Do you want to continue? [Y/n] y
- Check Java version.
java -version
- Here is the command output.
root@ip-172-31-41-48:/home/ubuntu# java -version

openjdk version "11.0.13" 2021-10-19

OpenJDK Runtime Environment (build 11.0.13+8-Ubuntu-0ubuntu1.20.04)

OpenJDK 64-Bit Server VM (build 11.0.13+8-Ubuntu-0ubuntu1.20.04, mixed mode, sharing)
Step 3: Install PostgreSQL on system.
apt-get install postgresql postgresql-contrib
- Here is the command output.
root@ip-172-31-41-48:/home/ubuntu# apt-get install postgresql postgresql-contrib

Reading package lists... Done

Building dependency tree

Reading state information... Done

The following additional packages will be installed:

libllvm10 libpq5 postgresql-12 postgresql-client-12 postgresql-client-common postgresql-common ssl-cert sysstat

Suggested packages:

postgresql-doc postgresql-doc-12 libjson-perl openssl-blacklist isag

The following NEW packages will be installed:

libllvm10 libpq5 postgresql postgresql-12 postgresql-client-12 postgresql-client-common postgresql-common postgresql-contrib ssl-cert sysstat

0 upgraded, 10 newly installed, 0 to remove and 16 not upgraded.

Need to get 30.6 MB of archives.

After this operation, 122 MB of additional disk space will be used.

Do you want to continue? [Y/n] y
- Login on PostgreSQL console.
sudo -u postgres psql postgres
- Here is the command output.
root@ip-172-31-41-48:/home/ubuntu# sudo -u postgres psql postgres

psql (12.9 (Ubuntu 12.9-0ubuntu0.20.04.1))

Type "help" for help.

postgres=#
- To change the postgres user password.Type the password & Exit.
postgres=# \password postgres

Enter new password:

Enter it again:

postgres=# \q
Step 4: To Create an user and database for TeamCity.
- Login on postgres console.
sudo -u postgres psql
- Create Database.
CREATE DATABASE teamcity;
- Create an user.
CREATE USER user_teamcity WITH ENCRYPTED PASSWORD 'password';
- Provide grant all privileges on database to user.
GRANT ALL PRIVILEGES ON DATABASE teamcity TO user_teamcity;
- Here is the command output.
root@ip-172-31-41-48:/home/ubuntu# sudo -u postgres psql

psql (12.9 (Ubuntu 12.9-0ubuntu0.20.04.1))

Type "help" for help.

postgres=# CREATE DATABASE teamcity;

CREATE DATABASE

postgres=# CREATE USER user_teamcity WITH ENCRYPTED PASSWORD 'password';

CREATE ROLE

postgres=# GRANT ALL PRIVILEGES ON DATABASE teamcity TO user_teamcity;

GRANT

postgres=# \q
Step 5: Download the Teamcity on system.
wget https://download.jetbrains.com/teamcity/TeamCity-2020.1.tar.gz
- Here is the command output.
root@ip-172-31-41-48:/home/ubuntu# wget https://download.jetbrains.com/teamcity/TeamCity-2020.1.tar.gz

--2021-12-28 13:10:14-- https://download.jetbrains.com/teamcity/TeamCity-2020.1.tar.gz

Resolving download.jetbrains.com (download.jetbrains.com)... 52.30.174.243, 54.72.98.183, 2a05:d018:93b:d103:91bc:f335:c907:dd3, ...

Connecting to download.jetbrains.com (download.jetbrains.com)|52.30.174.243|:443... connected.

HTTP request sent, awaiting response... 302 Moved Temporarily

Location: https://download-cdn.jetbrains.com/teamcity/TeamCity-2020.1.tar.gz [following]

--2021-12-28 13:10:15-- https://download-cdn.jetbrains.com/teamcity/TeamCity-2020.1.tar.gz

Resolving download-cdn.jetbrains.com (download-cdn.jetbrains.com)... 65.8.205.113, 65.8.205.40, 65.8.205.47, ...

Connecting to download-cdn.jetbrains.com (download-cdn.jetbrains.com)|65.8.205.113|:443... connected.

HTTP request sent, awaiting response... 200 OK

Length: 1390304590 (1.3G) [binary/octet-stream]

Saving to: ‘TeamCity-2020.1.tar.gz’

TeamCity-2020.1.tar.gz 100%[==================================>] 1.29G 28.2MB/s in 53s

2021-12-28 13:11:09 (24.9 MB/s) - ‘TeamCity-2020.1.tar.gz’ saved [1390304590/1390304590]
- Extract the downloaded folder.
tar -xzf TeamCity-2020.1.tar.gz
- Start the Teamcity.
./TeamCity/bin/runAll.sh start
- Here is the command output.
root@ip-172-31-41-48:/home/ubuntu# ./TeamCity/bin/runAll.sh start

Spawning TeamCity restarter in separate process

TeamCity restarter running with PID 7885

Starting TeamCity build agent...

Java executable is found: '/usr/lib/jvm/default-java/bin/java'

Starting TeamCity Build Agent Launcher...

Agent home directory is /home/ubuntu/TeamCity/buildAgent

Agent Launcher Java runtime version is 11

Lock file: /home/ubuntu/TeamCity/buildAgent/logs/buildAgent.properties.lock

Using no lock

Done [8439], see log at /home/ubuntu/TeamCity/buildAgent/logs/teamcity-agent.log
- Stop the Teamcity.
./TeamCity/bin/runAll.sh stop
Step 6: To open the following port number in UFW firewall.
ufw allow 8111
- Here is the command output.
root@ip-172-31-41-48:/home/ubuntu# ufw allow 8111

Rules updated

Rules updated (v6)
Step 7: Open Teamcity Web interface.
http://server-ip:8111
- Here is the output.
- Teamcity server stores server configuration settings,build results & caches on disk in a data directory so provide a data directory.
- If you have already worked with Teamcity on this local system,we can specify an existing data directory.
- By default, data directory path is /root/.BuildServer.
- Click on Proceed.

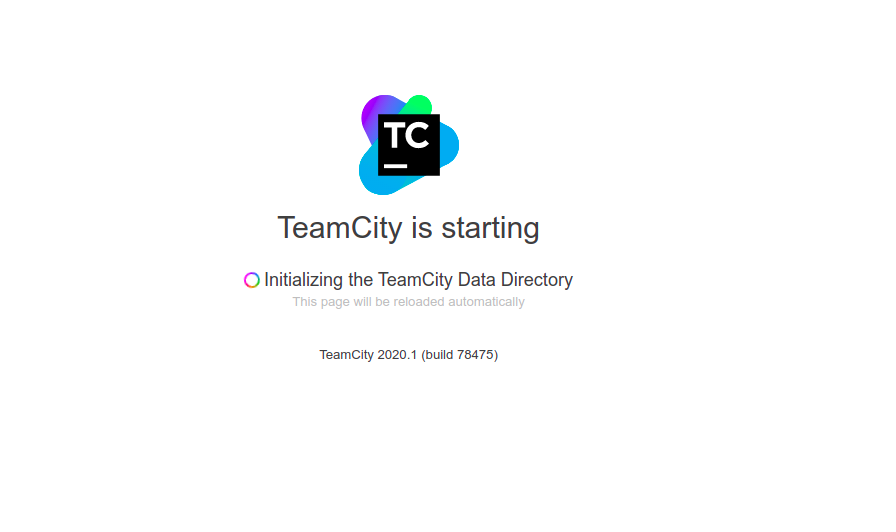
- Initializing the Teamcity Data directory.
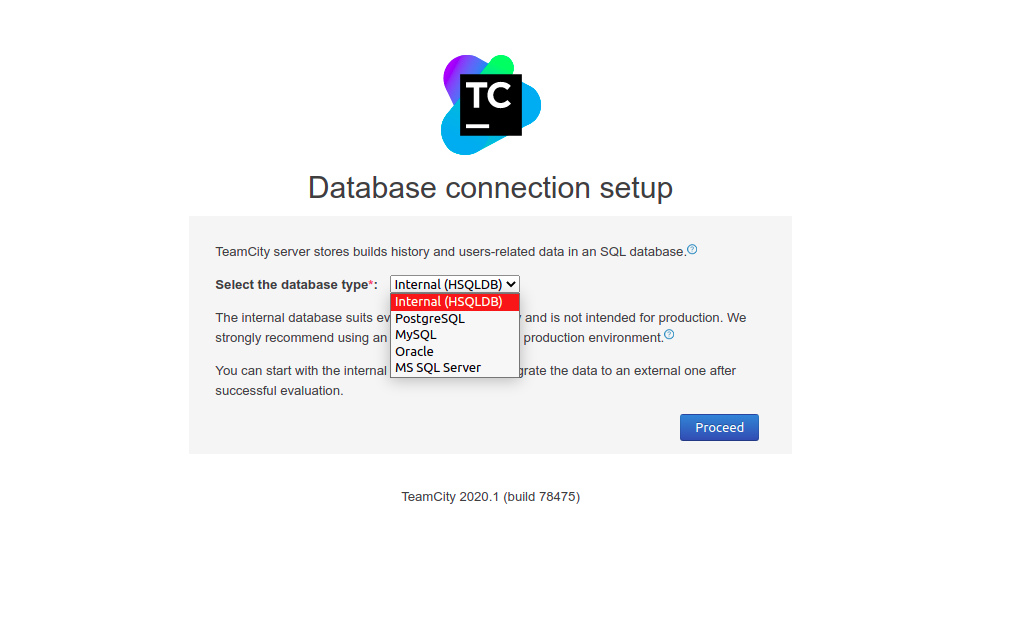
- Setup the Database connection.
- Select the database type.Click on PostgreSQL.
- Click on Proceed.
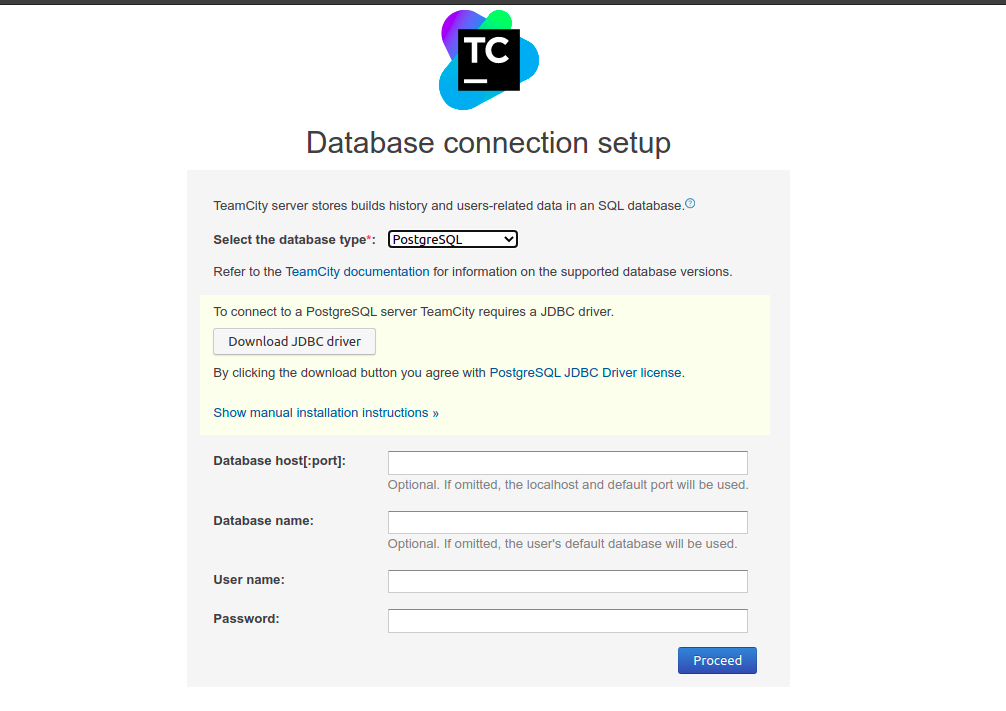
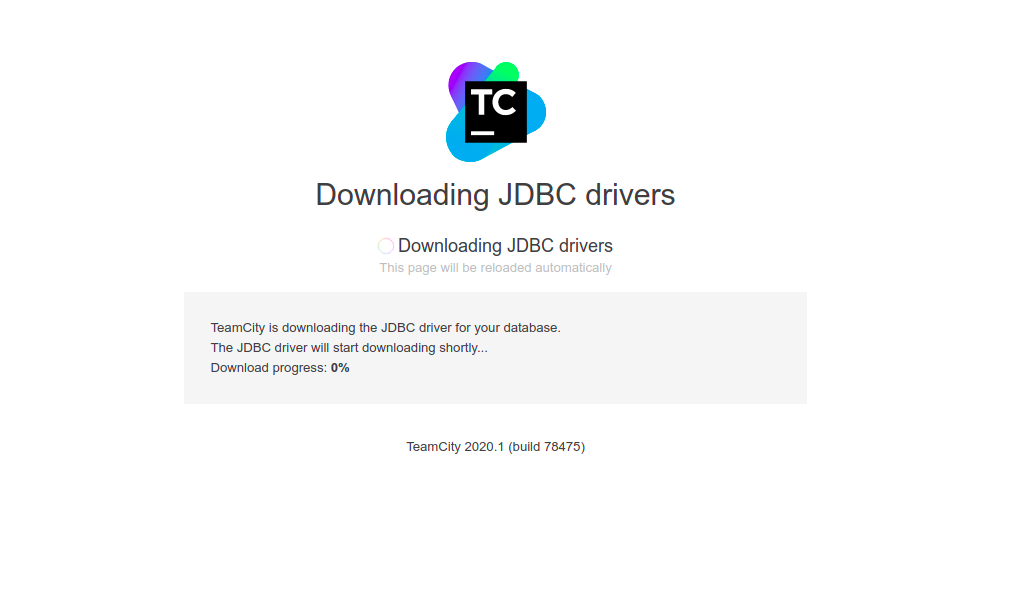
- Click on “Download the JDBC driver”.Teamcity requires a JDBC driver for PostgreSQL server connection.
- Once JDBC driver is downloaded.
- Provide the PostgreSQL Username & password.Database port number & name both are optional.
- Click on Proceed.
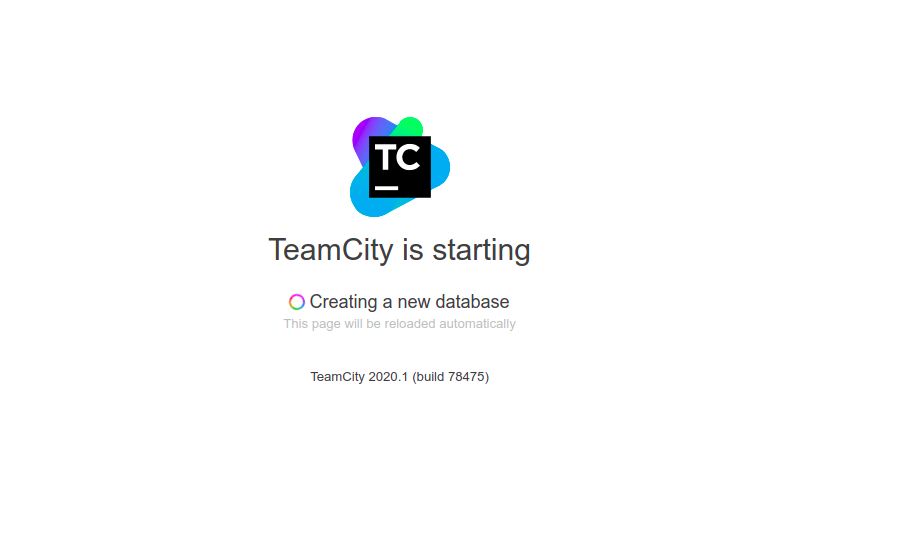
- Teamcity is Ready, to create a new database.
- Then,Initializing Teamcity server components.

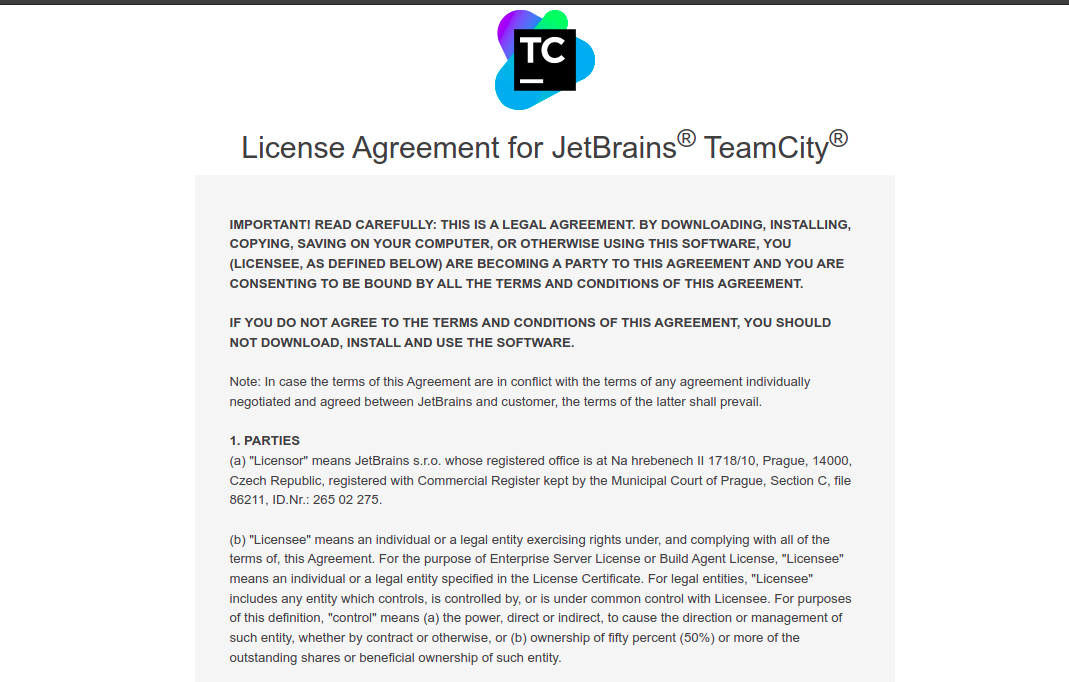
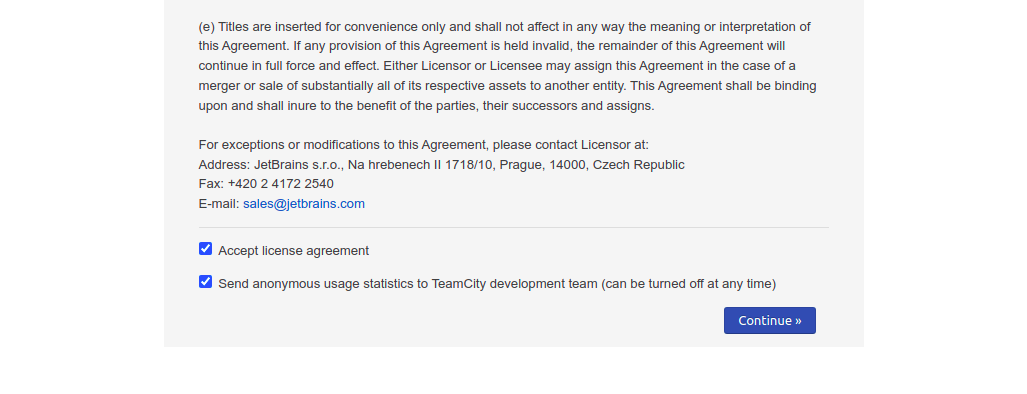
- Accept the License Agreement.
- Click on Continue.
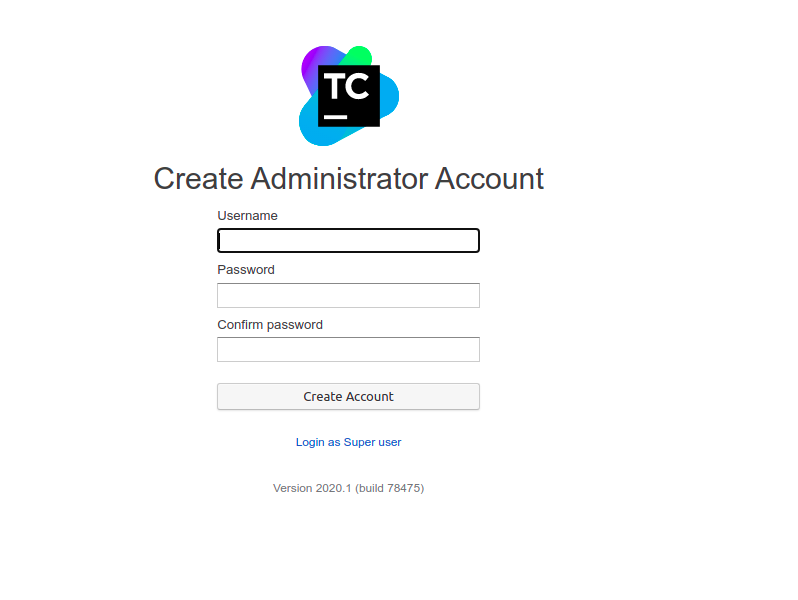
- Create an Administrator Account.
- Provide the Username & password.
- Click on create account.
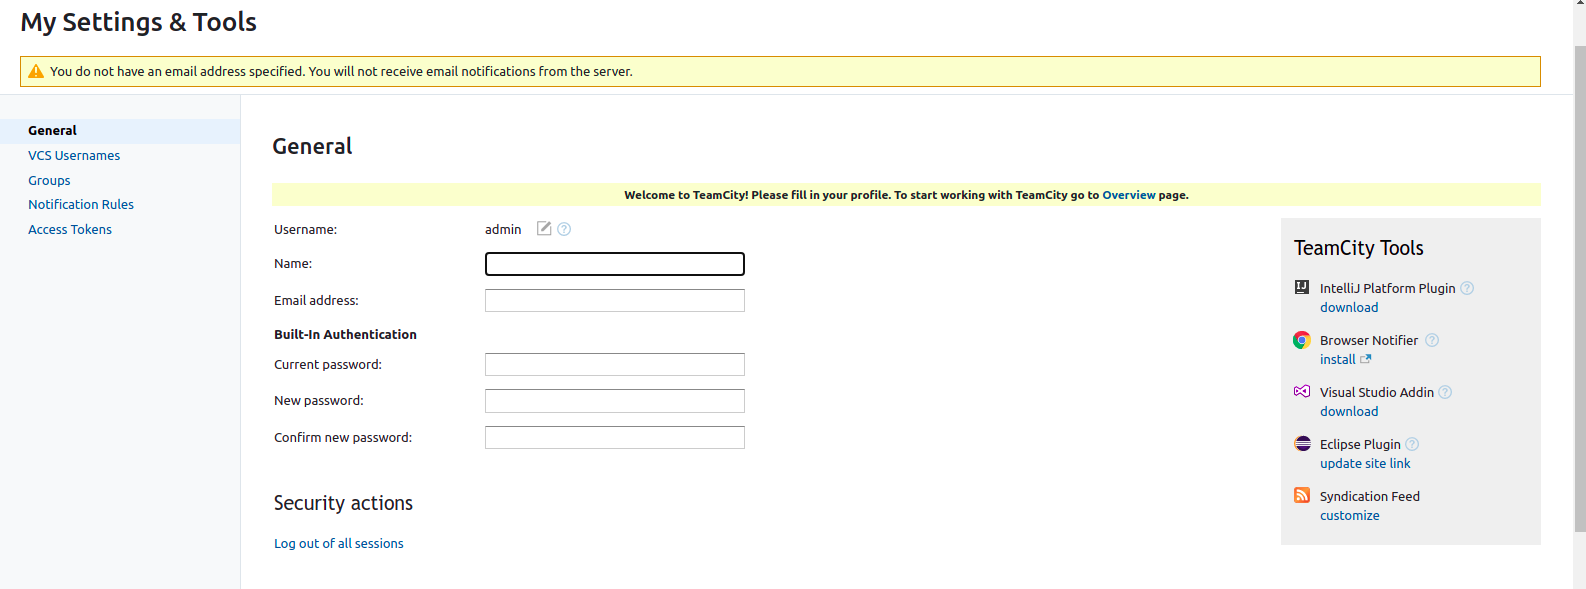
- In My settings & Tools, provide the information like Name,email address,current password & new password.
- Click on Save changes.

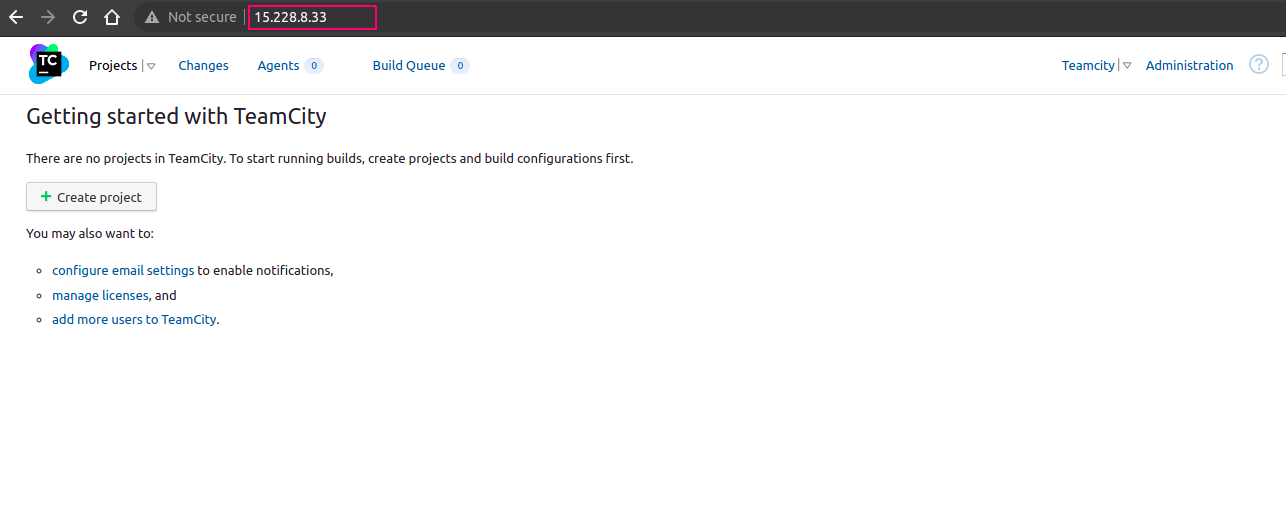
- Teamcity is Ready.
- Now we can easily create a project.
Step 8: Install & configure the web server.
- Install the web server (Nginx).
apt-get install nginx
- Create the configuration file for TeamCity.
vim /etc/nginx/sites-available/teamcity
- Add the following lines:
map $http_upgrade $connection_upgrade {

default upgrade;

'' '';

}

server {

listen 80;

server_name <DOMAIN.COM> www.<DOMAIN.COM>;

proxy_read_timeout 1200;

proxy_connect_timeout 240;

client_max_body_size 0;

location / {

proxy_pass http://localhost:8111/;

proxy_http_version 1.1;

proxy_set_header X-Forwarded-For $remote_addr;

proxy_set_header Host $server_name:$server_port;

proxy_set_header Upgrade $http_upgrade;

proxy_set_header Connection $connection_upgrade;

}

}
- Create a symlink for the new site (TeamCity) .
ln -s /etc/nginx/sites-available/teamcity /etc/nginx/sites-enabled/teamcity
- Delete the default site & symlink that nginx creates.
rm -rf /etc/nginx/sites-available/default

rm -rf /etc/nginx/sites-enabled/default
- Restart nginx.
service nginx restart
Step 9: Now,Open Teamcity on port 80.
http://server-ip
- Here is the output.

Step 10: If we want to configure TeamCity to run automatically.
- Create a new script.
vim /etc/init.d/teamcity
- Add the following lines:
#!/bin/sh

### BEGIN INIT INFO

# Provides: TeamCity autostart

# Required-Start: $remote_fs $syslog

# Required-Stop: $remote_fs $syslog

# Default-Start: 2 3 4 5

# Default-Stop: 0 1 6

# Short-Description: Start teamcity daemon at boot time

# Description: Enable service provided by daemon.

#####

# /etc/init.d/teamcity - startup script for teamcity

### END INIT INFO

# Ensure you enter the right user name that TeamCity will run under

USER="root" ## CHANGE THIS USER NAME TO MATCH YOUR USERNAME

case $1 in

start)

start-stop-daemon --start -c $USER --exec /home/ubuntu/TeamCity/bin/teamcity-server.sh start

;;

stop)

start-stop-daemon --start -c $USER --exec /home/ubuntu/TeamCity/bin/teamcity-server.sh stop

;;

esac

exit 0
- Stop the Teamcity.
./TeamCity/bin/teamcity-server.sh stop
- Provide the following permissions to the new script file.
chmod +x /etc/init.d/teamcity

update-rc.d teamcity defaults
- Start the Teamcity.
/etc/init.d/teamcity start
- Here is the command output.
root@ip-172-31-41-48:/home/ubuntu# chmod +x /etc/init.d/teamcity

root@ip-172-31-41-48:/home/ubuntu# update-rc.d teamcity defaults

root@ip-172-31-41-48:/home/ubuntu# /etc/init.d/teamcity start

Spawning TeamCity restarter in separate process

TeamCity restarter running with PID 15124