shivani singh
- January 25, 2022
Steps to Install & Configure Apache Subversion on Ubuntu 20.04 LTS
In this blog we are going to discuss about for Apache Subversion. Apache Subversion is a free & open source software, written in Java. It is a version control based released under the Apache License. Using SVN, we can manage and track changes to code and assets across projects. It supports SVN, SVN+SSH, HTTP, and HTTPS protocols.
Prerequisite:
- Ubuntu system with Sudo Privileges.
There are some steps to install & configure Apache Subversion(SVN) on Ubuntu:
Step 1: Update the System.
apt-get update
Step 2: Install Apache2.
apt install apache2 apache2-utils
- Start & Enable the Apache2 service.
systemctl start apache2.service

systemctl enable apache2.service
- Here is the command output.
root@ip-172-31-18-43:/home/ubuntu# systemctl start apache2.service

root@ip-172-31-18-43:/home/ubuntu# systemctl enable apache2.service

Synchronizing state of apache2.service with SysV service script with /lib/systemd/systemd-sysv-install.

Executing: /lib/systemd/systemd-sysv-install enable apache2
Step 3: Install SVN & Dependencies.
apt-get install subversion libapache2-mod-svn subversion-tools libsvn-dev
- Here is the command output.
root@ip-172-31-18-43:/home/ubuntu# apt-get install subversion libapache2-mod-svn subversion-tools libsvn-dev

Reading package lists... Done

Building dependency tree

Reading state information... Done

The following additional packages will be installed:

libapr1-dev libaprutil1-dev libc-dev-bin libc6-dev libconfig-inifiles-perl libcrypt-dev libexpat1-dev libldap2-dev libpython2-stdlib libpython2.7-minimal

libpython2.7-stdlib libsctp-dev libsctp1 libserf-1-1 libsvn-perl libsvn1 liburi-perl libutf8proc2 linux-libc-dev manpages-dev postfix python-subversion python2

python2-minimal python2.7 python2.7-minimal uuid-dev

Suggested packages:

db5.3-util python glibc-doc lksctp-tools libserf-dev libsvn-doc zlib1g-dev libwww-perl procmail postfix-mysql postfix-pgsql postfix-ldap postfix-pcre postfix-lmdb

postfix-sqlite sasl2-bin | dovecot-common resolvconf postfix-cdb mail-reader postfix-doc python2-doc python-tk python2.7-doc binutils binfmt-support ruby-svn svn2cl

The following NEW packages will be installed:

libapache2-mod-svn libapr1-dev libaprutil1-dev libc-dev-bin libc6-dev libconfig-inifiles-perl libcrypt-dev libexpat1-dev libldap2-dev libpython2-stdlib libpython2.7-minimal

libpython2.7-stdlib libsctp-dev libsctp1 libserf-1-1 libsvn-dev libsvn-perl libsvn1 liburi-perl libutf8proc2 linux-libc-dev manpages-dev postfix python-subversion python2

python2-minimal python2.7 python2.7-minimal subversion subversion-tools uuid-dev

0 upgraded, 31 newly installed, 0 to remove and 37 not upgraded.

Need to get 18.4 MB of archives.

After this operation, 99.3 MB of additional disk space will be used.

Do you want to continue? [Y/n] y
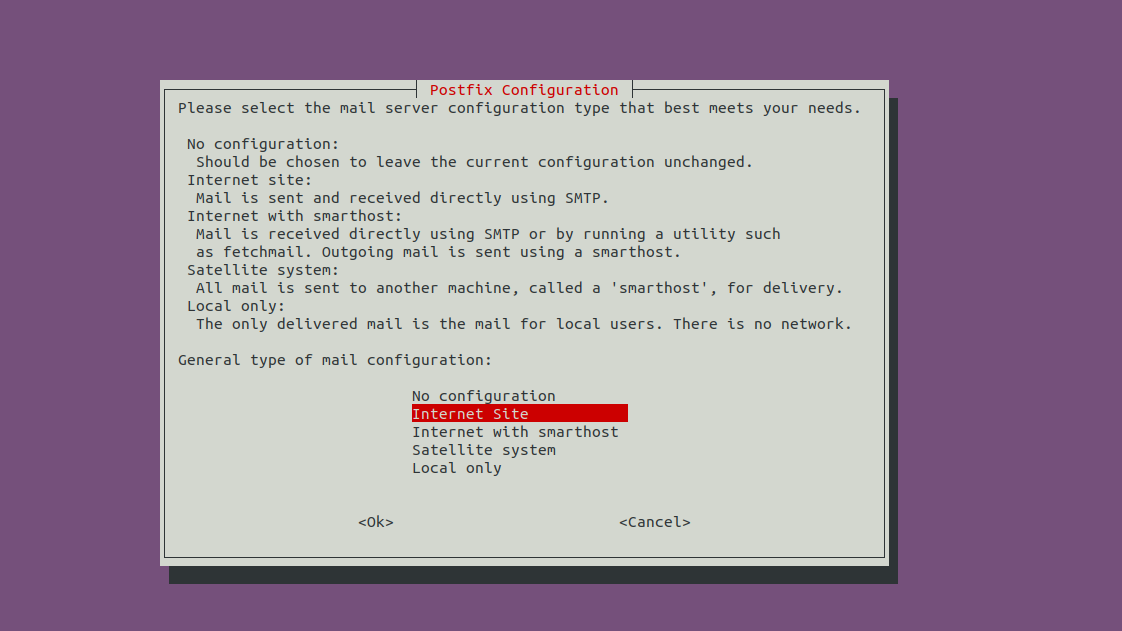
- Configure the Postfix.
- Select Internet Site & Click ok.
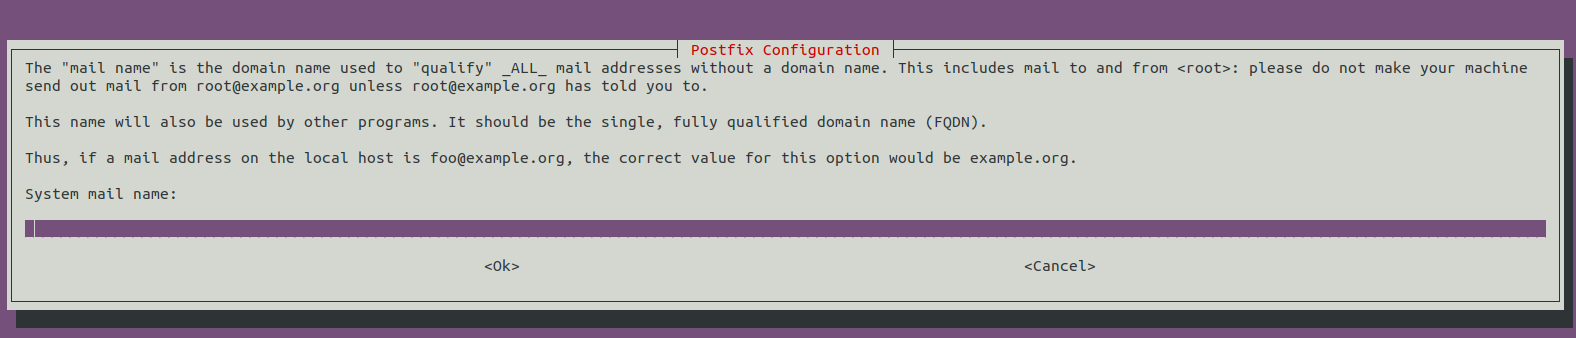
- Provide the System Mail Name & Click ok.
- Enable the Apache2 module to run SVN.
a2enmod dav

a2enmod dav_svn
- Restart the apache2 service.
service apache2 restart
- Here is the command output.
root@ip-172-31-18-43:/home/ubuntu# a2enmod dav

Module dav already enabled

root@ip-172-31-18-43:/home/ubuntu# a2enmod dav_svn

Considering dependency dav for dav_svn:

Module dav already enabled

Module dav_svn already enabled

root@ip-172-31-18-43:/home/ubuntu# service apache2 restart

root@ip-172-31-18-43:/home/ubuntu#
Step 4: Configure Apache2 service for SVN.
- Open the following config file.
vim /etc/apache2/mods-enabled/dav_svn.conf
- Add the following lines:
<Location /svn>

DAV svn

SVNParentPath /var/www/svn

AuthType Basic

AuthName "Subversion Repository"

AuthUserFile /etc/apache2/dav_svn.passwd

Require valid-user

</Location>
- Now Create the Repository & Provide the permission.
mkdir /var/www/svn

svnadmin create /var/www/svn/project

chown -R www-data:www-data /var/www/svn

chmod -R 775 /var/www/svn
Step 5: Create SVN User Account.
- Provide the username admin.
htpasswd -cm /etc/apache2/dav_svn.passwd admin
- Provide the password.
- Here is the command output.
root@ip-172-31-41-136:/home/ubuntu# mkdir /var/www/svn

root@ip-172-31-41-136:/home/ubuntu# svnadmin create /var/www/svn/project

root@ip-172-31-41-136:/home/ubuntu# chown -R www-data:www-data /var/www/svn

root@ip-172-31-41-136:/home/ubuntu# chmod -R 775 /var/www/svn

root@ip-172-31-41-136:/home/ubuntu# htpasswd -cm /etc/apache2/dav_svn.passwd admin

New password:

Re-type new password:

Adding password for user admin
- Restart the apache2 service.
systemctl restart apache2
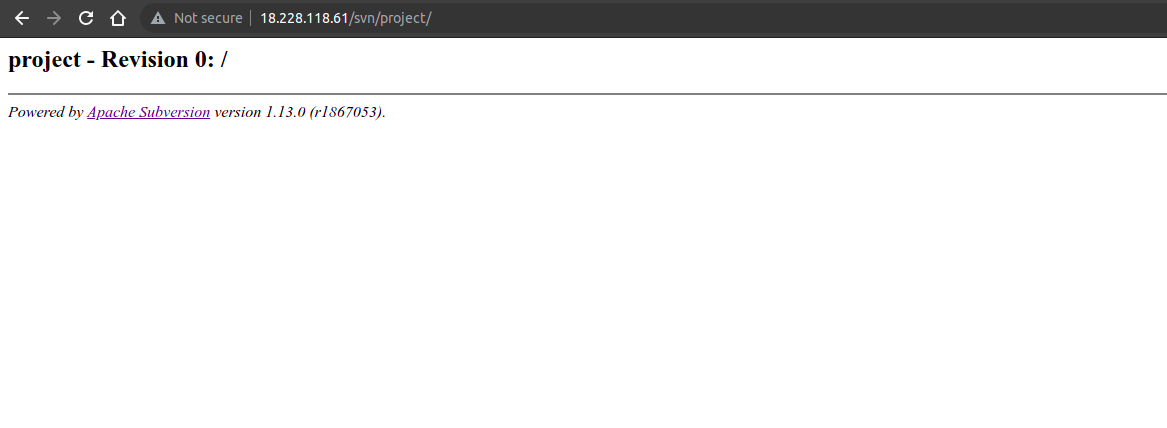
Step 6: Open Apache Subversion Web Interface.
http://server-ip/svn/project
- Here is the output.
- Provide the Username & Password.
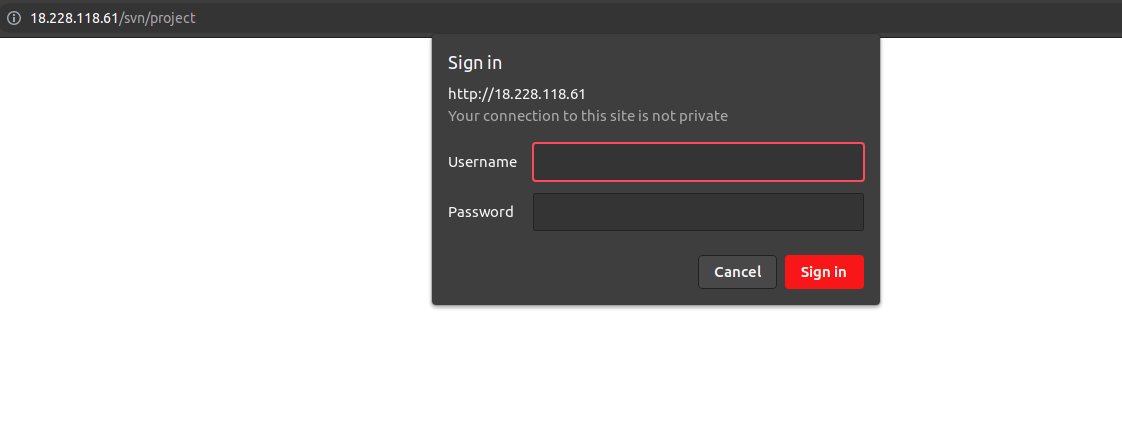
- Now Apache Subversion is Ready.