Gaurav Batra
- February 4, 2022
Steps to Install & Configure Django on Ubuntu 20.04 LTS
Django is a free & open source Python Web framework tool. It is used for Building dynamic websites and applications. Using Django,we can easily create a python web application.
Prerequisites:
- Ubuntu system with Sudo Privileges.
There are some steps to Setup Django on Ubuntu:
Step 1: Update the System.
apt-get update
Step 2: No need to install Python on Ubuntu 20.04.So check python version.
python3 -V
- Here is the command output.
root@ip-172-31-25-227:/home/ubuntu# python3 -V

Python 3.8.10
- Install pip3.
apt-get install python3-pip
- Check pip3 version.
pip3 -V
- Here is the command output.
root@ip-172-31-25-227:/home/ubuntu# pip3 -V

pip 20.0.2 from /usr/lib/python3/dist-packages/pip (python 3.8)
Step 3: Install Django using pip3 on system.
pip3 install Django
- Here is the command output.
root@ip-172-31-25-227:/home/ubuntu# pip3 install Django

Collecting Django

Downloading Django-4.0.2-py3-none-any.whl (8.0 MB)

|████████████████████████████████| 8.0 MB 31.2 MB/s

Collecting asgiref<4,>=3.4.1

Downloading asgiref-3.5.0-py3-none-any.whl (22 kB)

Collecting backports.zoneinfo; python_version < "3.9"

Downloading backports.zoneinfo-0.2.1-cp38-cp38-manylinux1_x86_64.whl (74 kB)

|████████████████████████████████| 74 kB 3.2 MB/s

Collecting sqlparse>=0.2.2

Downloading sqlparse-0.4.2-py3-none-any.whl (42 kB)

|████████████████████████████████| 42 kB 1.3 MB/s

Installing collected packages: asgiref, backports.zoneinfo, sqlparse, Django

Successfully installed Django-4.0.2 asgiref-3.5.0 backports.zoneinfo-0.2.1 sqlparse-0.4.2
- Check Django version.
django-admin --version
- Here is the command output.
root@ip-172-31-25-227:/home/ubuntu# django-admin --version

4.0.2
Step 4: Create a Simple Application.
- Change the directory where we want to create a new application.
mkdir -p /var/www && cd /var/www
- Now create a application.
django-admin startproject django_app
- Change the directory.
cd django_app
- To migrate the database.
python3 manage.py migrate
- Here is the command output.
root@ip-172-31-25-227:/home/ubuntu# mkdir -p /var/www && cd /var/www

root@ip-172-31-25-227:/var/www# django-admin startproject django_app

root@ip-172-31-25-227:/var/www# cd django_app

root@ip-172-31-25-227:/var/www/django_app# python3 manage.py migrate

Operations to perform:

Apply all migrations: admin, auth, contenttypes, sessions

Running migrations:

Applying contenttypes.0001_initial... OK

Applying auth.0001_initial... OK

Applying admin.0001_initial... OK

Applying admin.0002_logentry_remove_auto_add... OK

Applying admin.0003_logentry_add_action_flag_choices... OK

Applying contenttypes.0002_remove_content_type_name... OK

Applying auth.0002_alter_permission_name_max_length... OK

Applying auth.0003_alter_user_email_max_length... OK

Applying auth.0004_alter_user_username_opts... OK

Applying auth.0005_alter_user_last_login_null... OK

Applying auth.0006_require_contenttypes_0002... OK

Applying auth.0007_alter_validators_add_error_messages... OK

Applying auth.0008_alter_user_username_max_length... OK

Applying auth.0009_alter_user_last_name_max_length... OK

Applying auth.0010_alter_group_name_max_length... OK

Applying auth.0011_update_proxy_permissions... OK

Applying auth.0012_alter_user_first_name_max_length... OK

Applying sessions.0001_initial... OK
Step 5: Create a User for Django Application.
python3 manage.py createsuperuser
- Provide the username,email-address & password.
- Here is the command output.
root@ip-172-31-25-227:/var/www/django_app# python3 manage.py createsuperuser

Username (leave blank to use 'root'): admin

Email address: admin@domain.com

Password:

Password (again):

Superuser created successfully.
Step 6: To allow external hosts, so Open the Setting file.
vi django_app/settings.py
- Provide the server-IP.
ALLOWED_HOSTS = ['server_IP']
For example:
ALLOWED_HOSTS = ['54.233.126.109']
- Open the following port number in UFW firewall.
ufw allow 8000
- Here is the command output.
root@ip-172-31-25-227:/var/www/django_app# ufw allow 8000

Rules updated

Rules updated (v6)
- Run the Application.
python3 manage.py runserver 0.0.0.0:8000
- Here is the command output.
root@ip-172-31-25-227:/var/www/django_app# python3 manage.py runserver 0.0.0.0:8000

Watching for file changes with StatReloader

Performing system checks...

System check identified no issues (0 silenced).

February 03, 2022 - 06:35:56

Django version 4.0.2, using settings 'django_app.settings'

Starting development server at http://0.0.0.0:8000/

Quit the server with CONTROL-C.

[03/Feb/2022 06:36:13] "GET / HTTP/1.1" 200 10697

[03/Feb/2022 06:36:13] "GET /static/admin/css/fonts.css HTTP/1.1" 200 423

[03/Feb/2022 06:36:15] "GET /static/admin/fonts/Roboto-Light-webfont.woff HTTP/1.1" 200 85692

[03/Feb/2022 06:36:15] "GET /static/admin/fonts/Roboto-Regular-webfont.woff HTTP/1.1" 200 85876
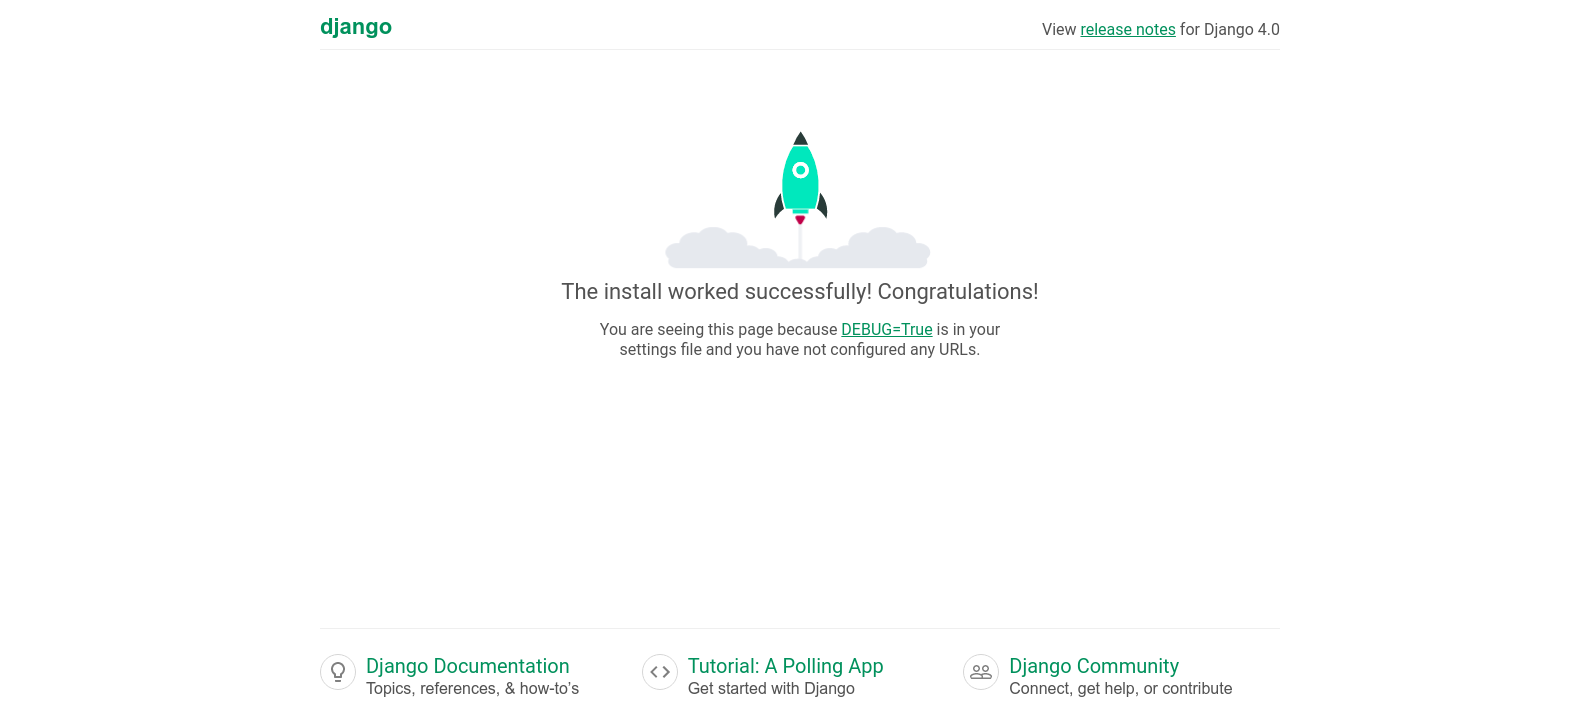
Step 7: Open the Django web interface using URL.
http://server-ip:8000
- Here is the output.
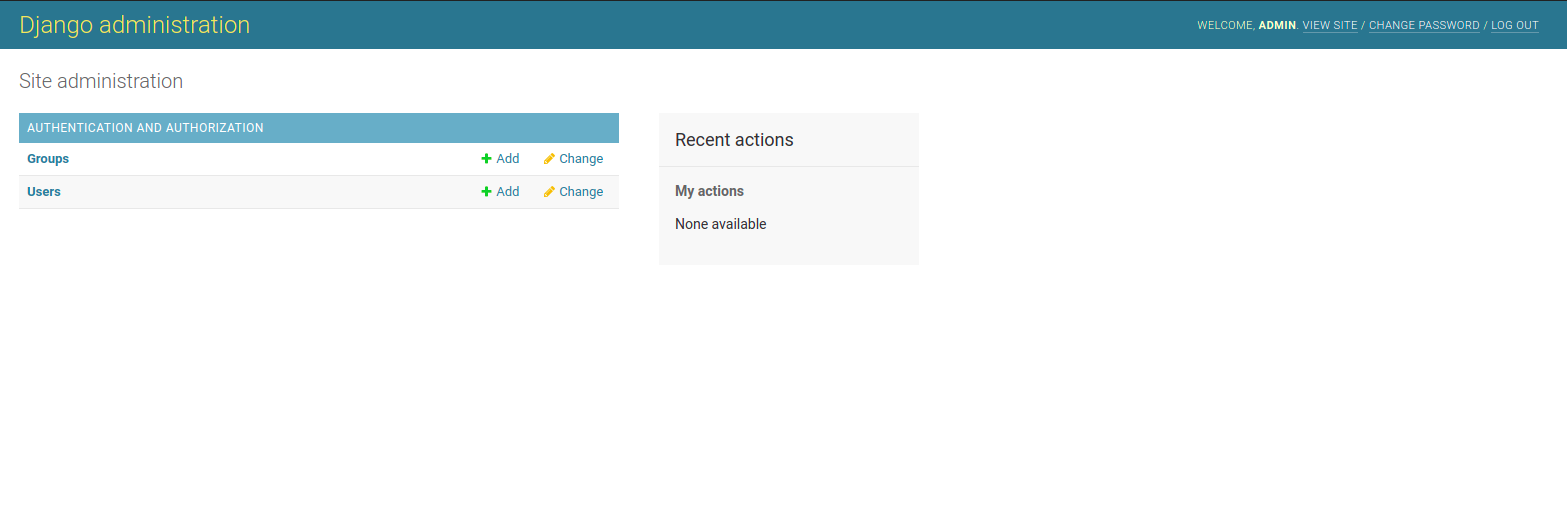
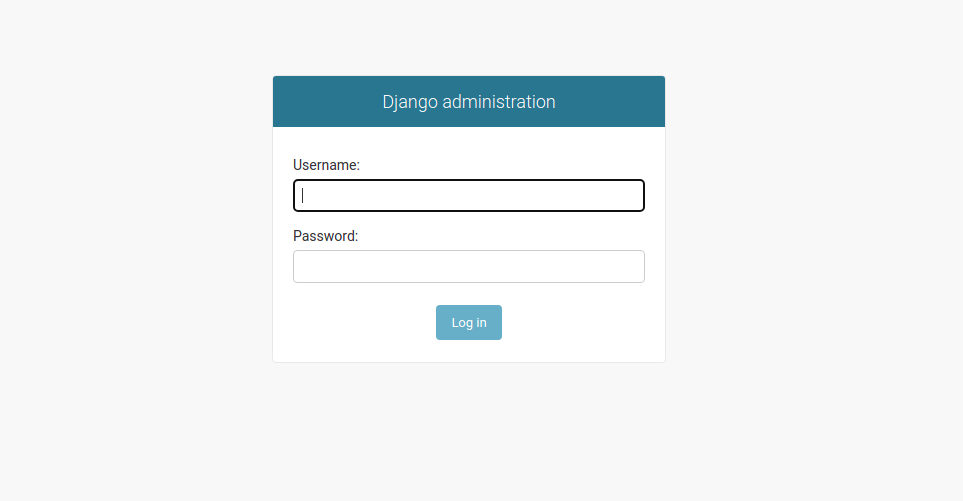
- Open the Django Administrator Page using the following URL.
http://server-ip:8000/admin
- Here is the output.
- Provide the Username & Password that we created.
- Now, Django Administration Page is Ready.