Gaurav Batra
- March 10, 2022
Steps to Install & Configure Uptime Kuma on Ubuntu 20.04 LTS
Uptime Kuma is a free & open source monitoring tool, written in Nodejs. It is used to monitor the uptime of hosts or servers. Using this tool, we can easily check the website or service is up or down & to monitored the target is not reachable for specified time interval, then send the notification through Slack, Discord, or other notification service.
There are some steps to Install & Configure Uptime Kuma in Ubuntu:
Step 1: Update the System.
apt-get update
Step 2: Create a user.
useradd -m -s /bin/bash kuma
- Set the password.
passwd kuma
- Provide root privileges.
usermod -aG sudo kuma
- Here is the command output.

Step 3: Install NVM.
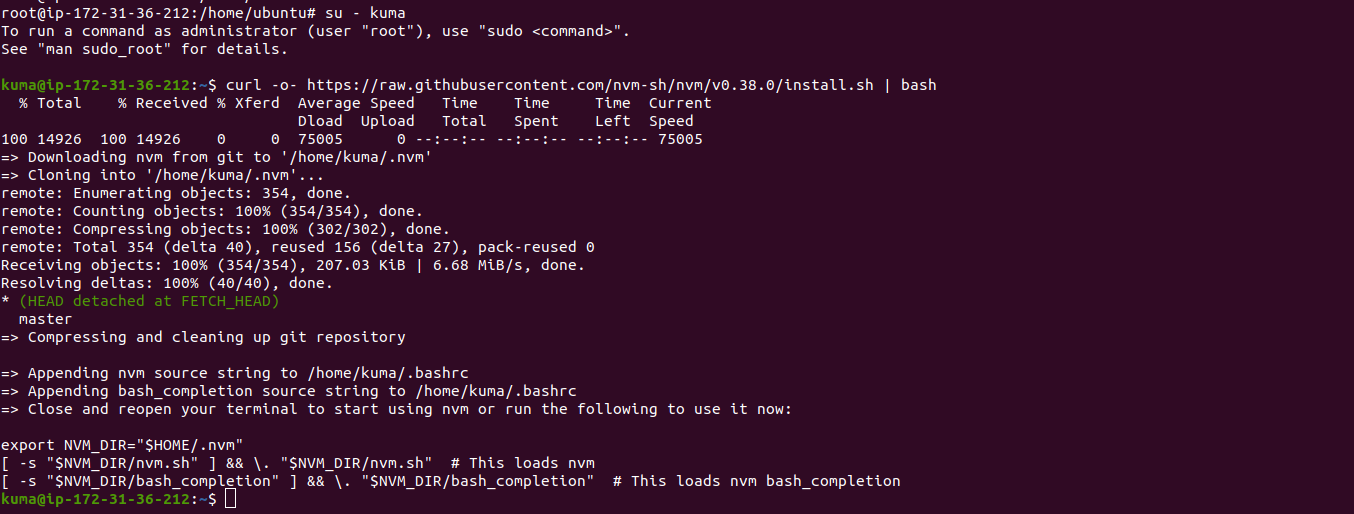
- Switch the user.
su - kuma
- Install the NVM.
curl -o- https://raw.githubusercontent.com/nvm-sh/nvm/v0.38.0/install.sh | bash
- Here is the command output.
- Reload the bashrc file.
source ~/.bashrc
- Check NVM version.
nvm --version
- Here is the command output.

Step 4: Install Nodejs.
nvm install --lts
- Here is the command output.

- Check node version.
node --version
- Here is the command output.

Step 5: Download & Install Uptime Kuma on system.
apt-get install git

git clone https://github.com/louislam/uptime-kuma.git
- Here is the command output.

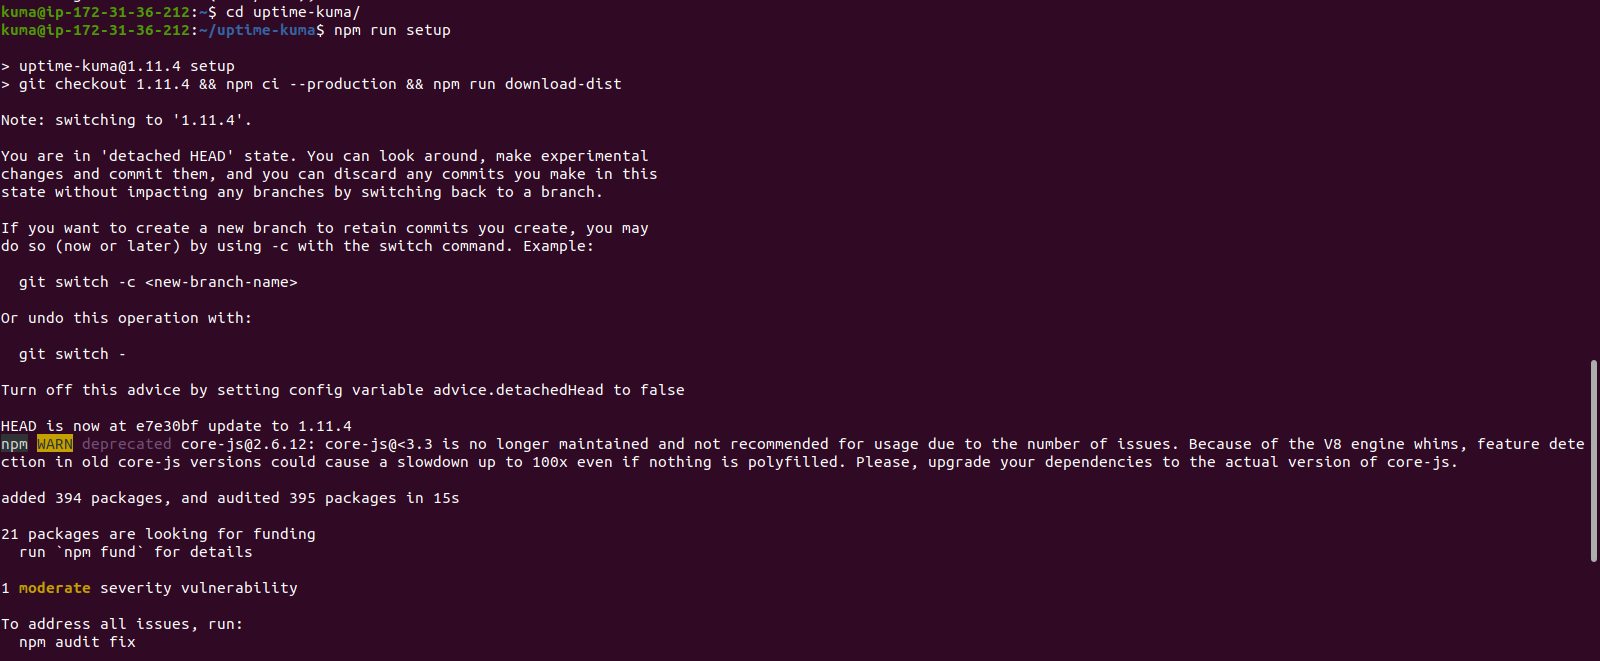
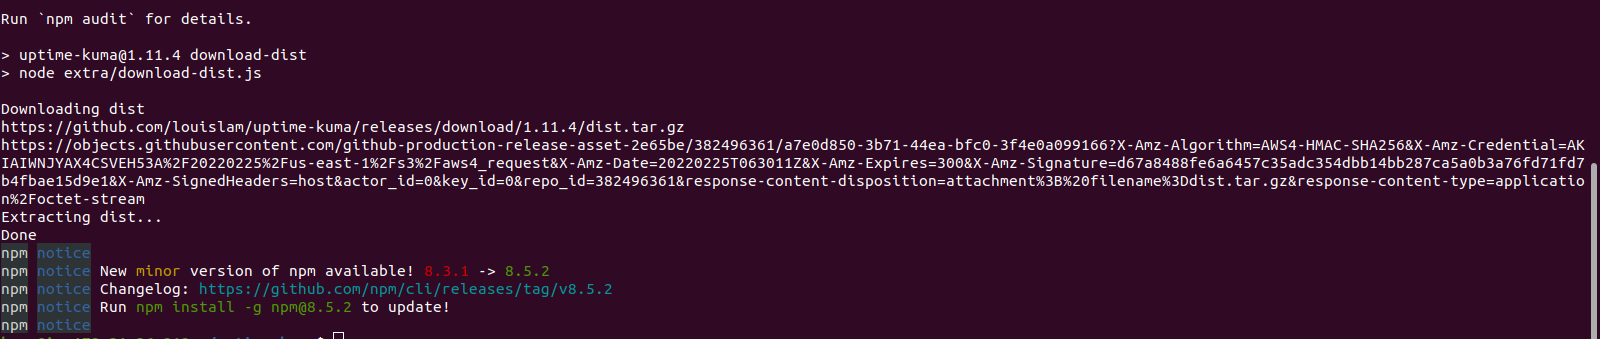
- Change the directory & setup the kuma.
cd uptime-kuma/

npm run setup
- Here is the command output.
Step 6: Setup Uptime-Kuma with pm2.
pm2: It is a Nodejs process manager.It helps to manage and keep nodejs application alive forever.IT has some built-in features that make the nodejs application deployment easy. We can easily monitor the application status, logs, and even set up the service file for application.
- Install pm2.
npm install pm2 --global
- Here is the command output.

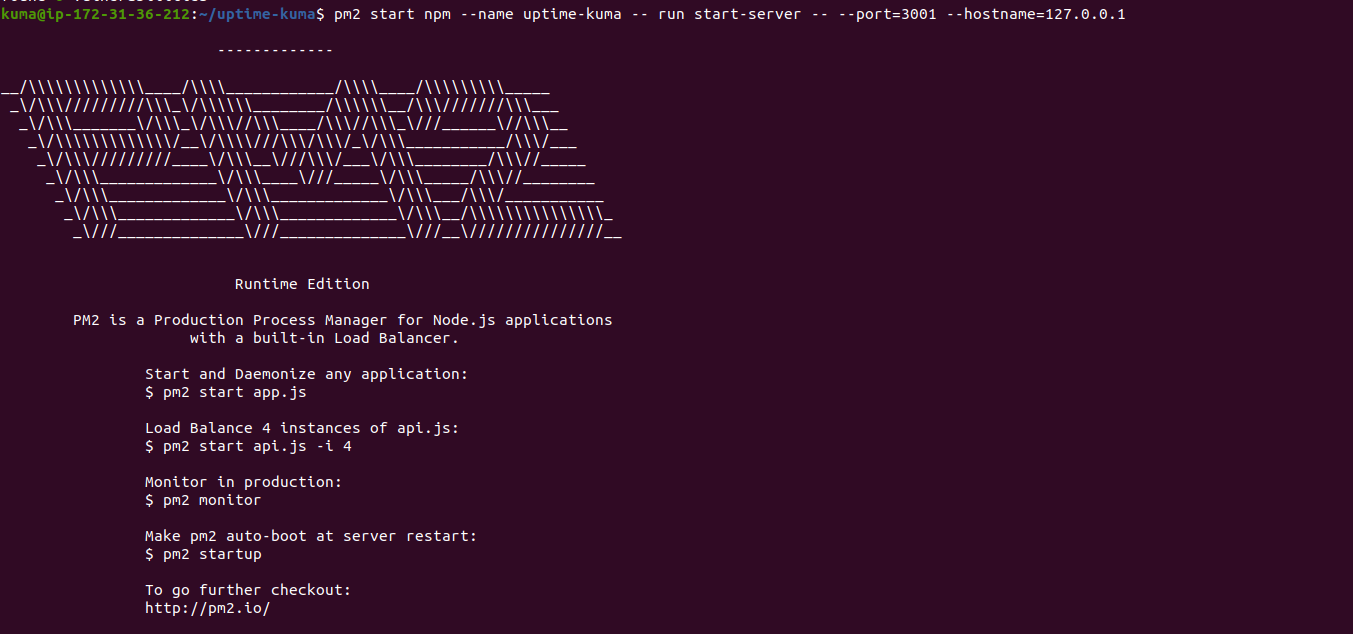
- To start Kuma.
pm2 start npm --name uptime-kuma -- run start-server -- --port=3001 --hostname=127.0.0.1
- Here is the command output.

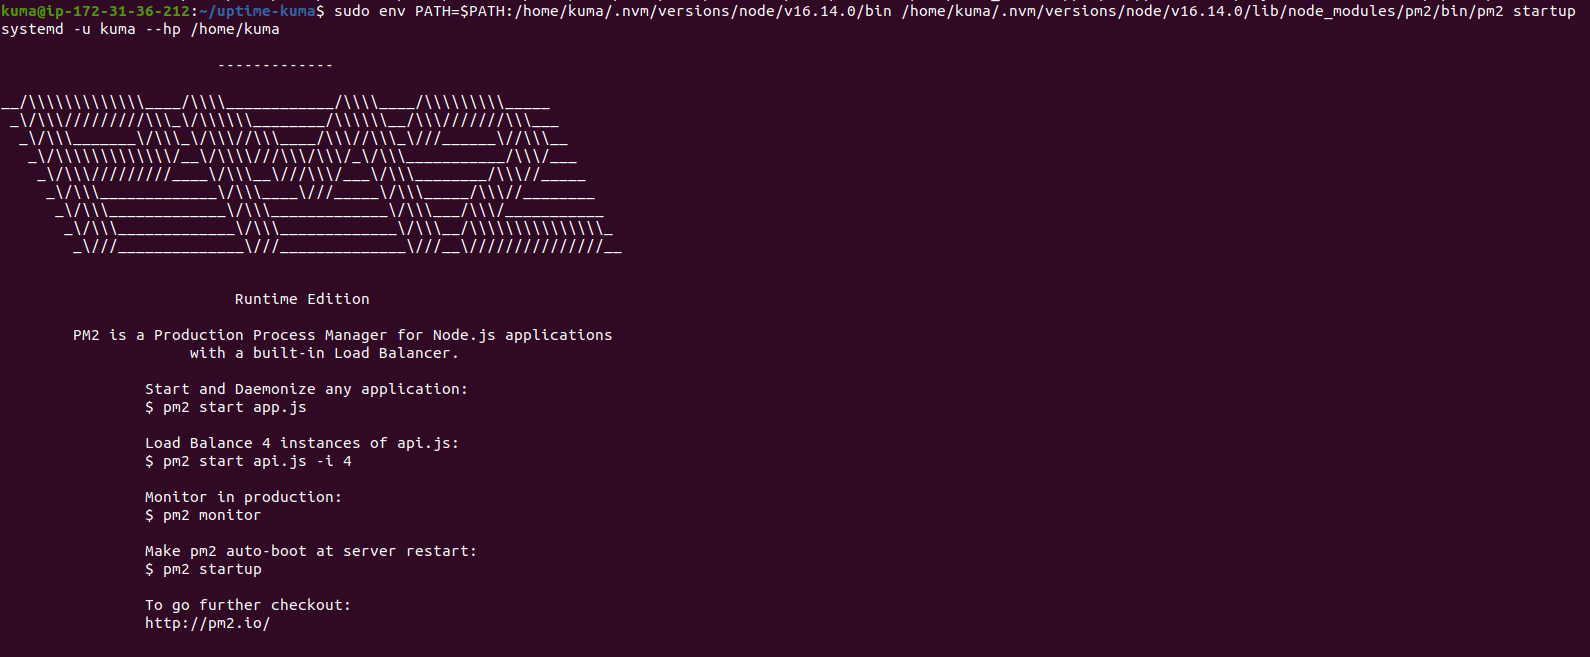
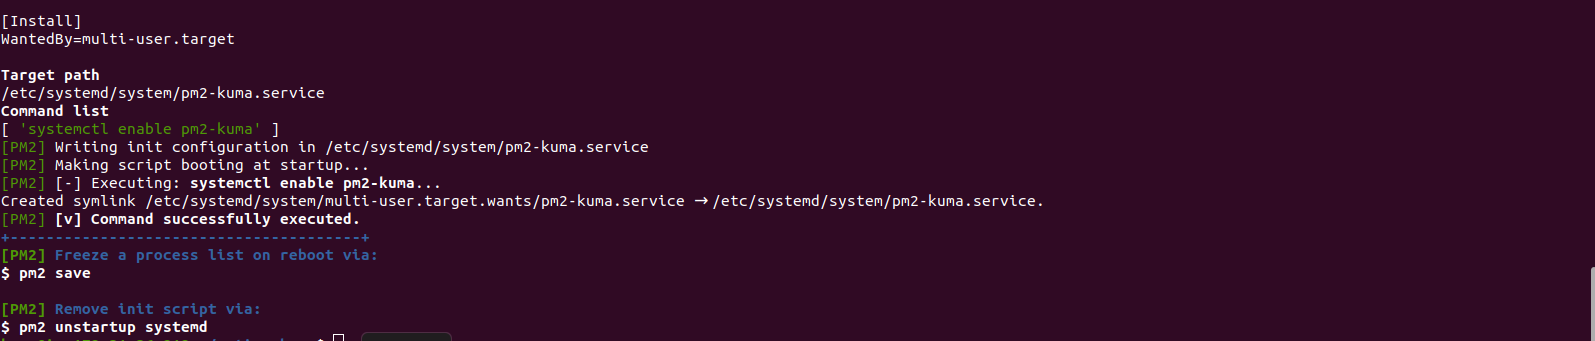
- Create a system file for the service.
pm2 startup
- Here is the command output.

- Copy the command from the above command result & paste on terminal.
- Here is the command output.
- To save the current ongoing process.
pm2 save
- Here is the command output.

Step 7: Install Apache2.
sudo apt install apache2
- To enable the proxy modules.
sudo a2enmod ssl proxy proxy_ajp proxy_wstunnel proxy_http rewrite deflate headers proxy_balancer proxy_connect proxy_html
- Create a virtual host config file.
sudo vim /etc/apache2/sites-available/example.conf
- Add the following lines:
<VirtualHost *:80>

ServerName EXAMPLE.COM

ProxyPass / http://localhost:3001/

RewriteEngine on

RewriteCond %{HTTP:Upgrade} websocket [NC]

RewriteCond %{HTTP:Connection} upgrade [NC]

RewriteRule ^/?(.*) "ws://localhost:3001/$1" [P,L]

</VirtualHost>
- Enable the config file.
a2ensite example.conf
- Disable the default config file.
a2dissite 000-default.conf
- Enable the rewrite mode.
a2enmod rewrite
- Restart the Apache service.
service apache2 restart
- Here is the command output.

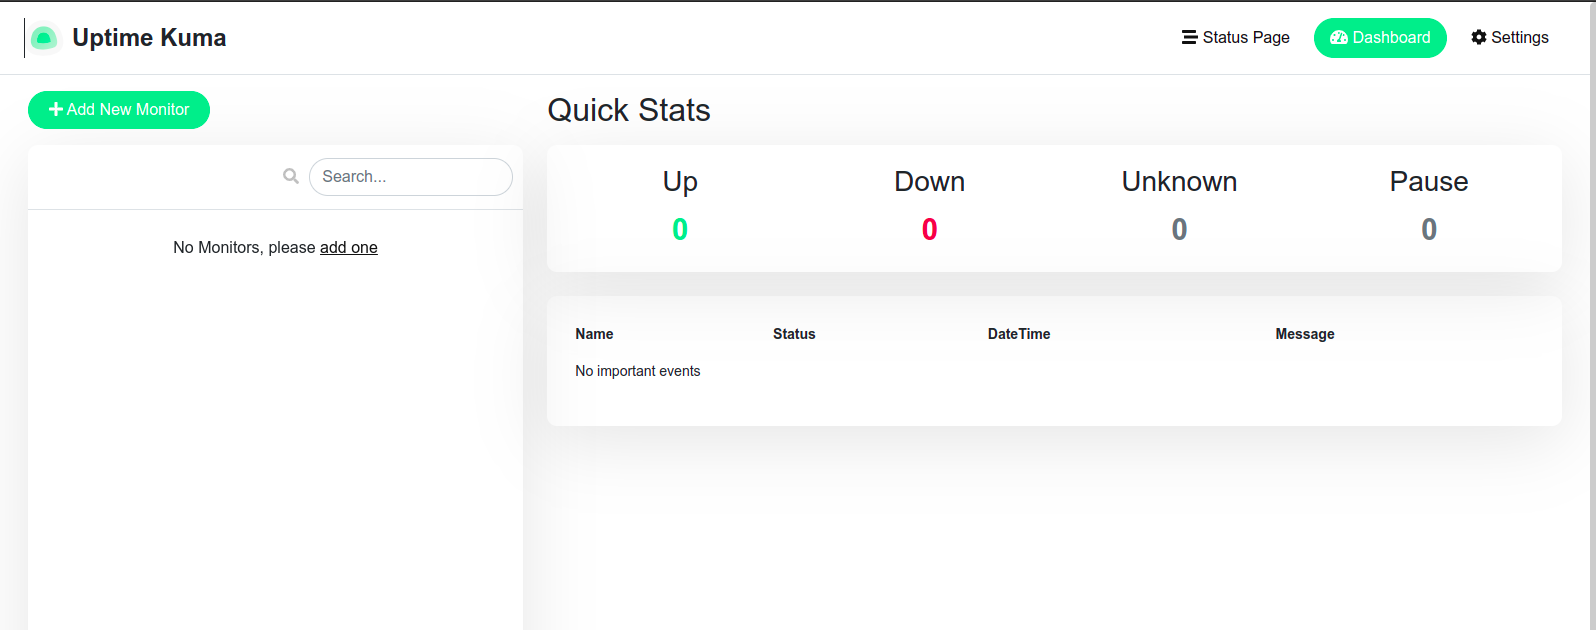
Step 8: Open Uptime Kuma web interface
http://server-ip

or

http://server-ip:3001
- Create Admin Account.
- Select Language.
- Provide the username & password.
- Click on Create.
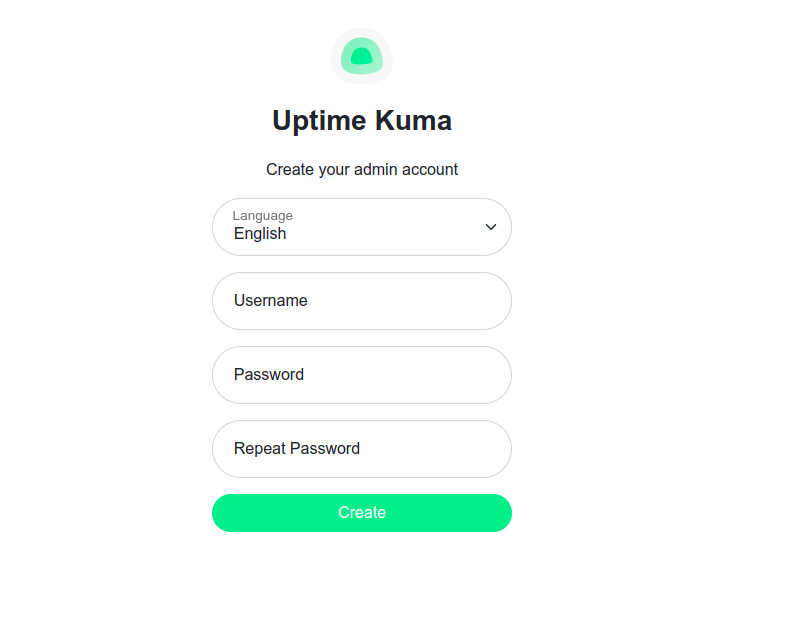
- Now,Uptime Kuma is Ready.